With Catchr, you can populate different database types:
Amazon S3
Azure SQL
Azure Blob Storage
BigQuery
Google Cloud Storage
MySQL
Postgres
Redshift
Snowflake
Connect your database to Catchr
Set up the connection between your database and Catchr via the Databases section.
Create a Datastream.
A Datastream connects your connected database to Catchr. It defines where the data will be sent.
Create a Job
A Job sends data through the data stream and creates a table in your database.
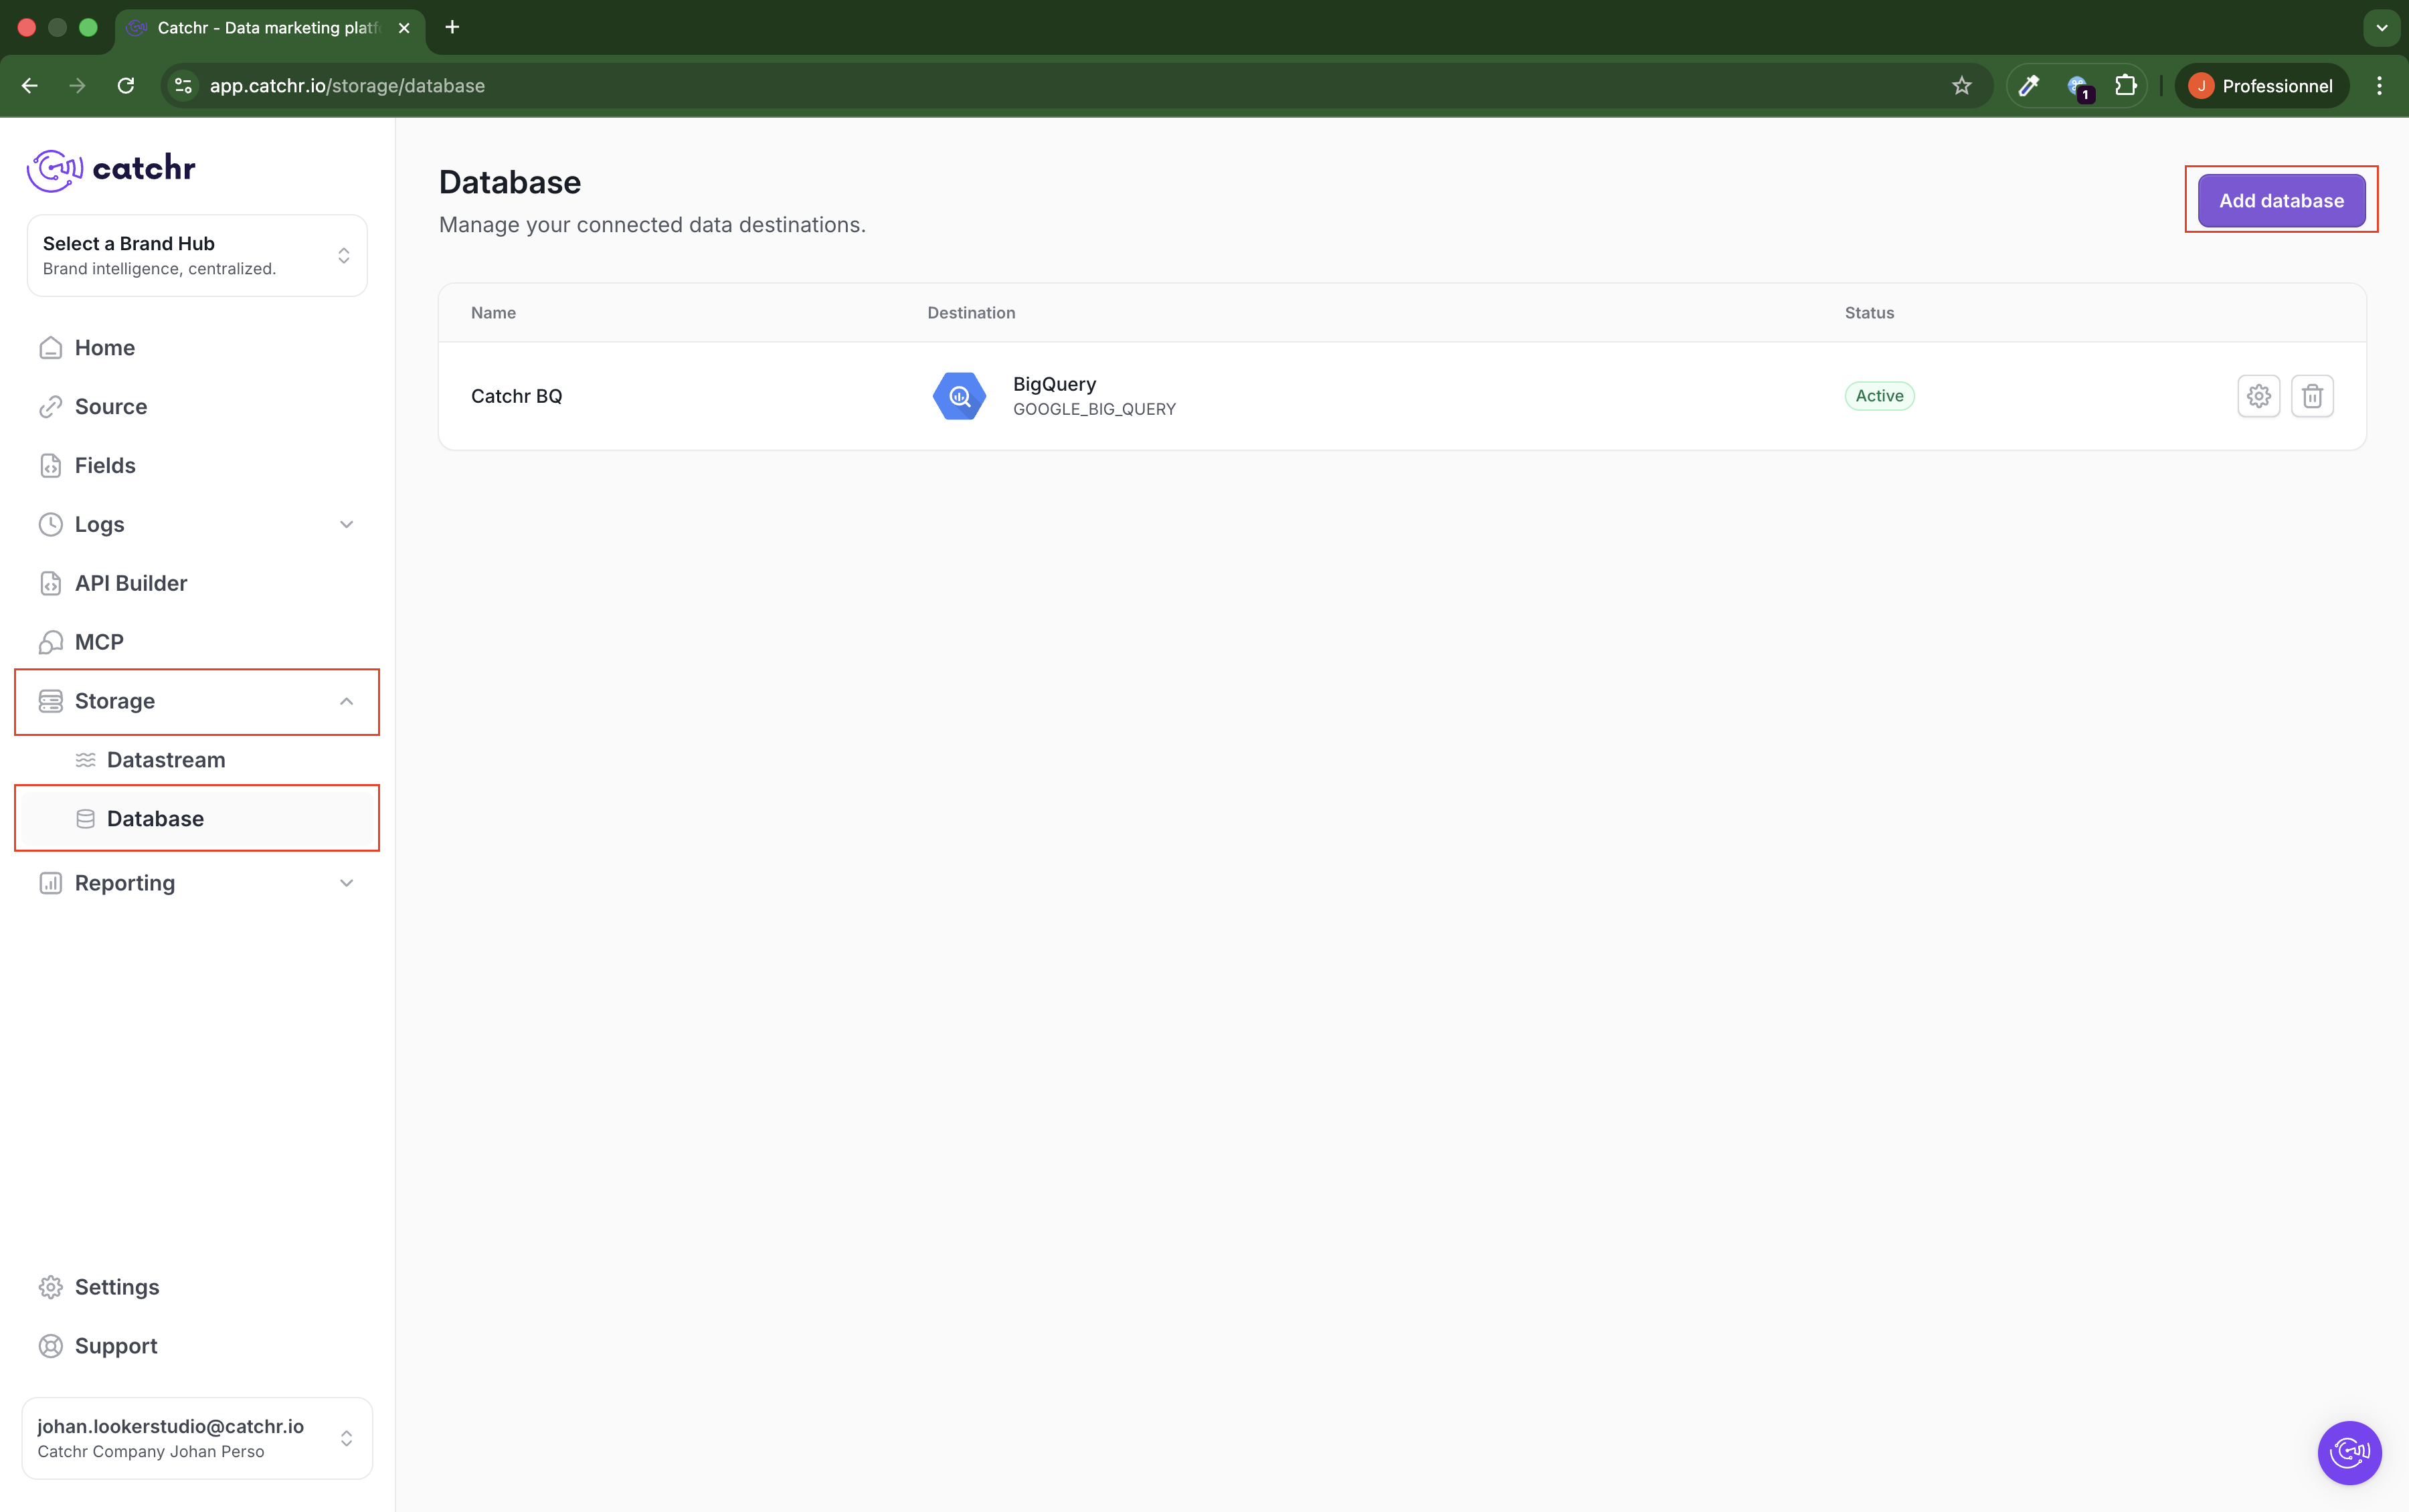
Go to app.catchr.io and open the Database menu in Storage
Click on + Add database.
Enter a name for your database.
This name is internal to Catchr. It will be used to identify the database within Catchr and has no impact on the actual connection.
Select the type of database you want to connect.
Fill in the connection settings.
Click on Save to finish the setup.
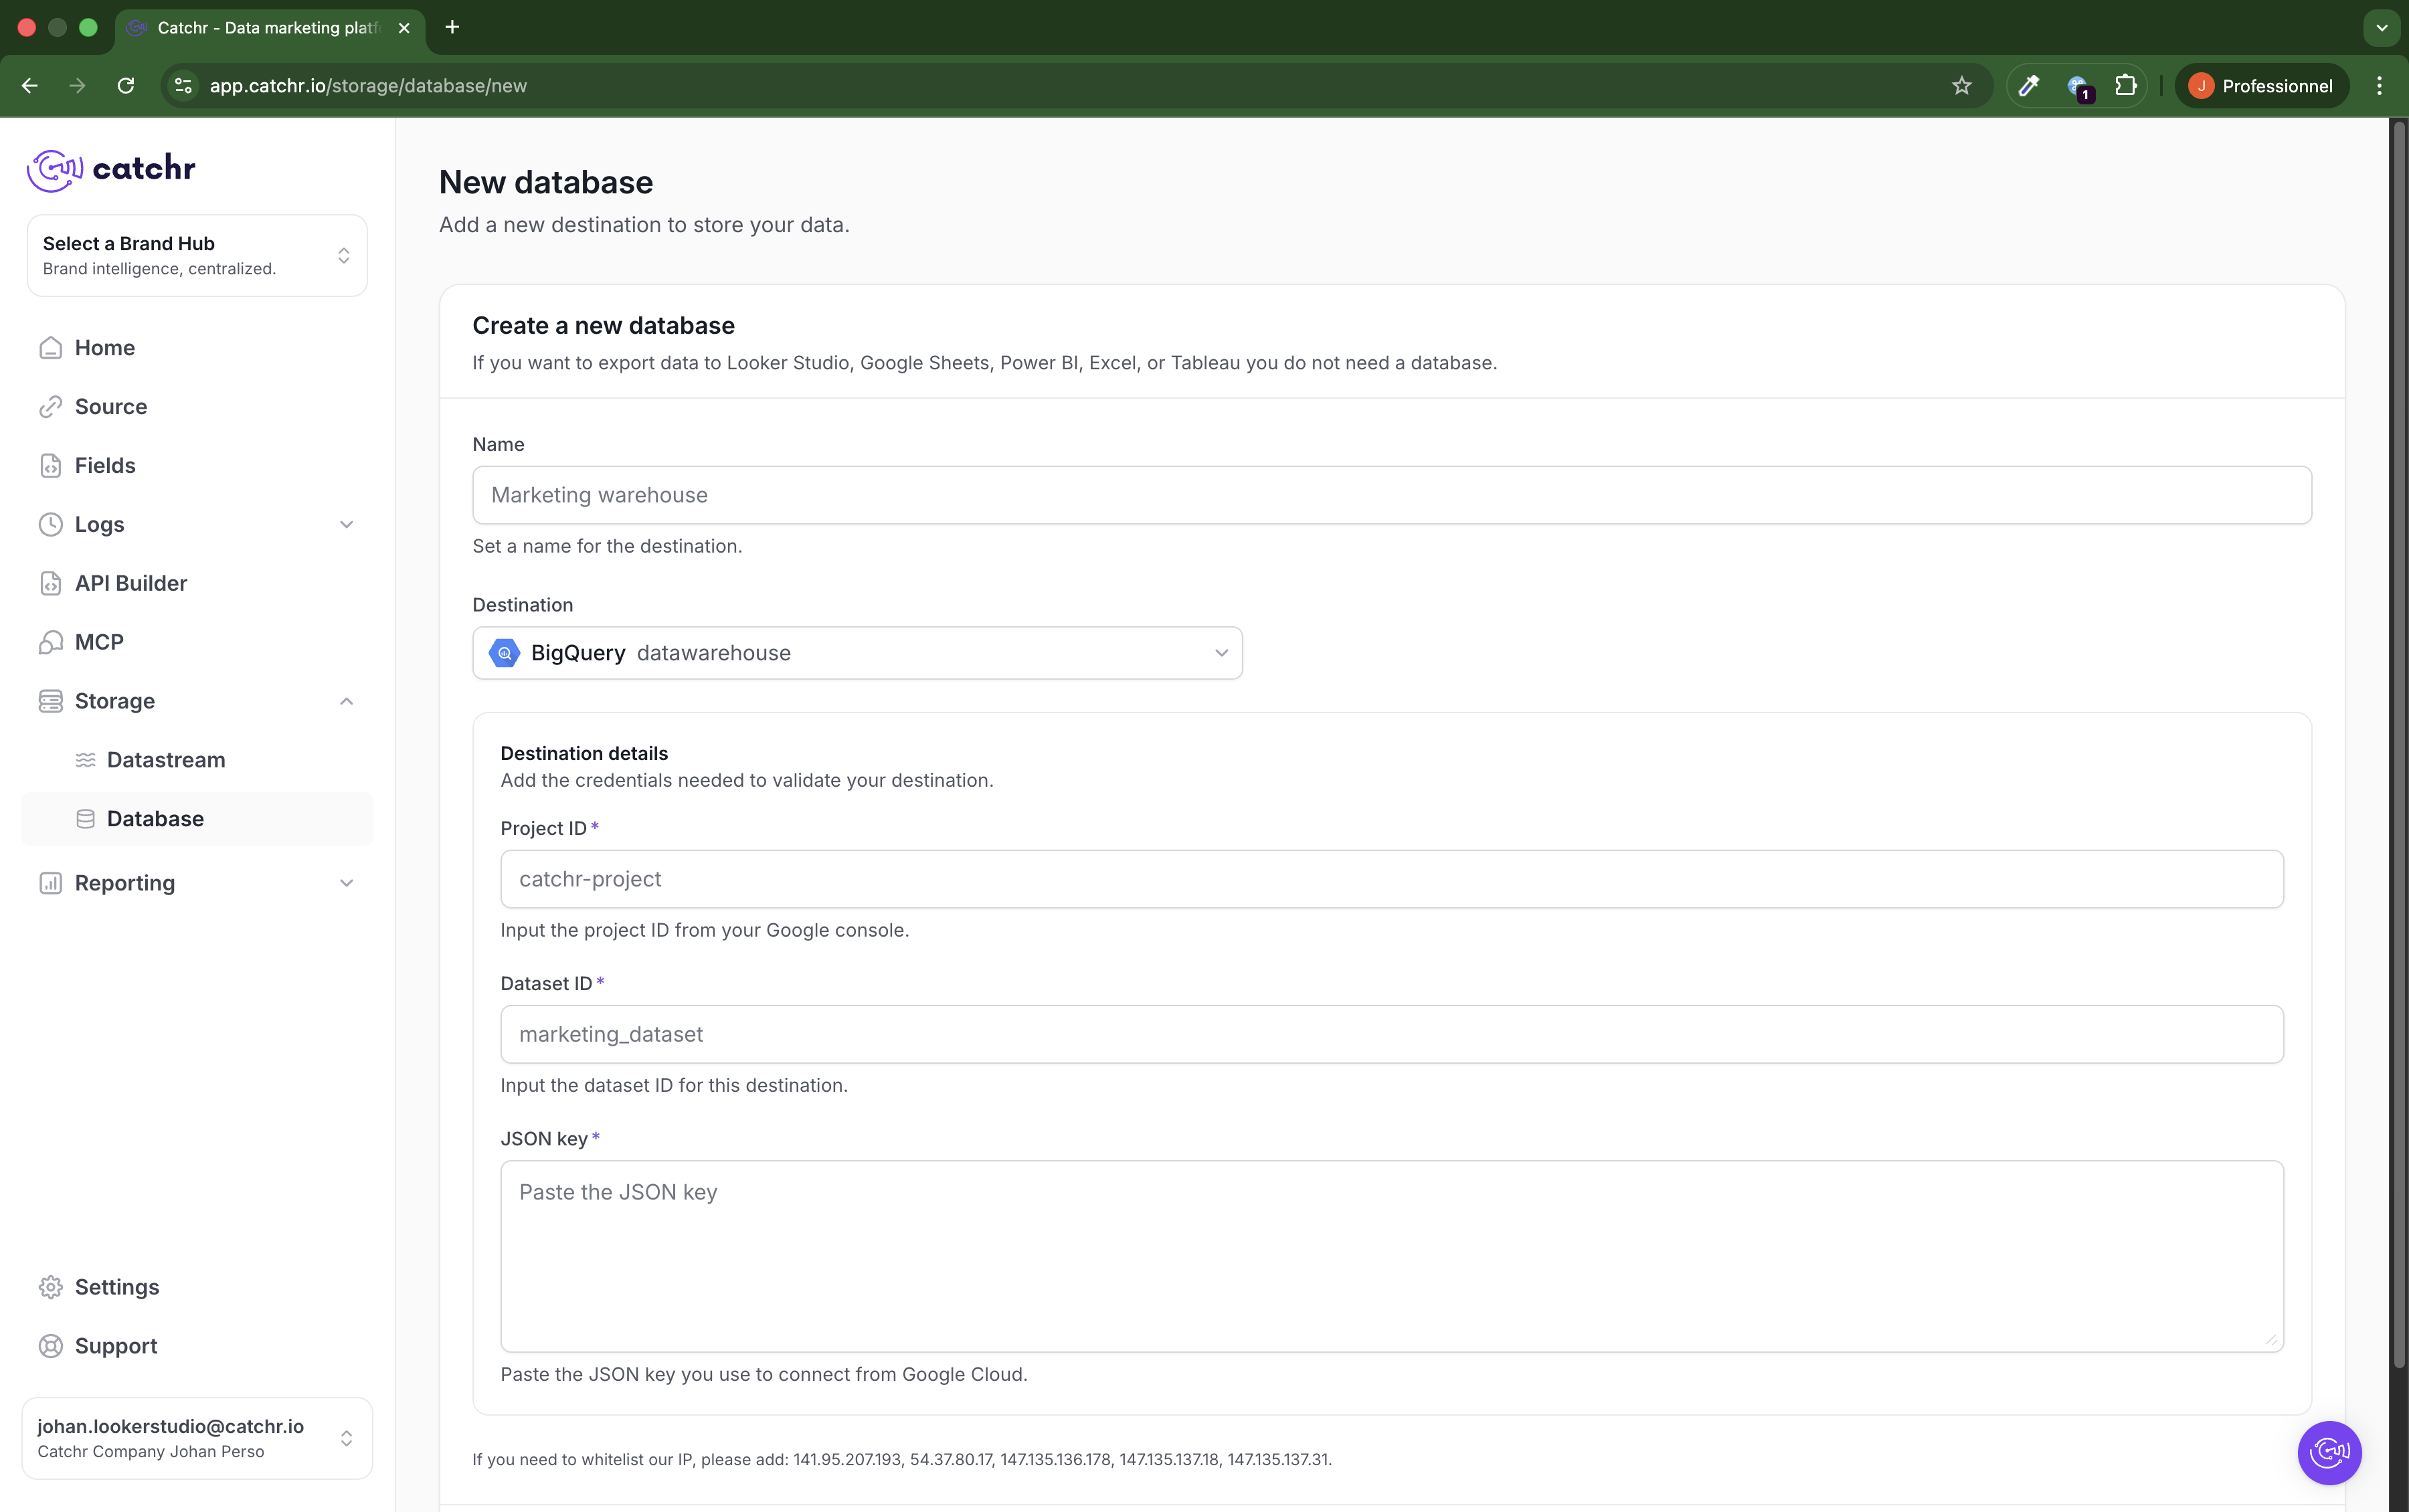
Each database type has its required configuration. You can refer to the documentation for each database type.
At the bottom of the page, you will find the list of IPs to whitelist if necessary. Please refer to the page directly and not the screenshot, as new IPs might have been added.
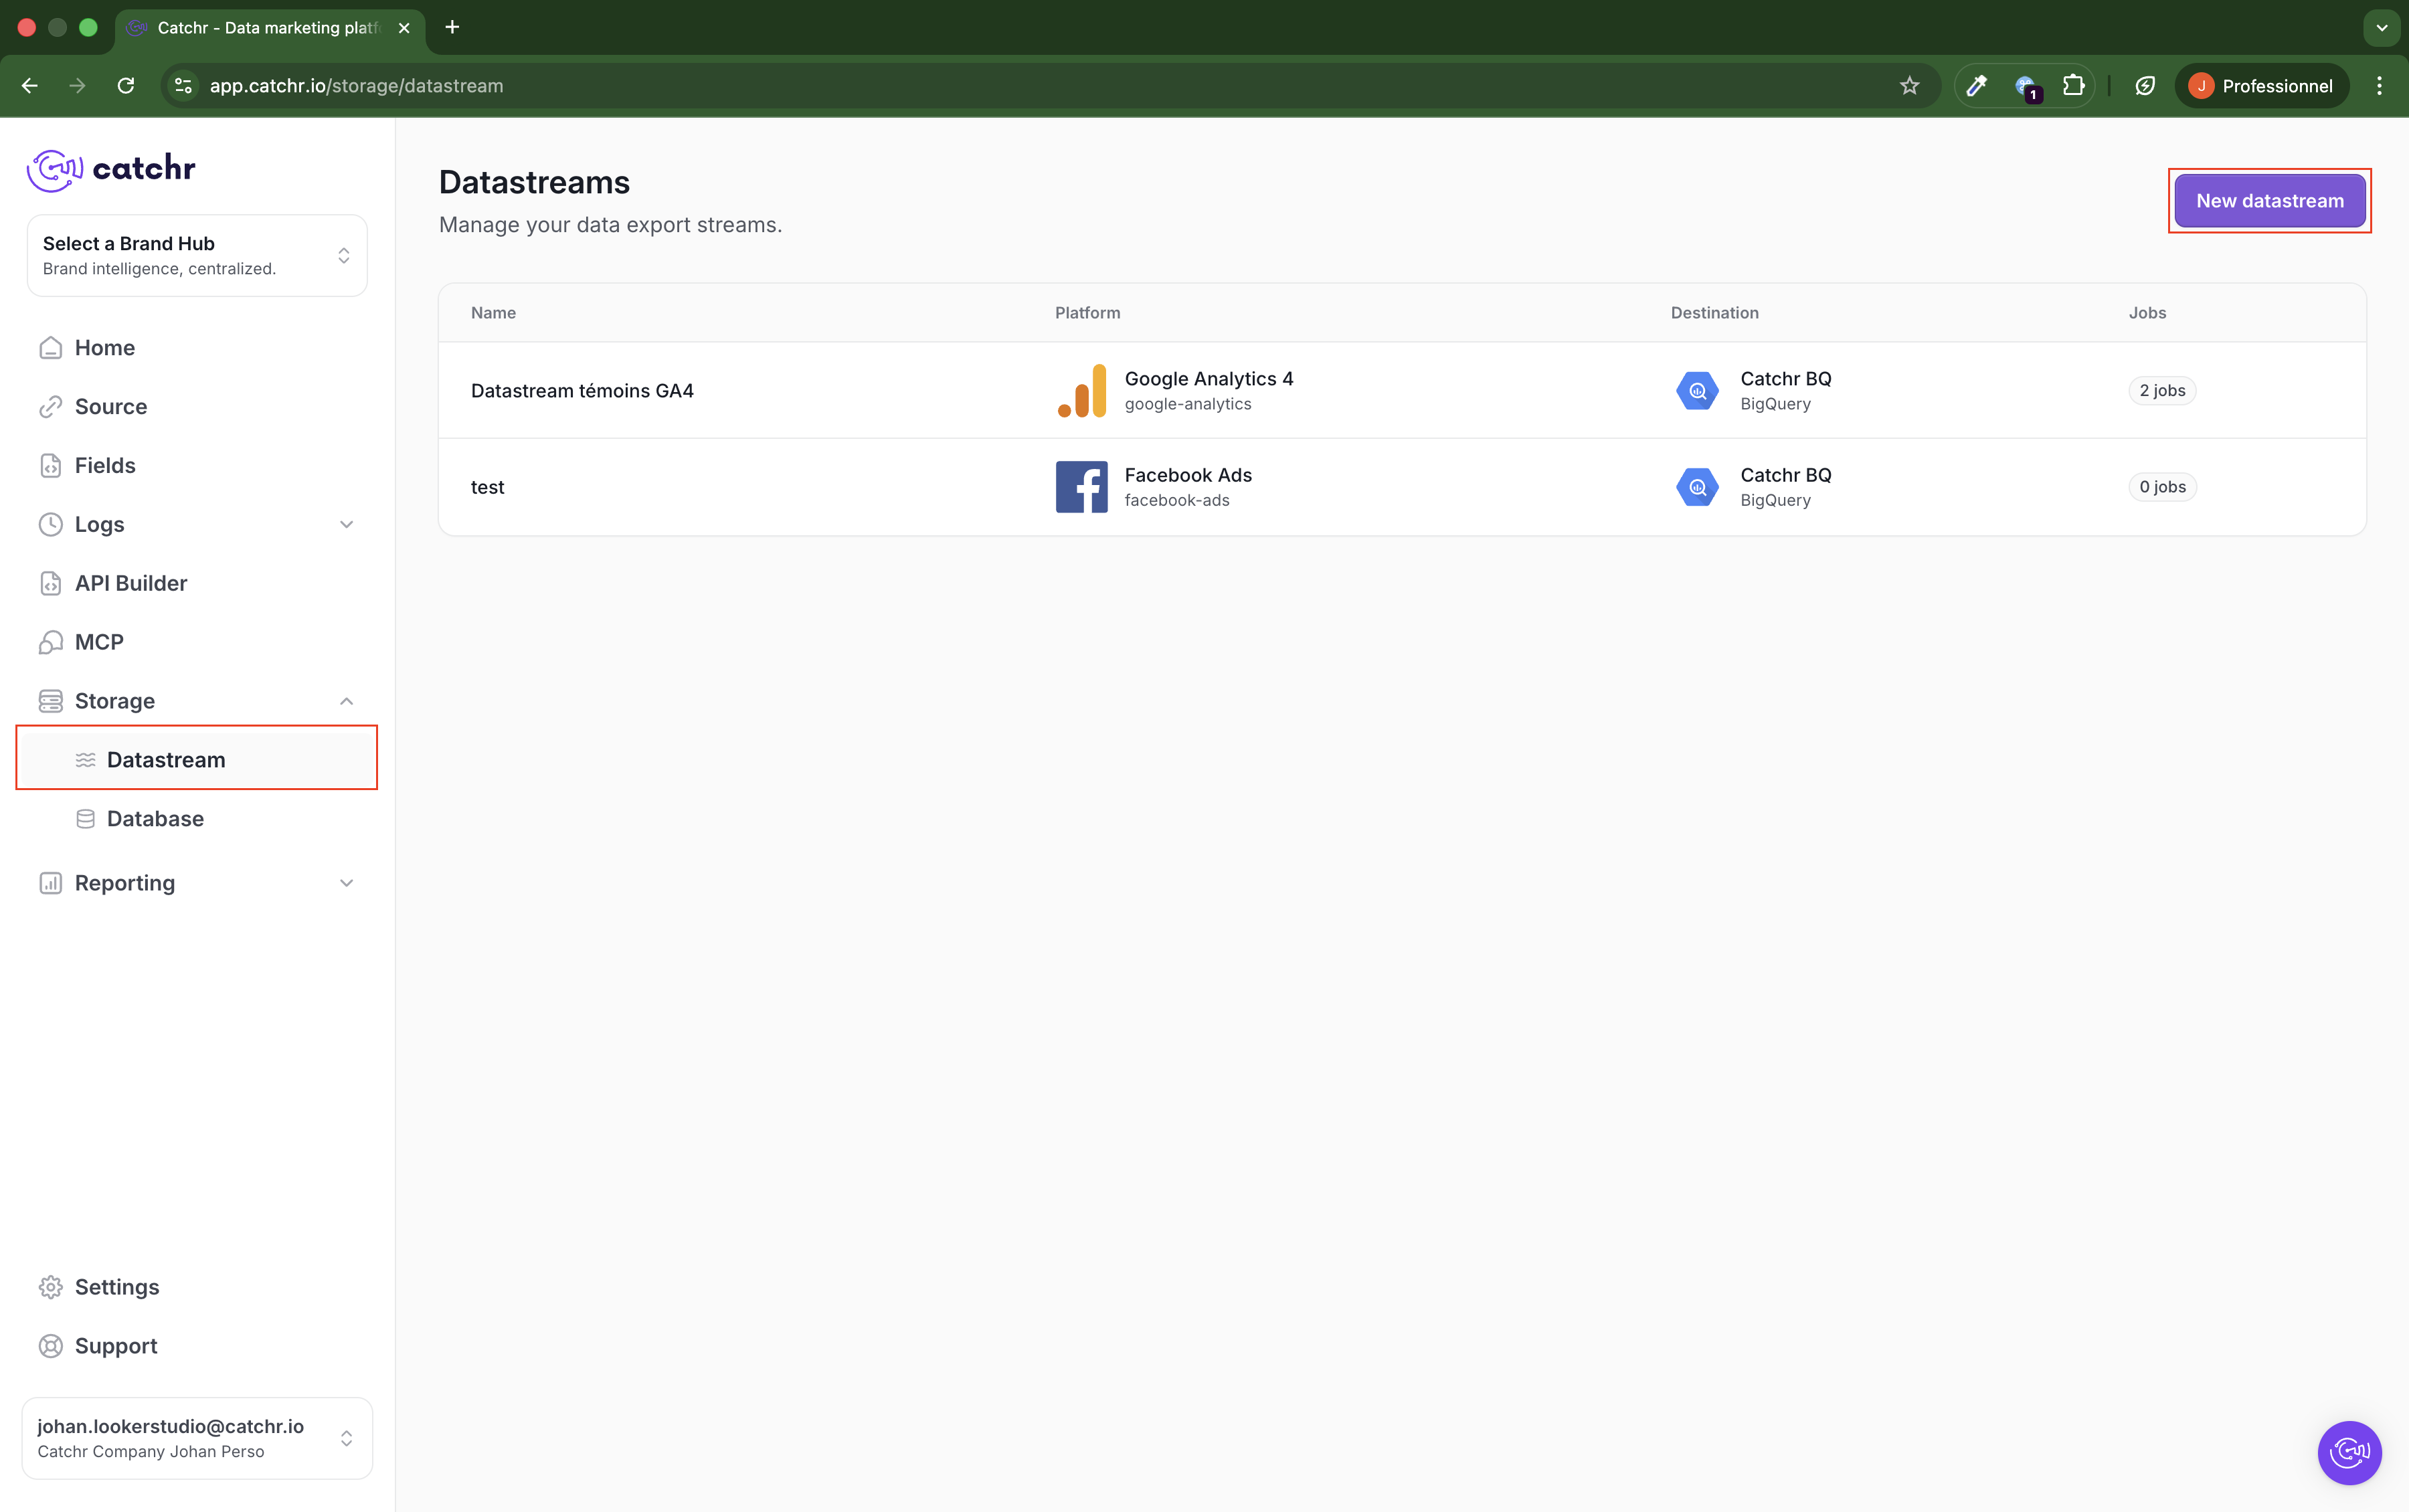
Go to app.catchr.io and open the Datastream menu in Storage.
Click on New datastream
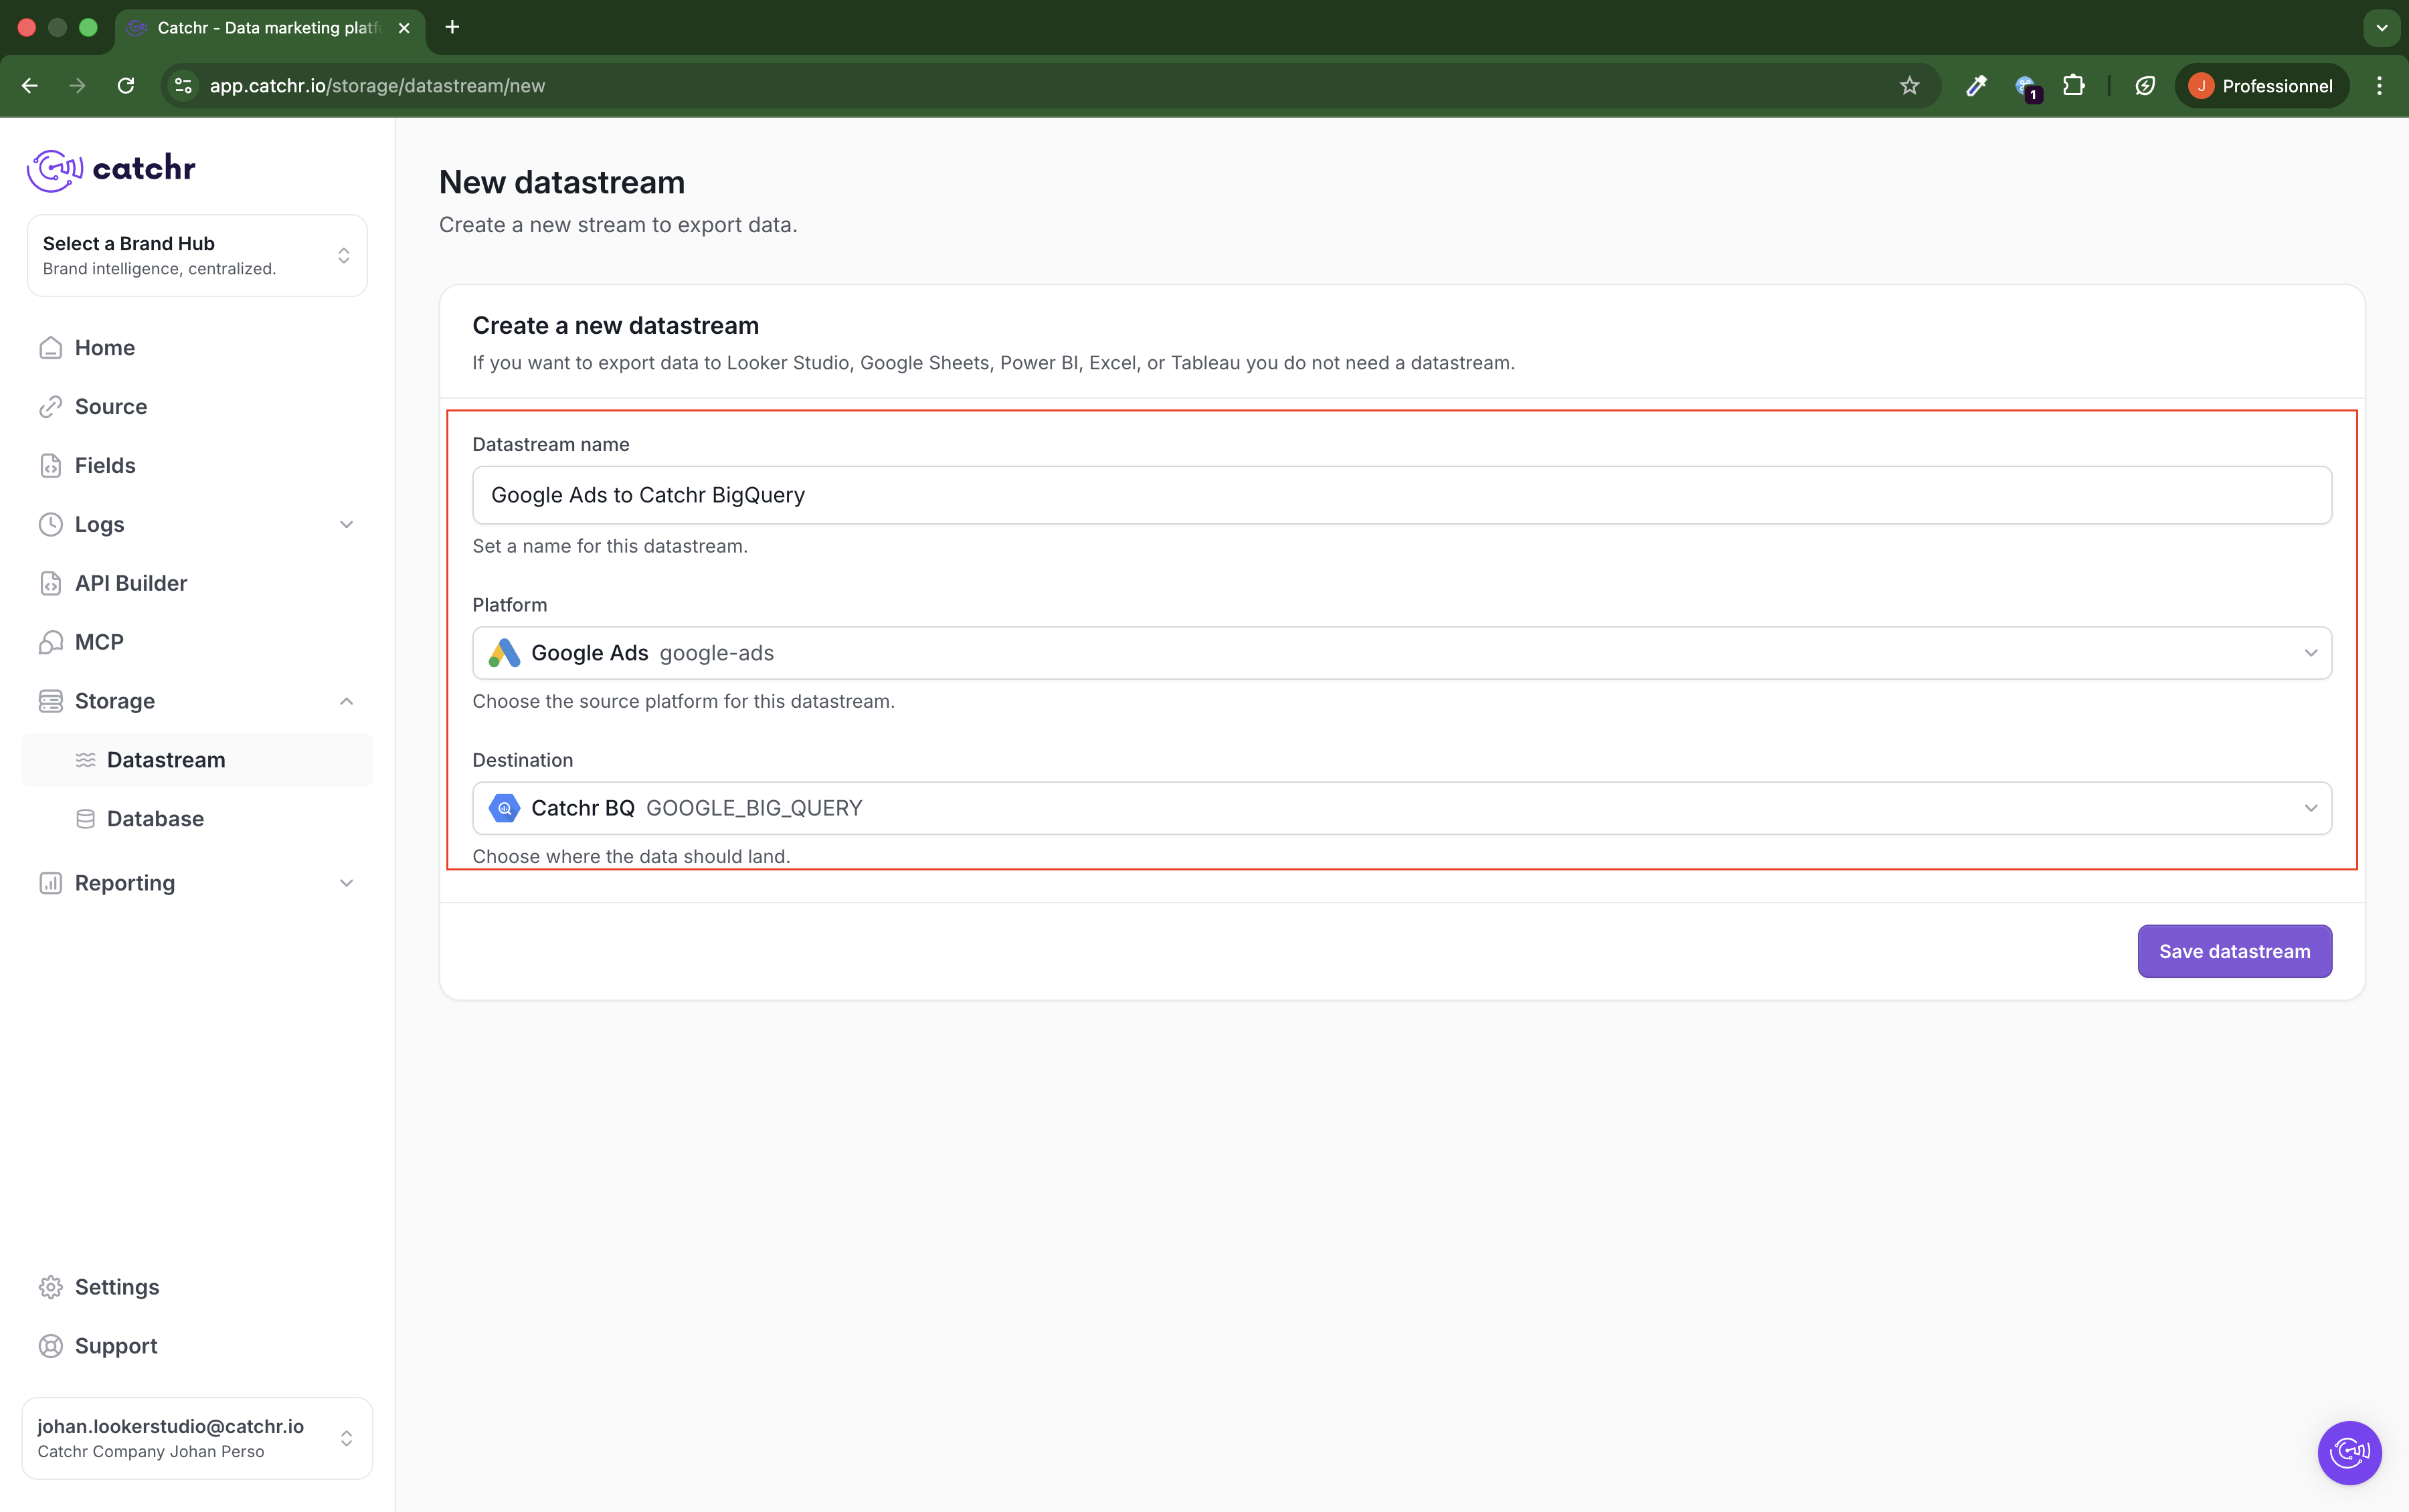
Enter a name for your data stream.
This name will be used to identify the data stream within Catchr.
Select the source, i.e., where the data is coming from.
Make sure the source has been created beforehand.
Choose the destination, which is the database you previously connected.
Click Save.
Once your data stream is set up, you can create a job to populate your database.
If you’ve just created your data stream, click on + Add job at the top right of the page.
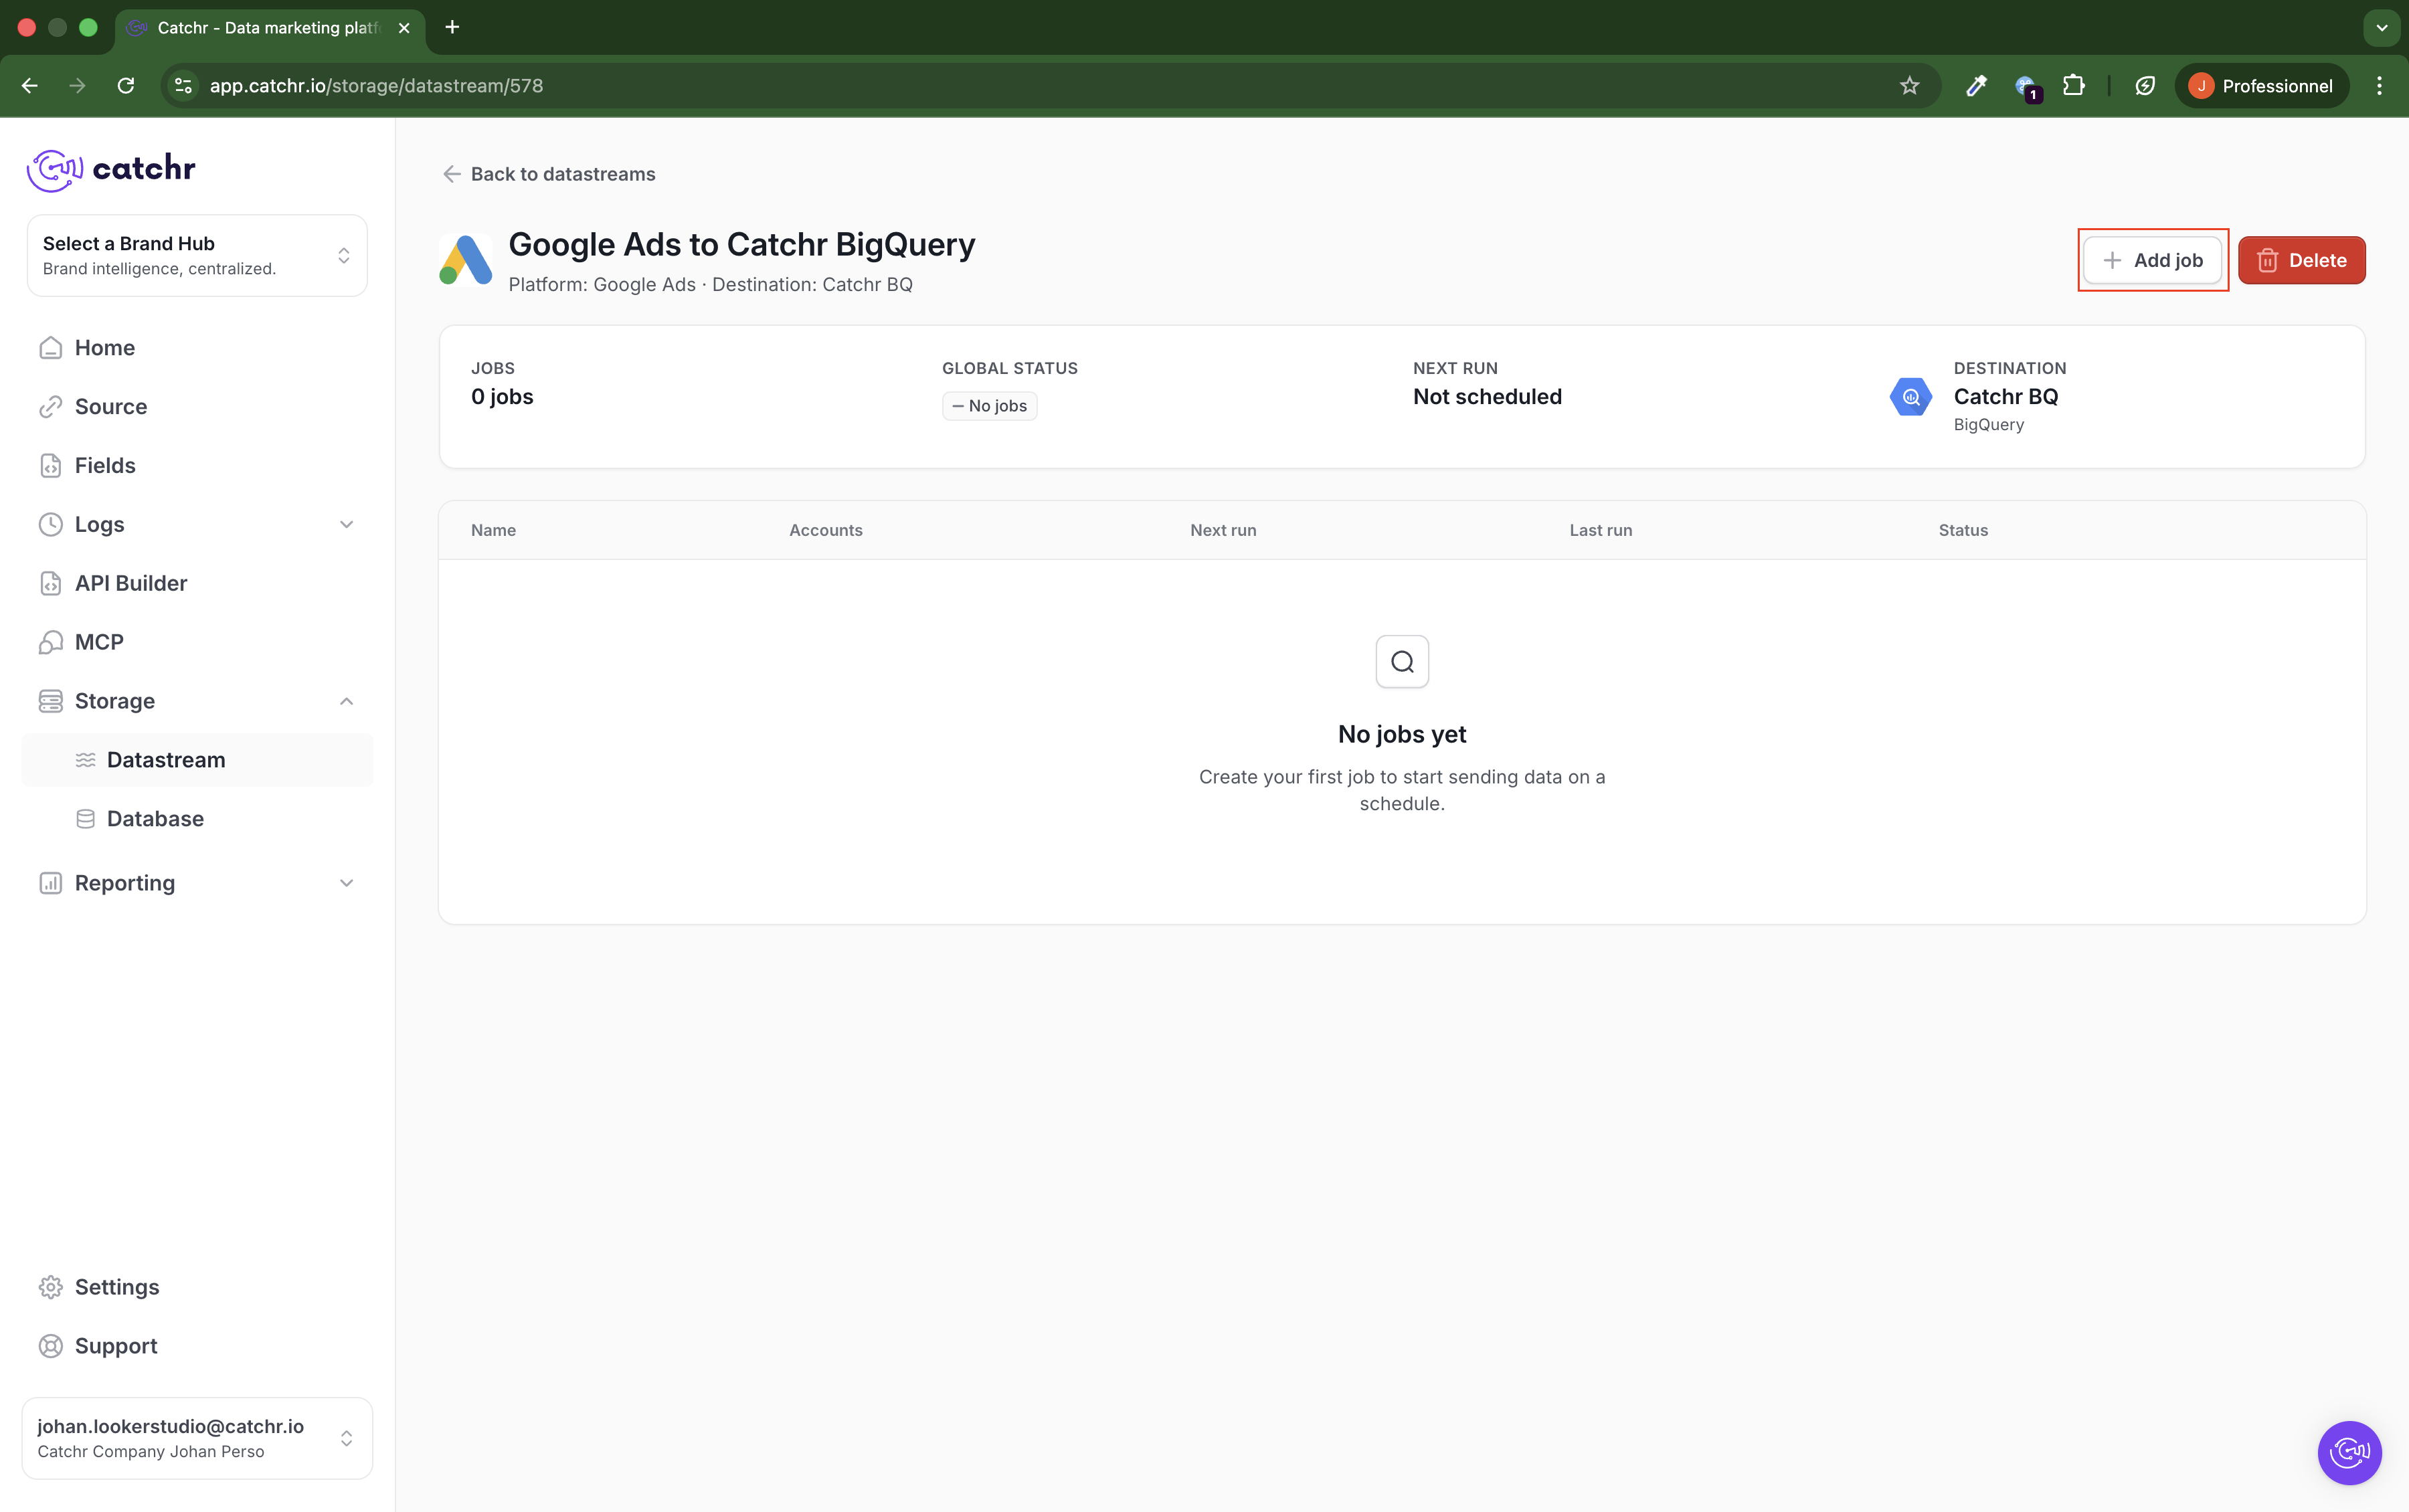
The job creation process includes four main steps:
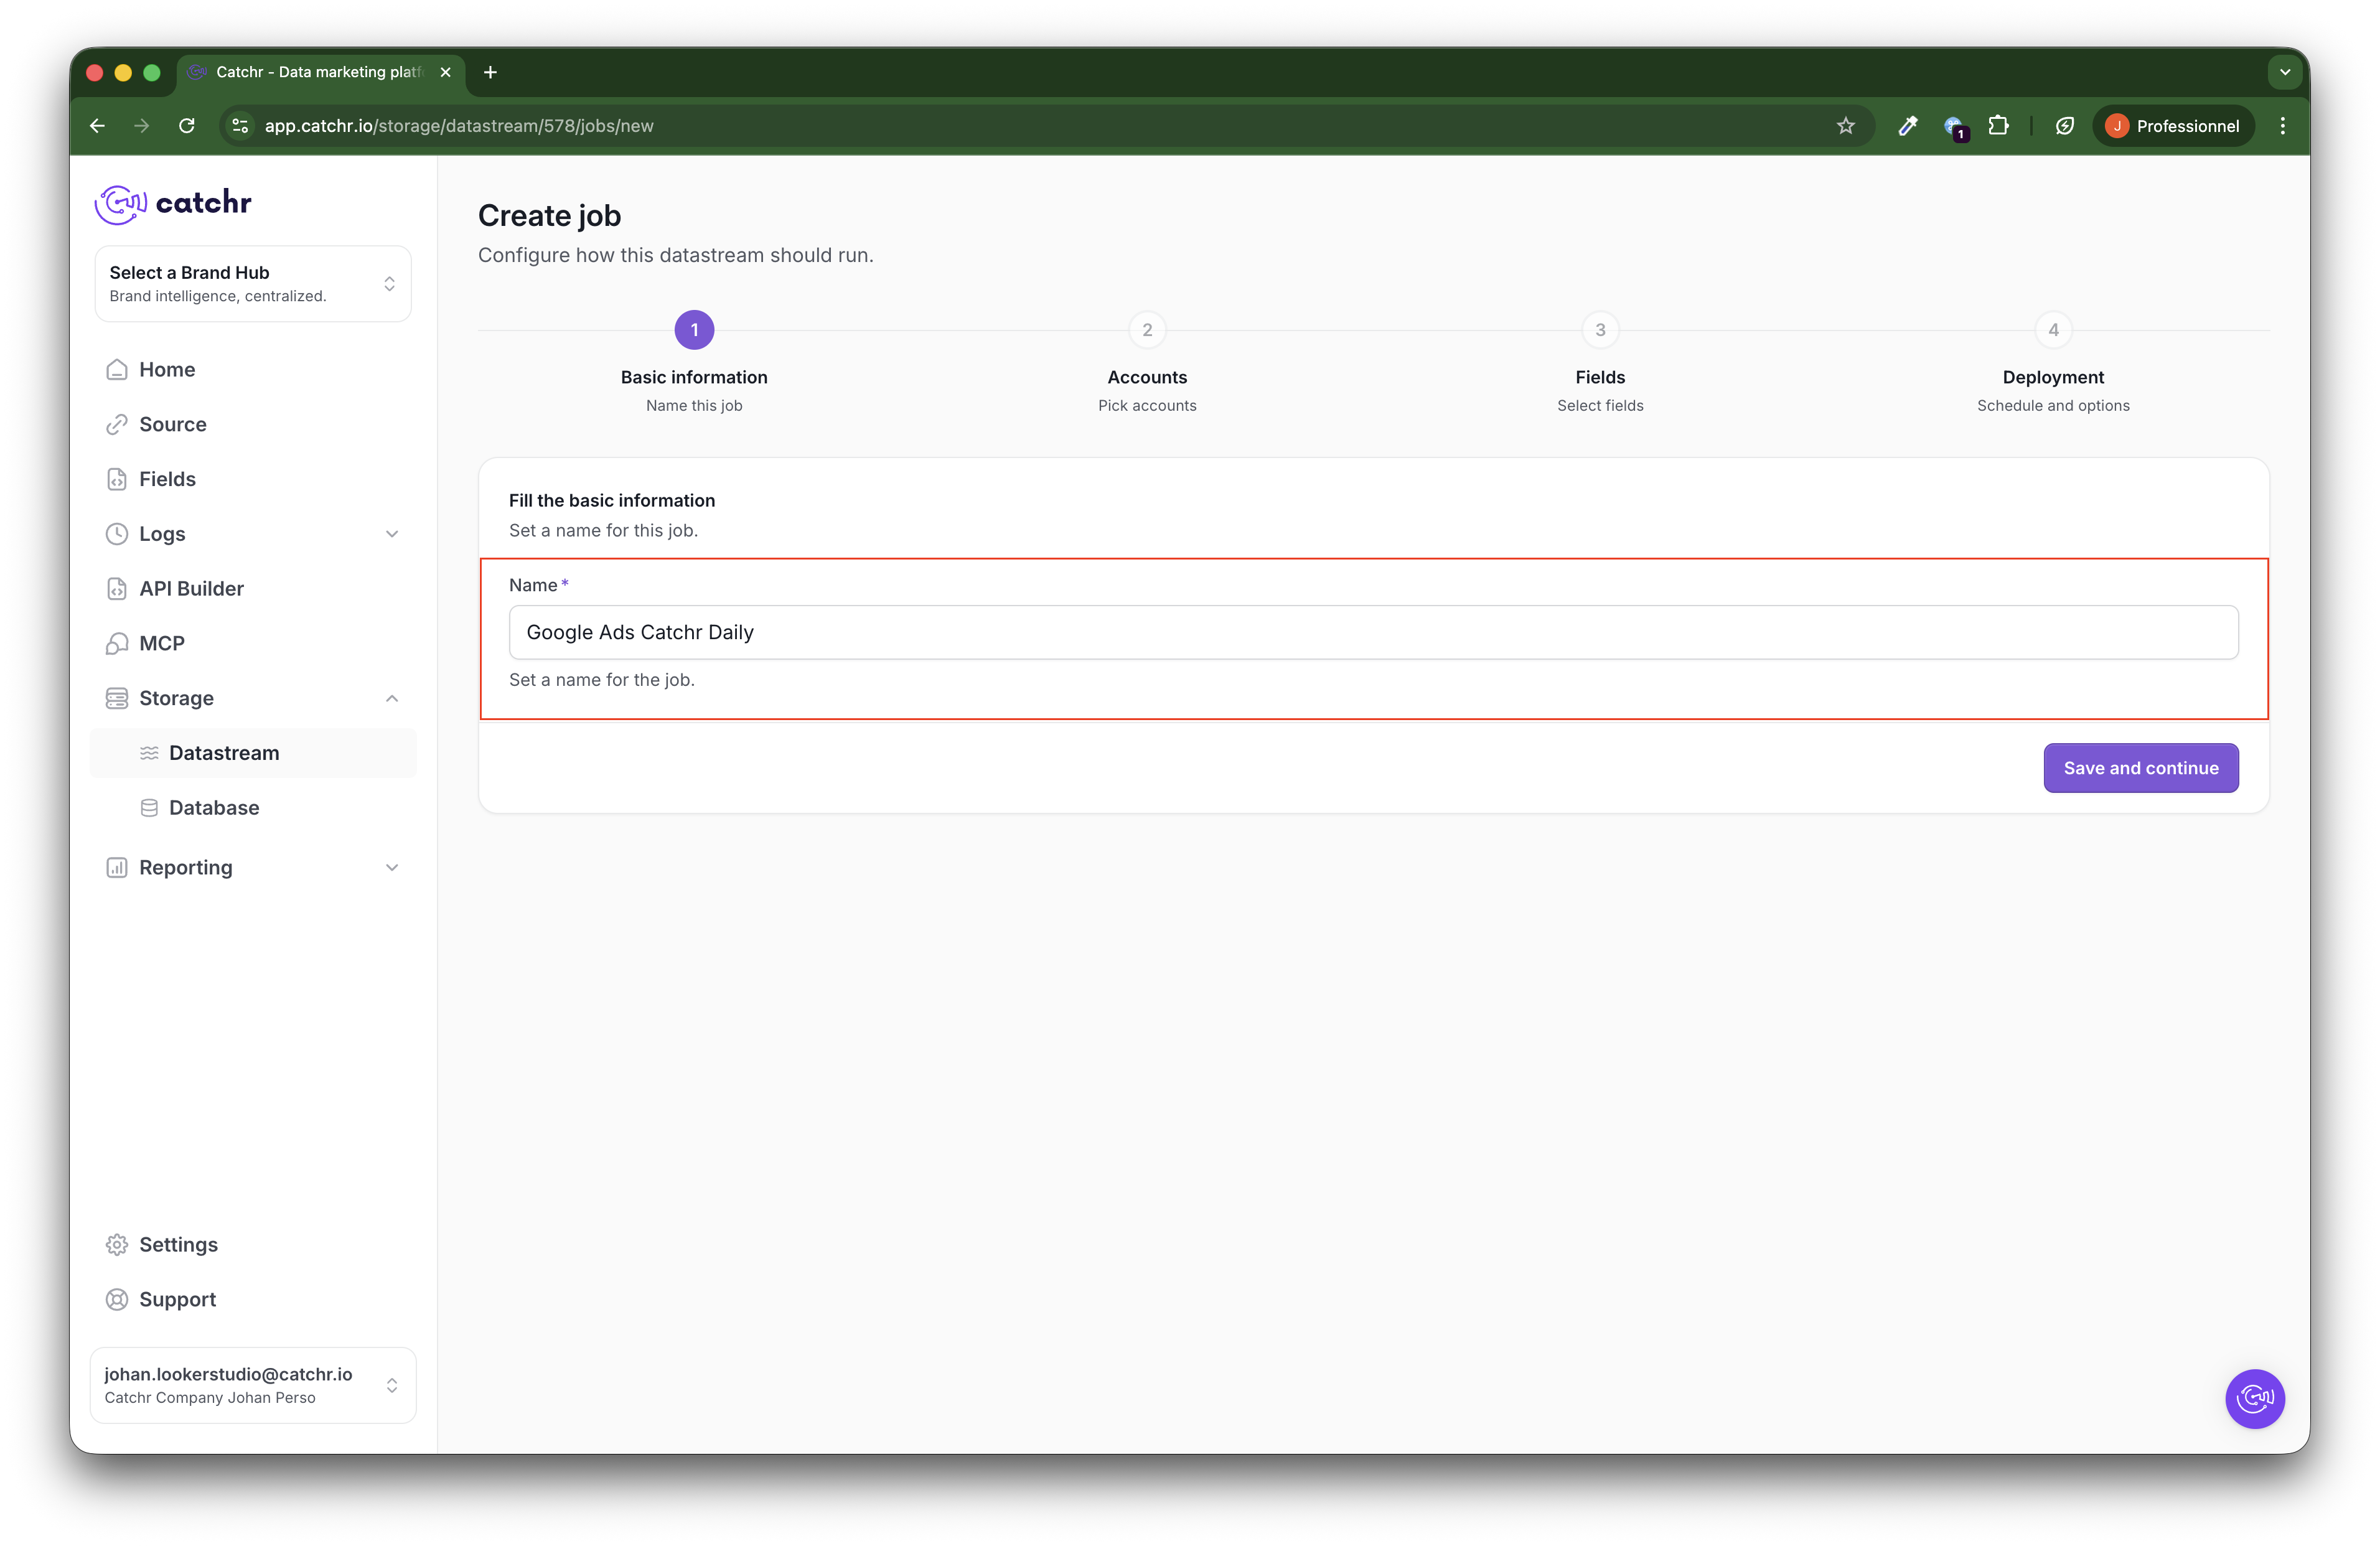
Give your job a name.
This name will be used to identify the job within Catchr.
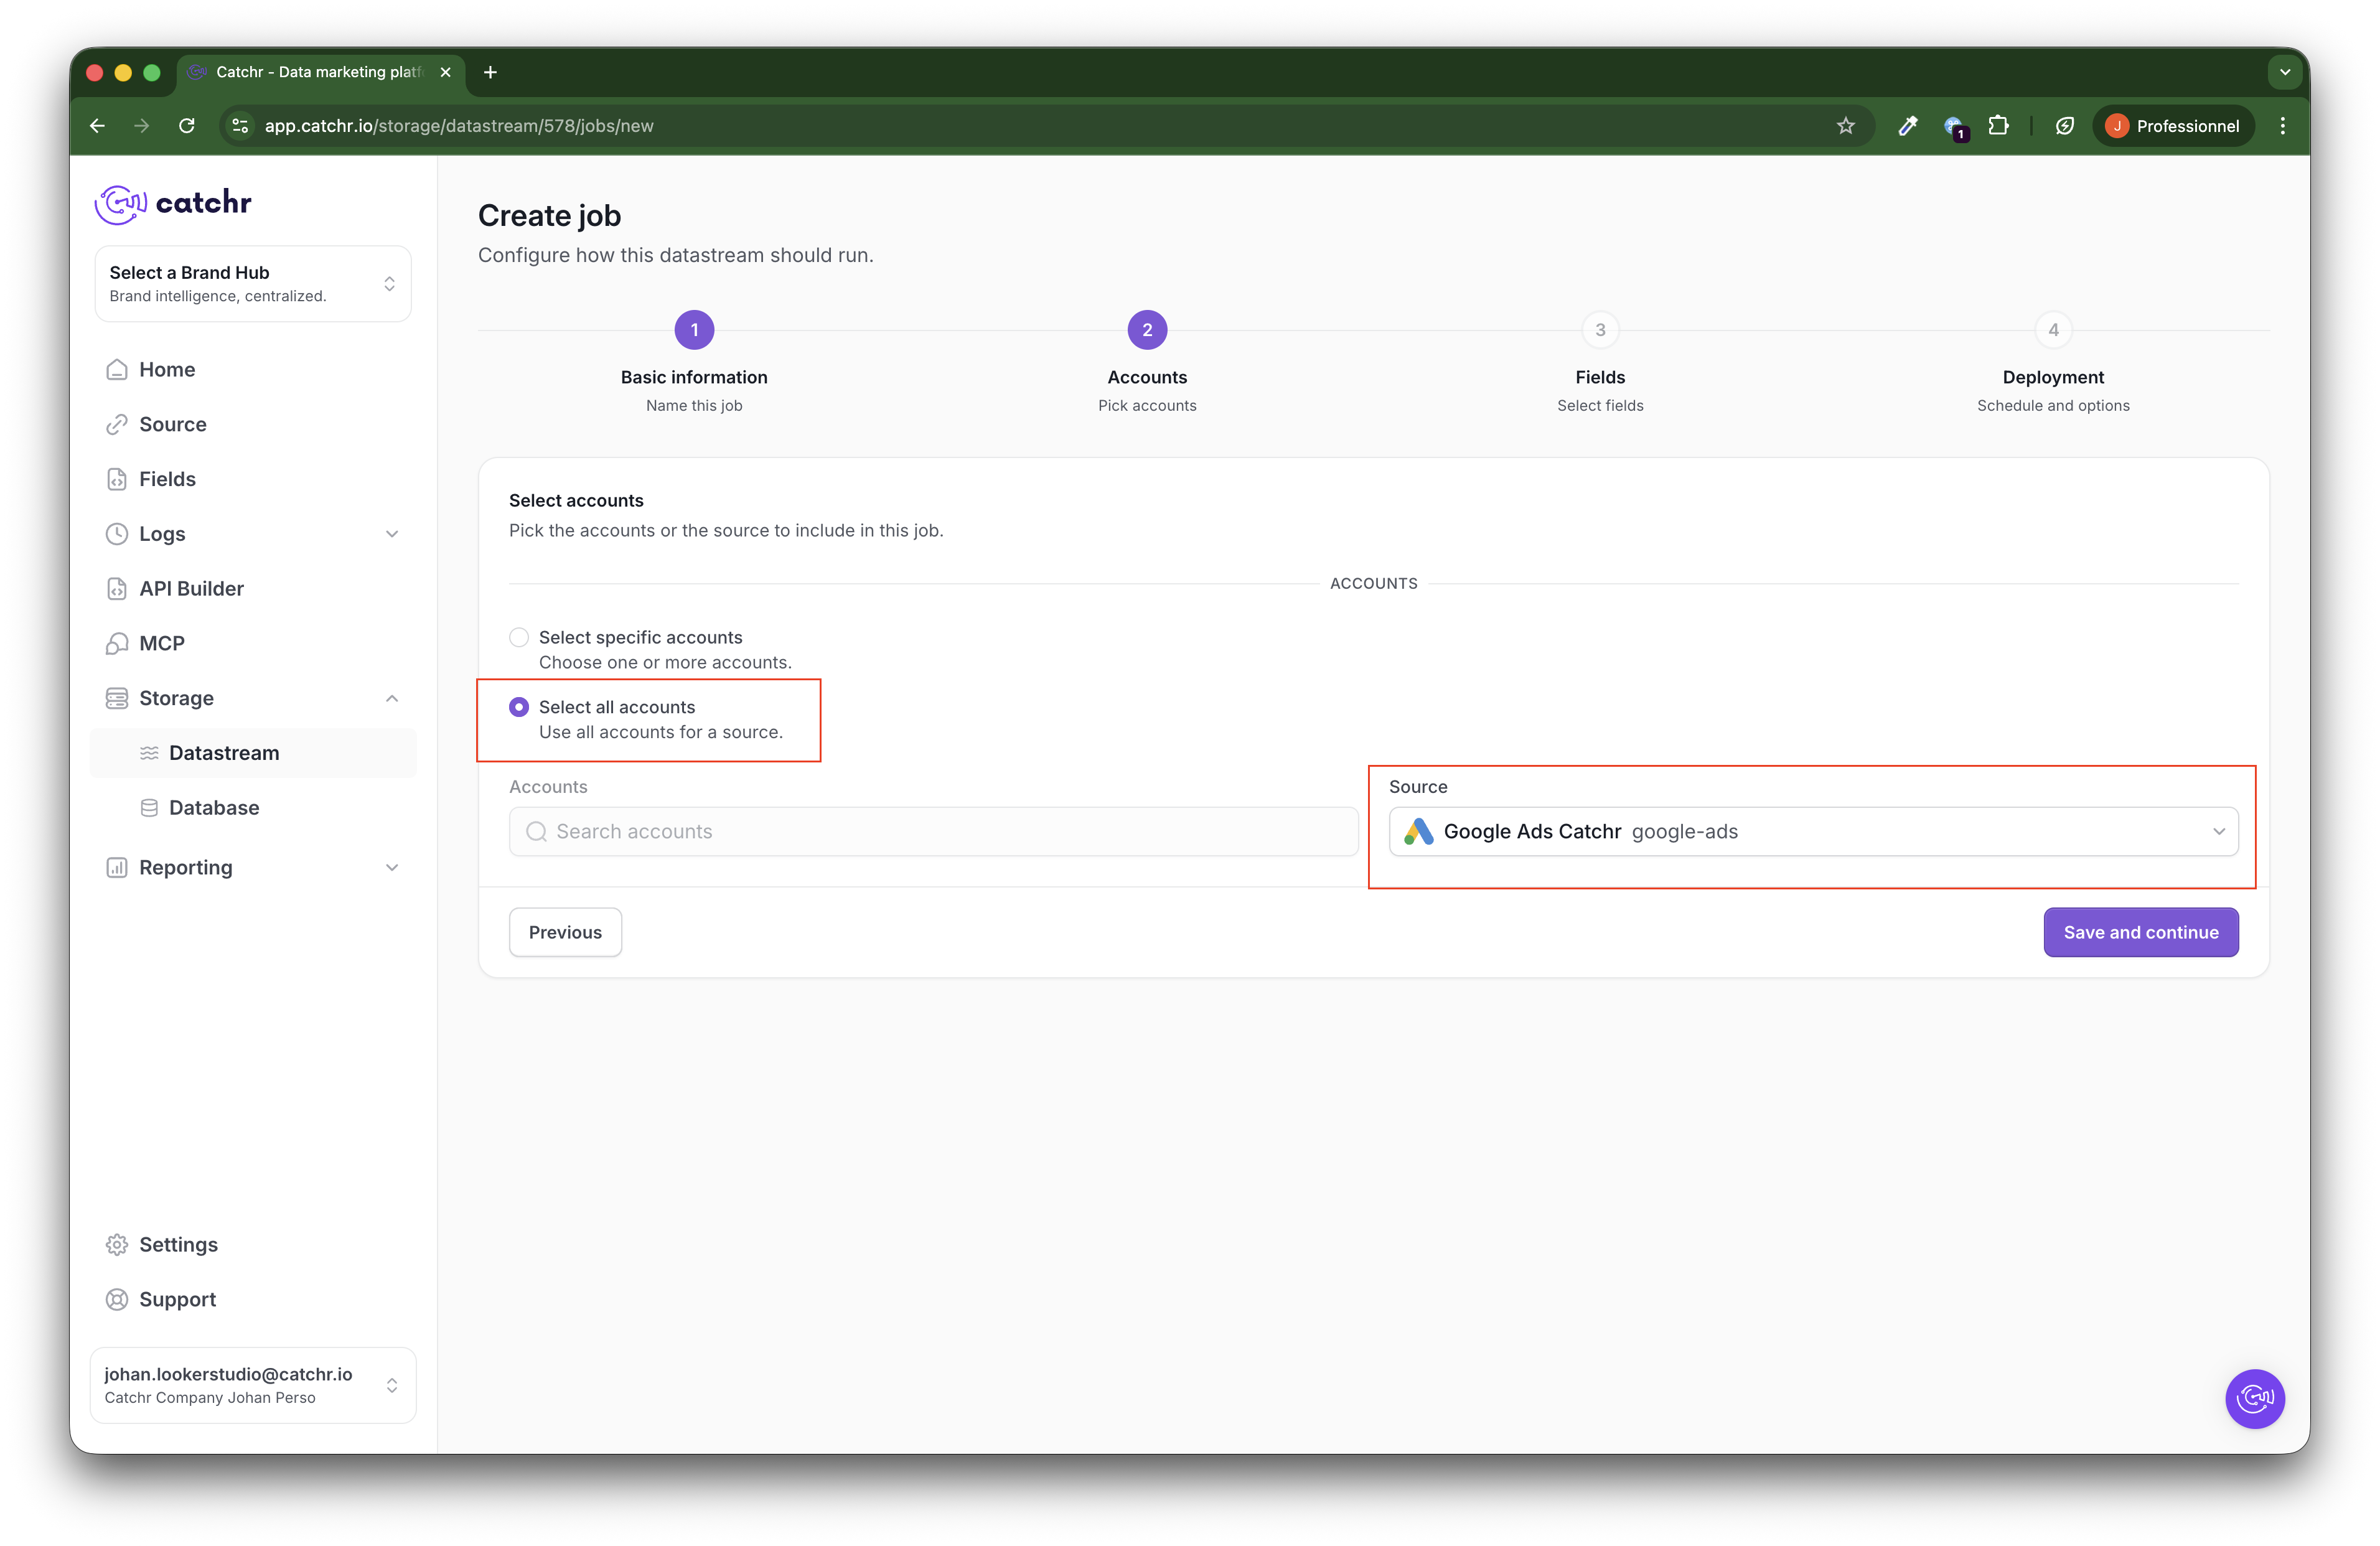
Choose the account(s) from which the data will be pulled. The accounts are available through the source you previously connected to Catchr.
You have two options:
Manually select one or more accounts, even if they come from different sources.
Automatically select all accounts from a source available in Catchr.
 This option will activate all available accounts in the selected source (if you have an Agency plan or above, we can activate an option that makes you pay only for accounts with data. Contact us via chat).
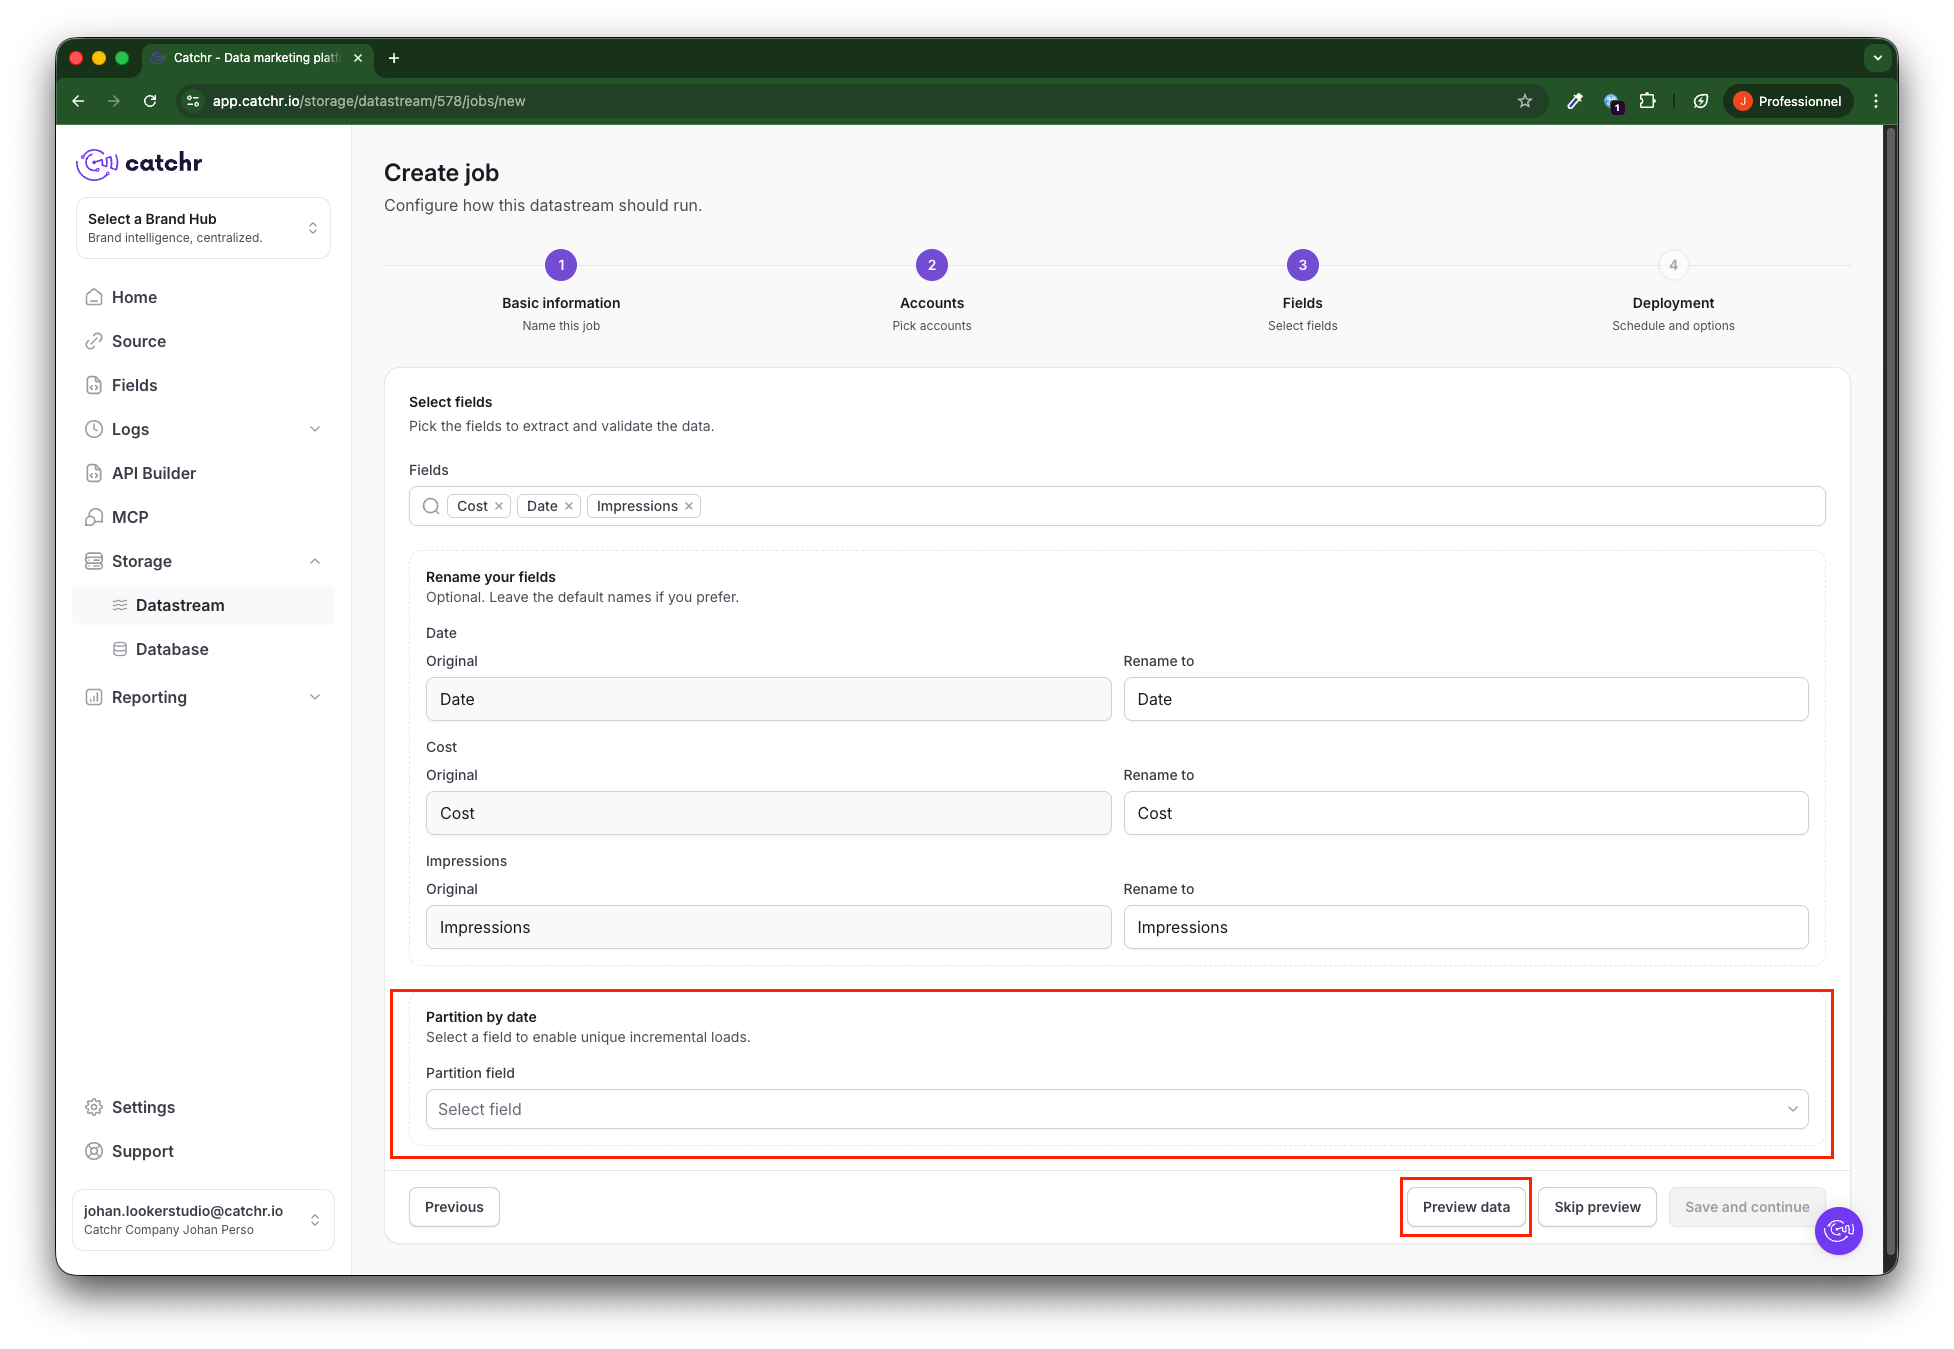
Choose the fields you want to import.
The left column is the field ID, and the right column is the field name. You can rename the field if necessary.
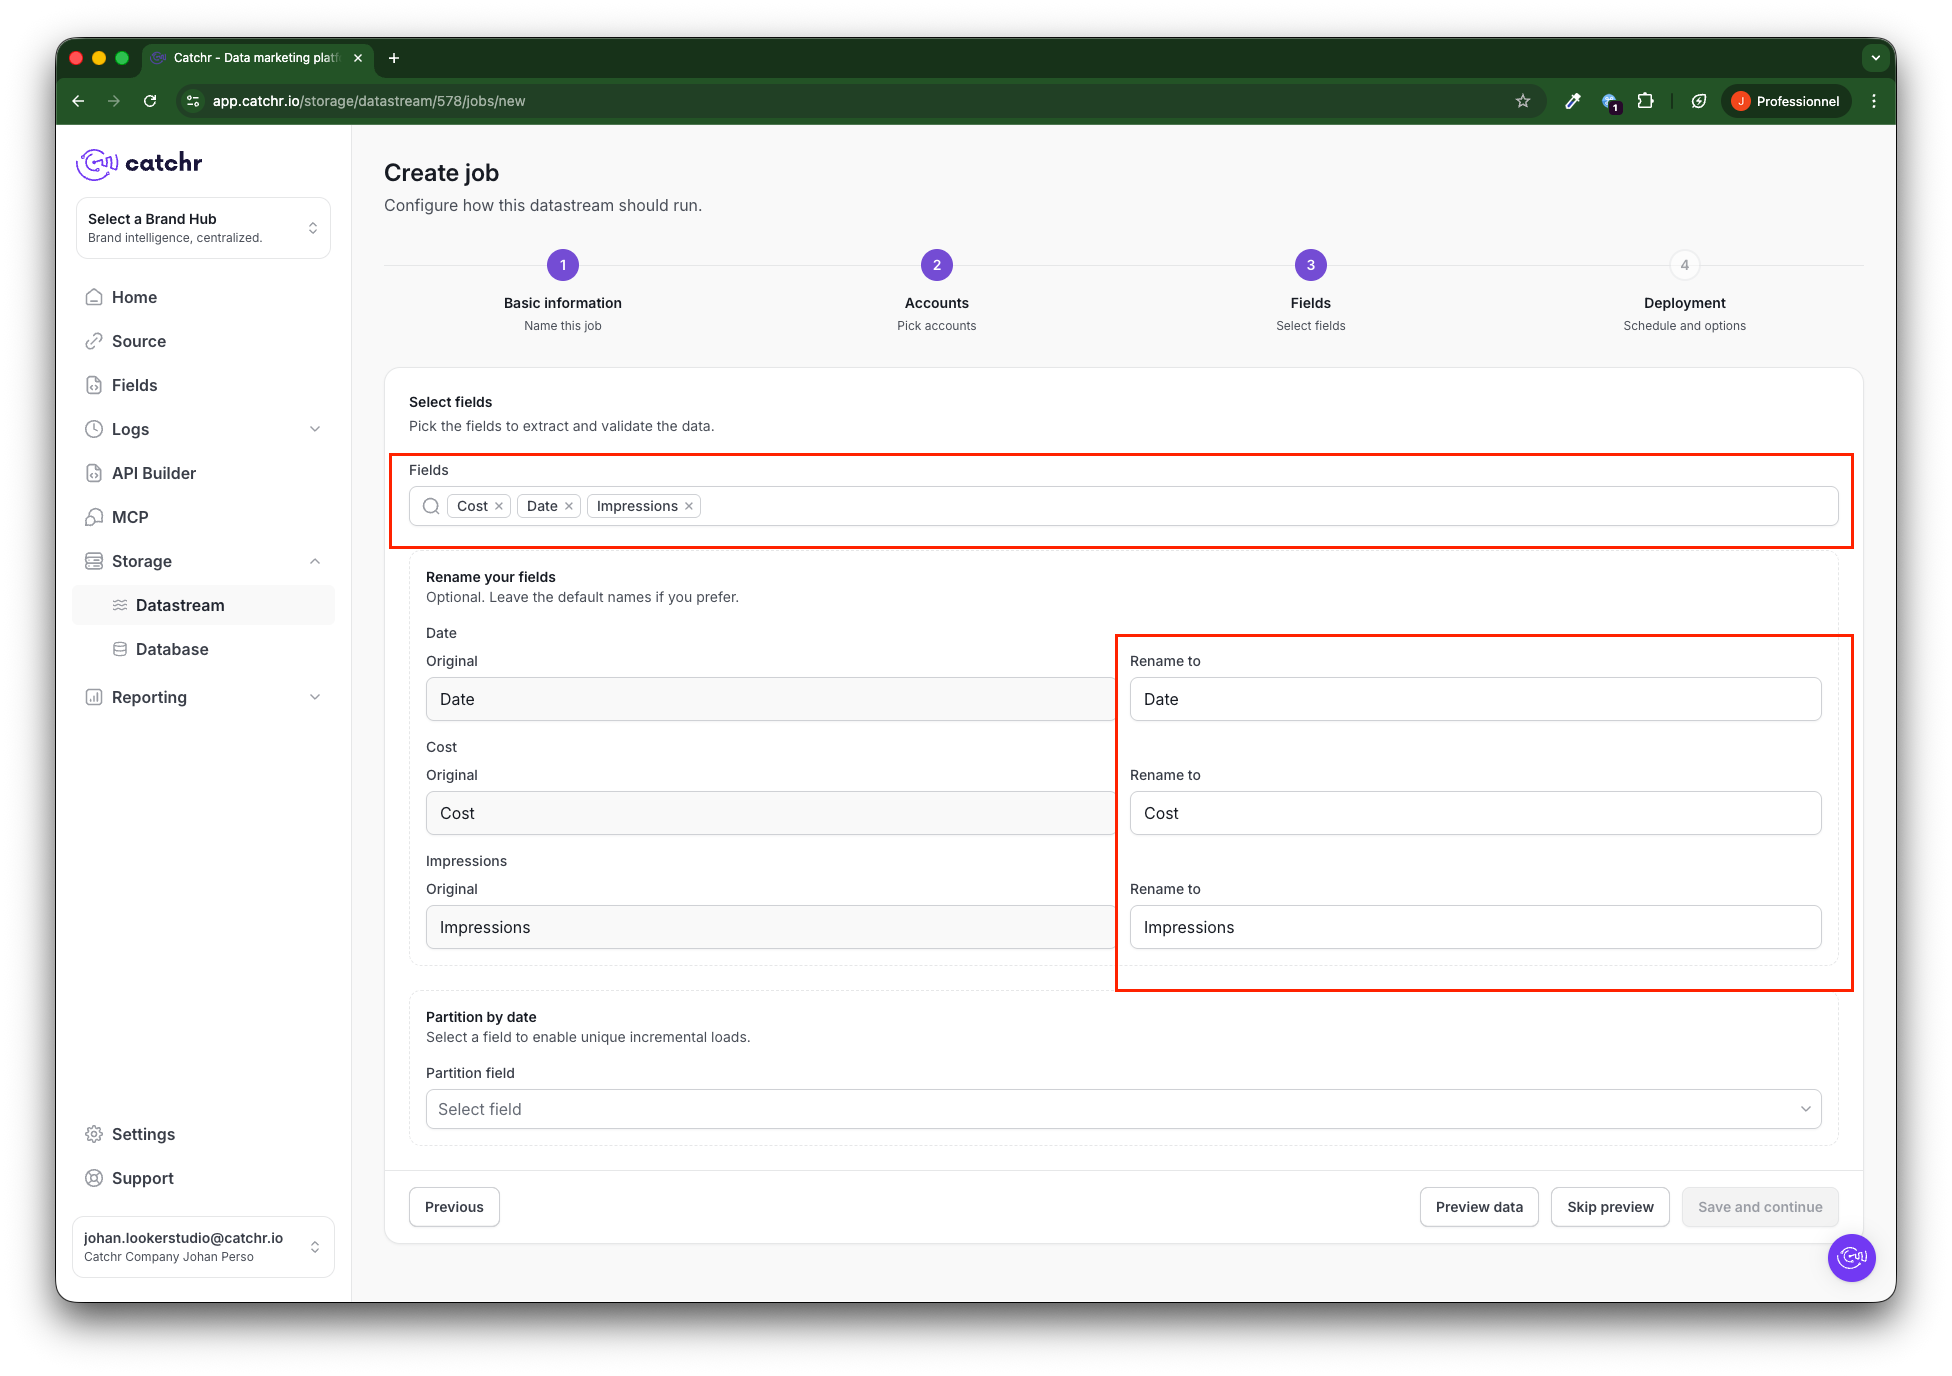
Then, select the partition field, which is usually the Date field.
If no partition field is selected, the data won’t be updated in the table, and each new run will add more rows.
This partition field is used to update existing rows. For example, if you import the last 7 days of data every day, we will update days 1 to 6 and add new rows for the 7th day. Without a partition field, all days will be added as new rows, potentially leading to duplicate data.
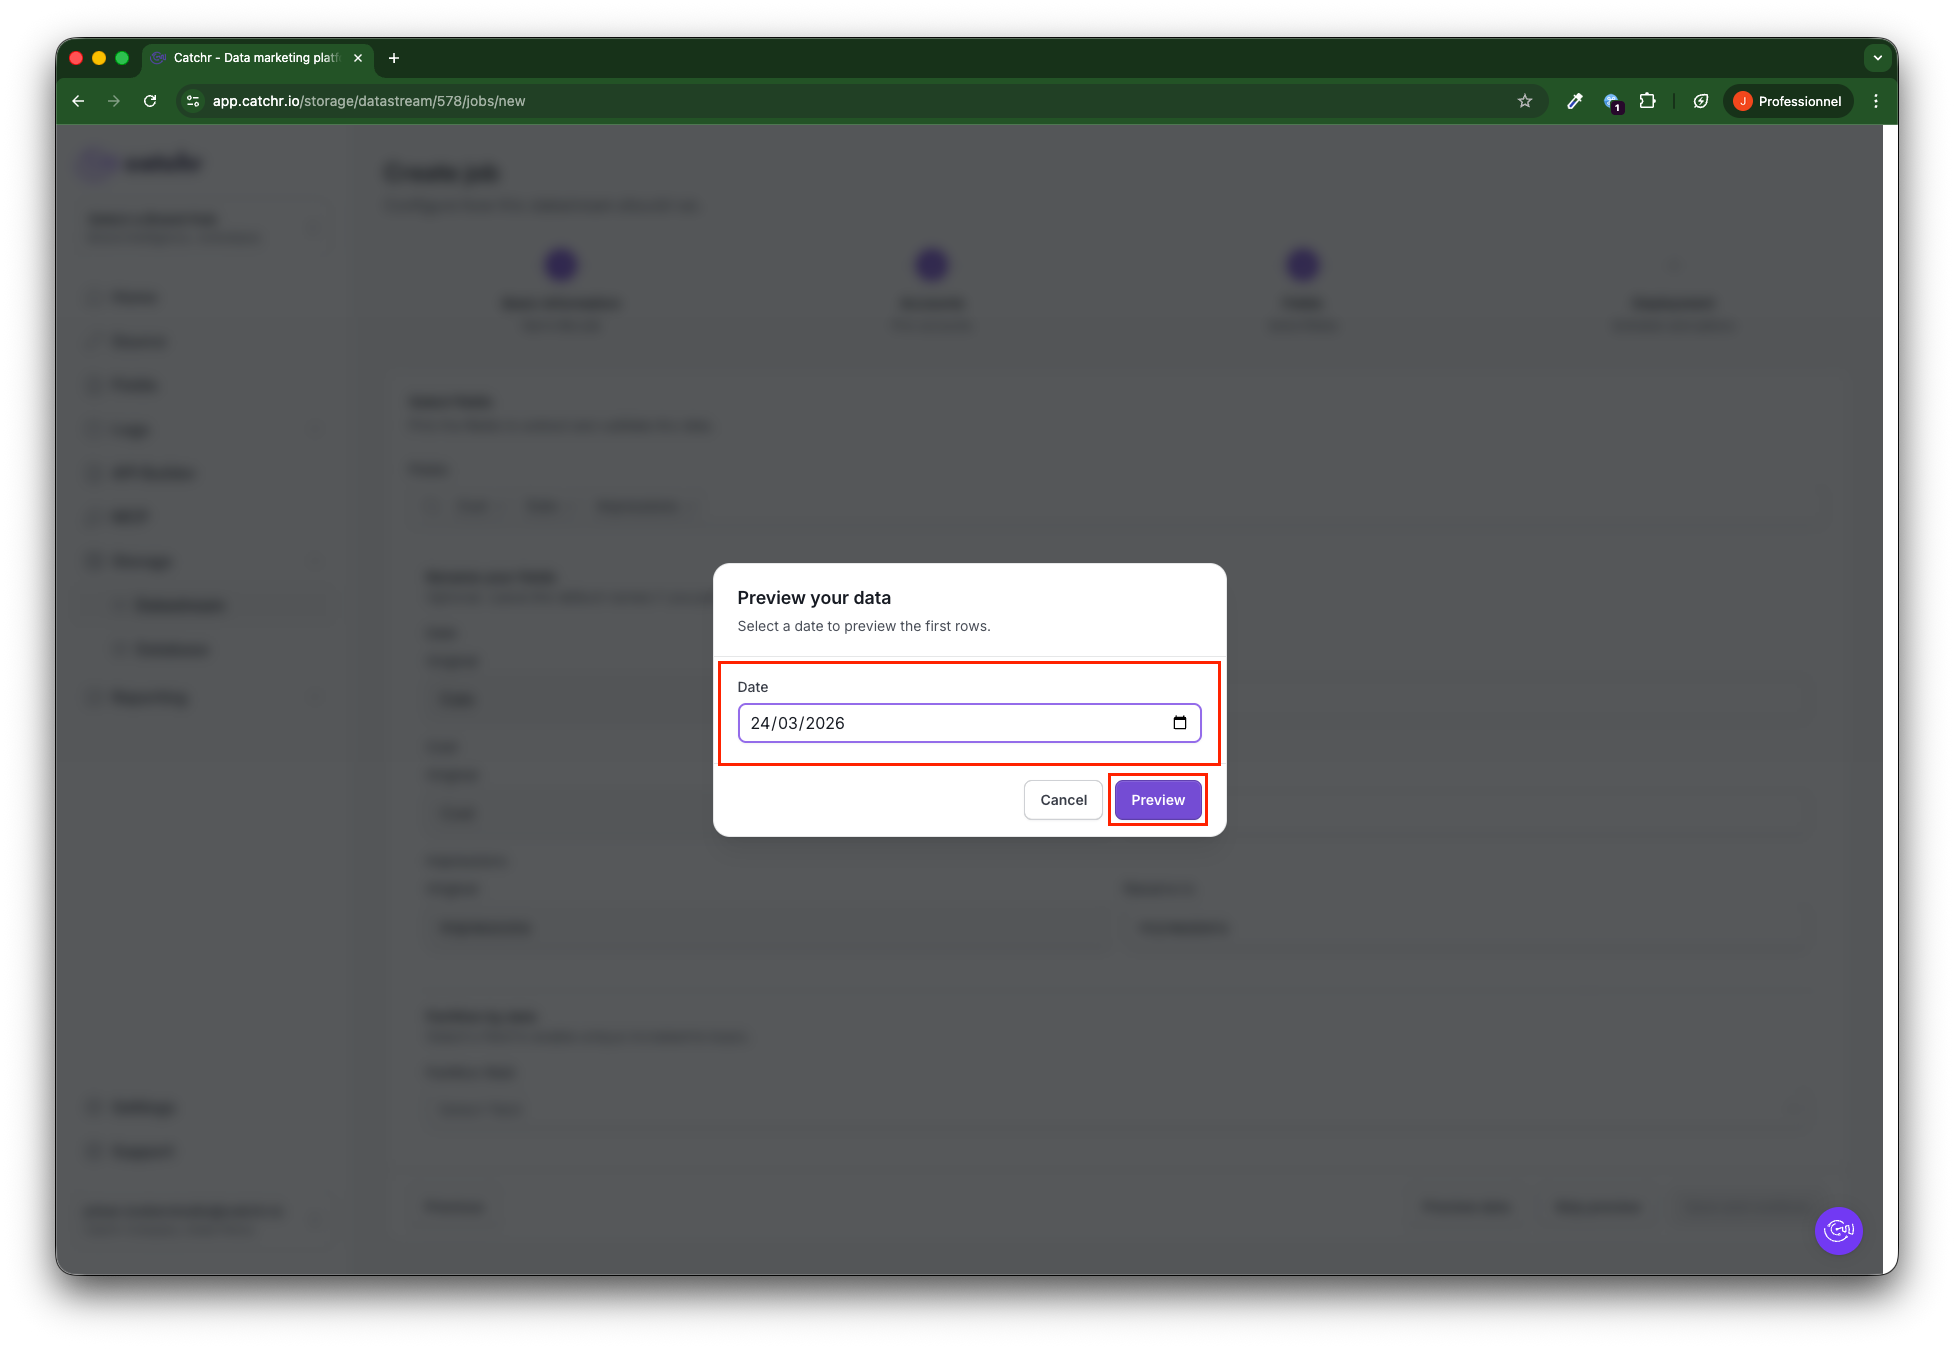
Click Preview data.
Select a date with available data, then click Preview.
If you selected a single account in the previous step:
You must choose a day with data in the account. The preview will try to run the request to see if everything works. If there is no data on the selected day, the request will return an error.
If you selected multiple accounts in the previous step:
The request will run only on the first chosen account. Therefore, you must choose a date with data on this account.
If you selected Source in the previous step:
You will be prompted to choose the account to run the request before selecting the date.
For all situations:
You can pick any valid date if the platform doesn't store historical data.
This step also helps you verify that the query runs correctly. We advise against skipping it, but some platforms can take a long time to return data, so you cannot preview it. In this case, you must skip the preview steps.
A platform where you can have trouble getting a preview:
The Trade Desk
Amazon DSP
If an error occurs, refer to the section Troubleshooting common errors at the end of this page.
Once the preview displays successfully, double-check that the data matches your expectations.

Step 4: Set up the data import schedule
Initial data fetching: Define the period from which data should be first imported.
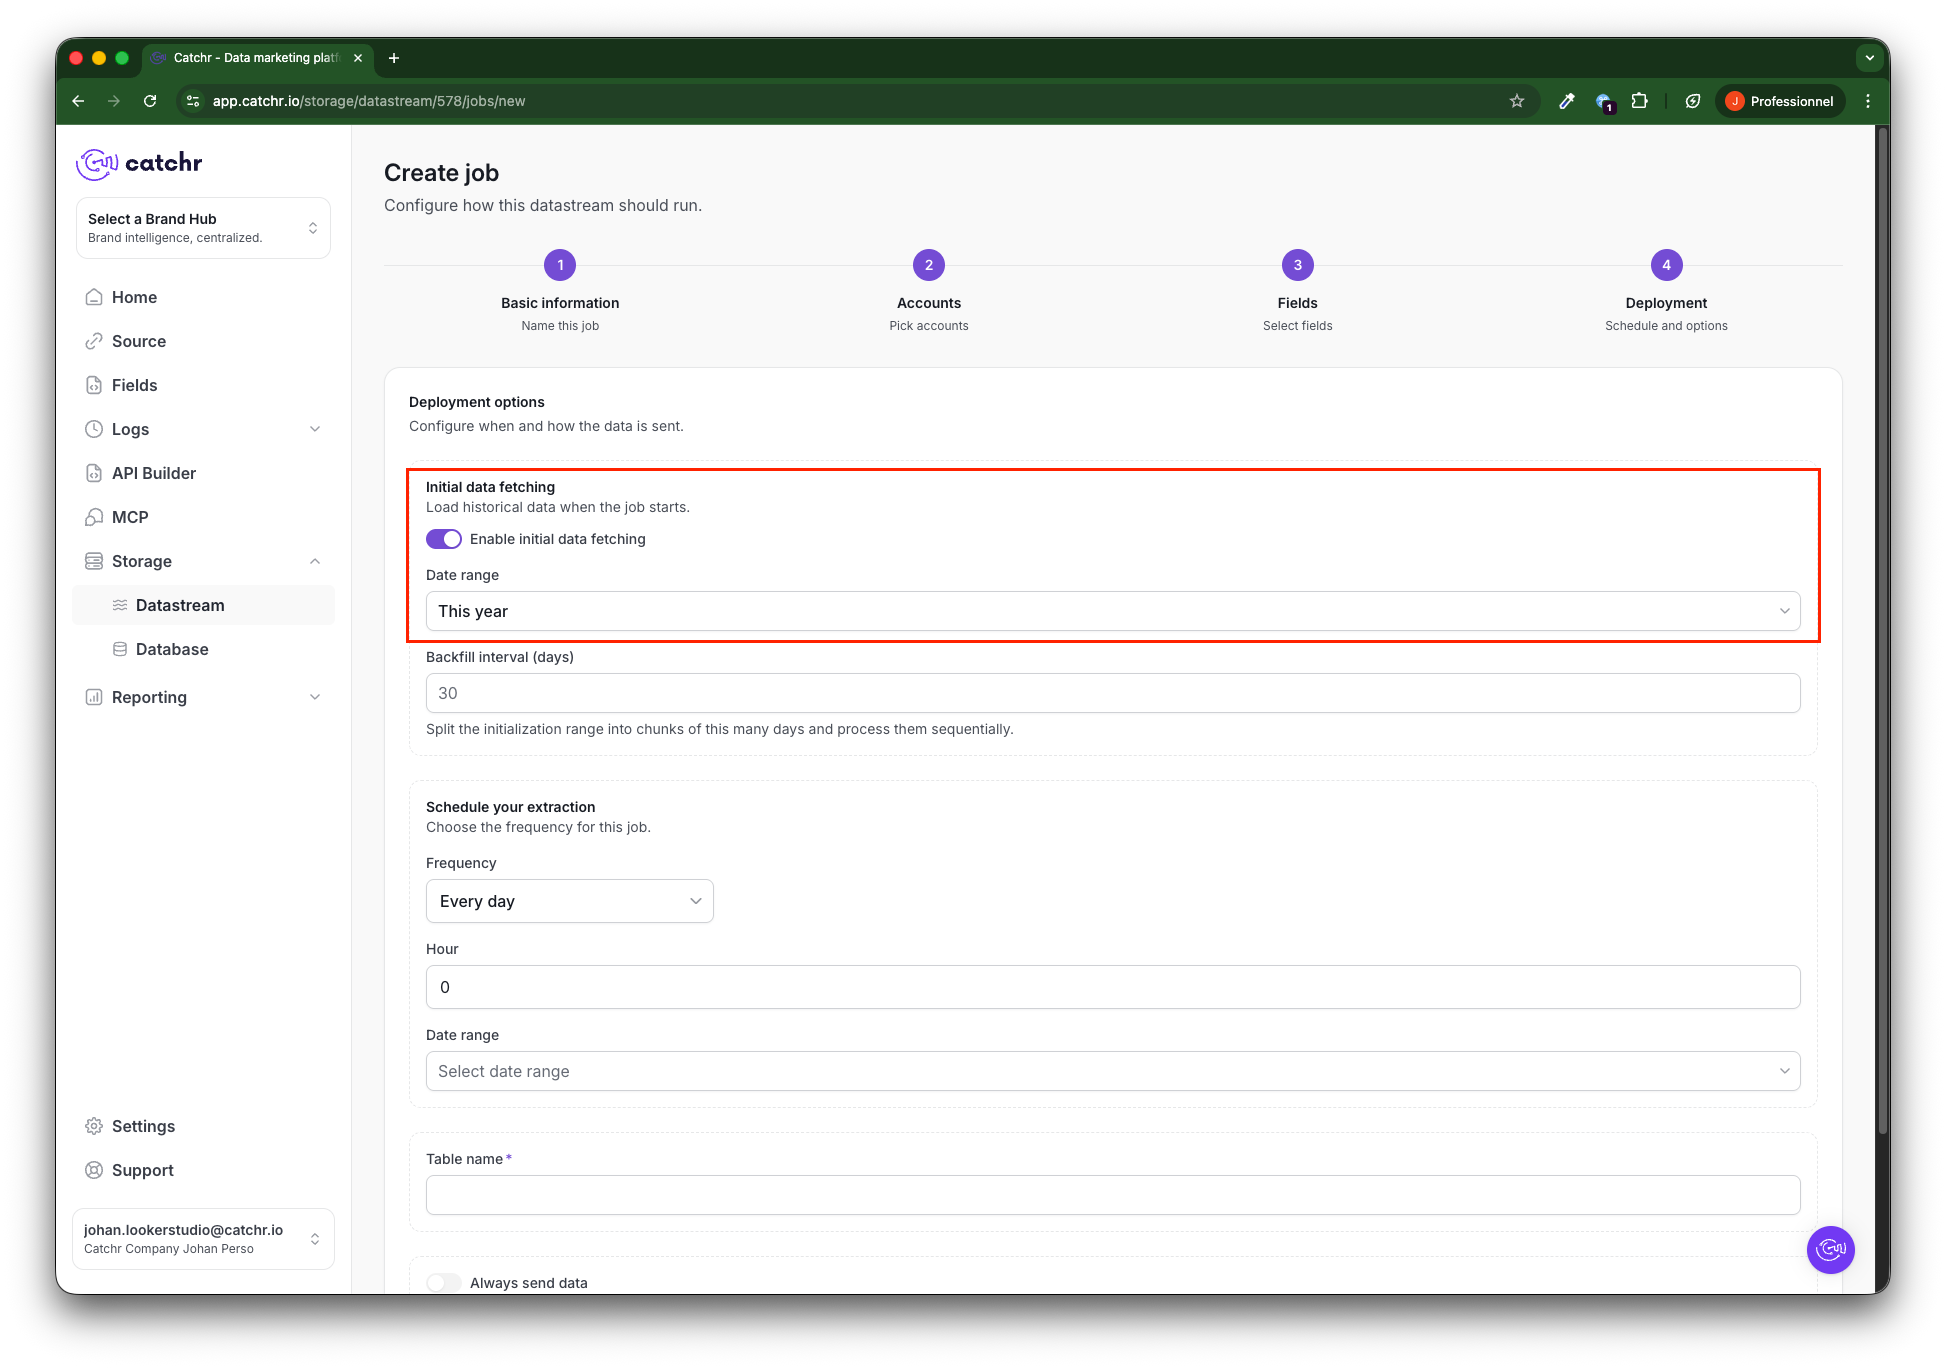
To avoid API limits on large queries, the data is split into smaller time intervals based on the backfill setting.
Each interval is processed sequentially to ensure a complete and reliable data import. With non-aggregated metrics like the Reach, this will cause data discrepencies. In the database, if you ask for the Reach over the year, you will have the sum of Reach for each months, not the Reach for each the year.

Schedule your dump: Set the frequency and the import window (how far back in time to fetch data automatically at that frequency).
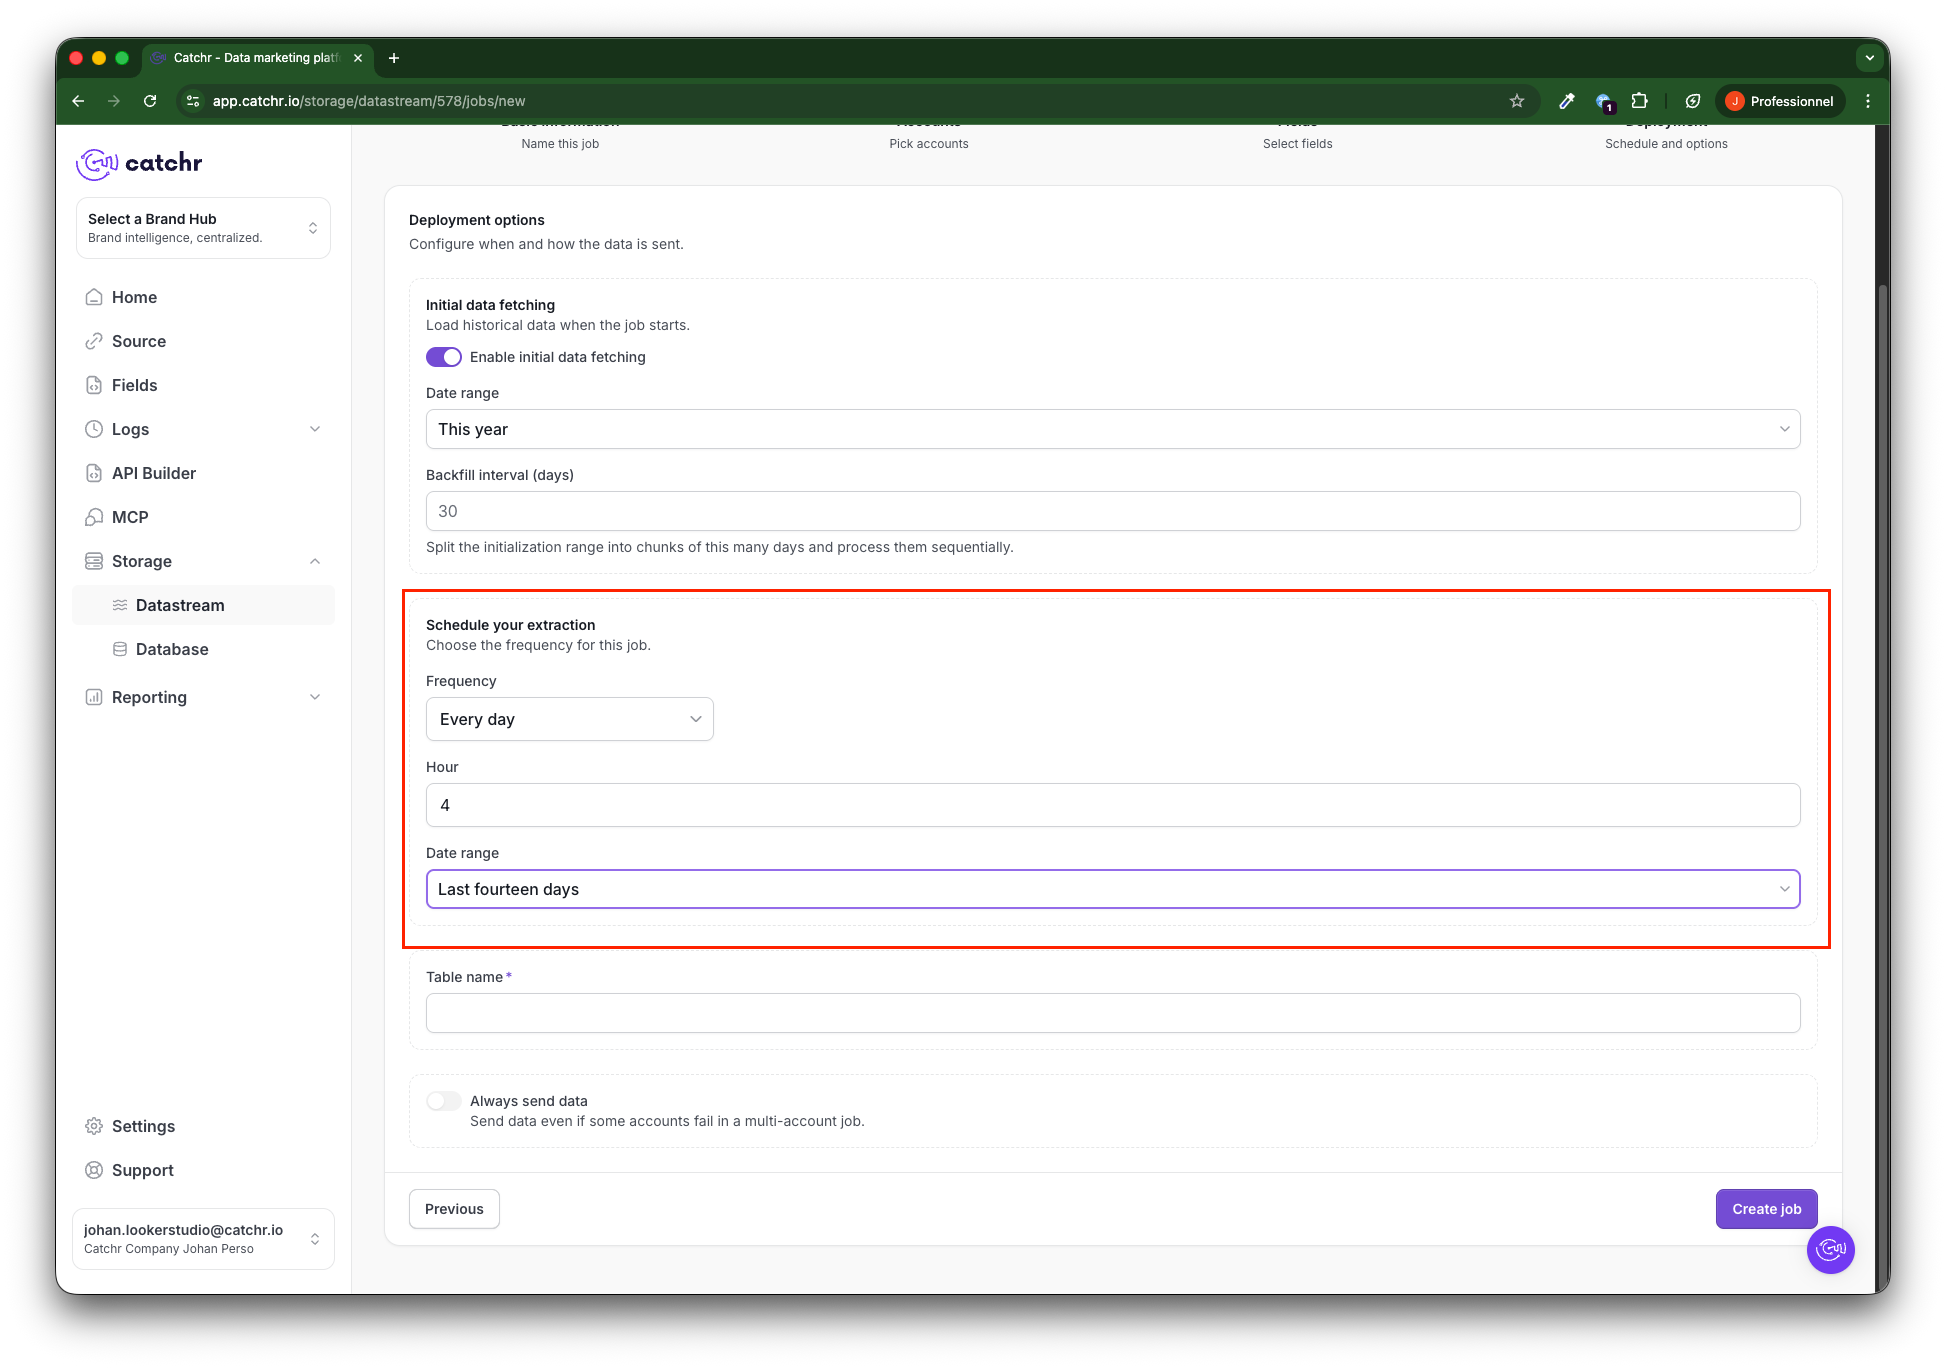
On each run, Catchr will delete and rewrite the data in the target table for the selected period.
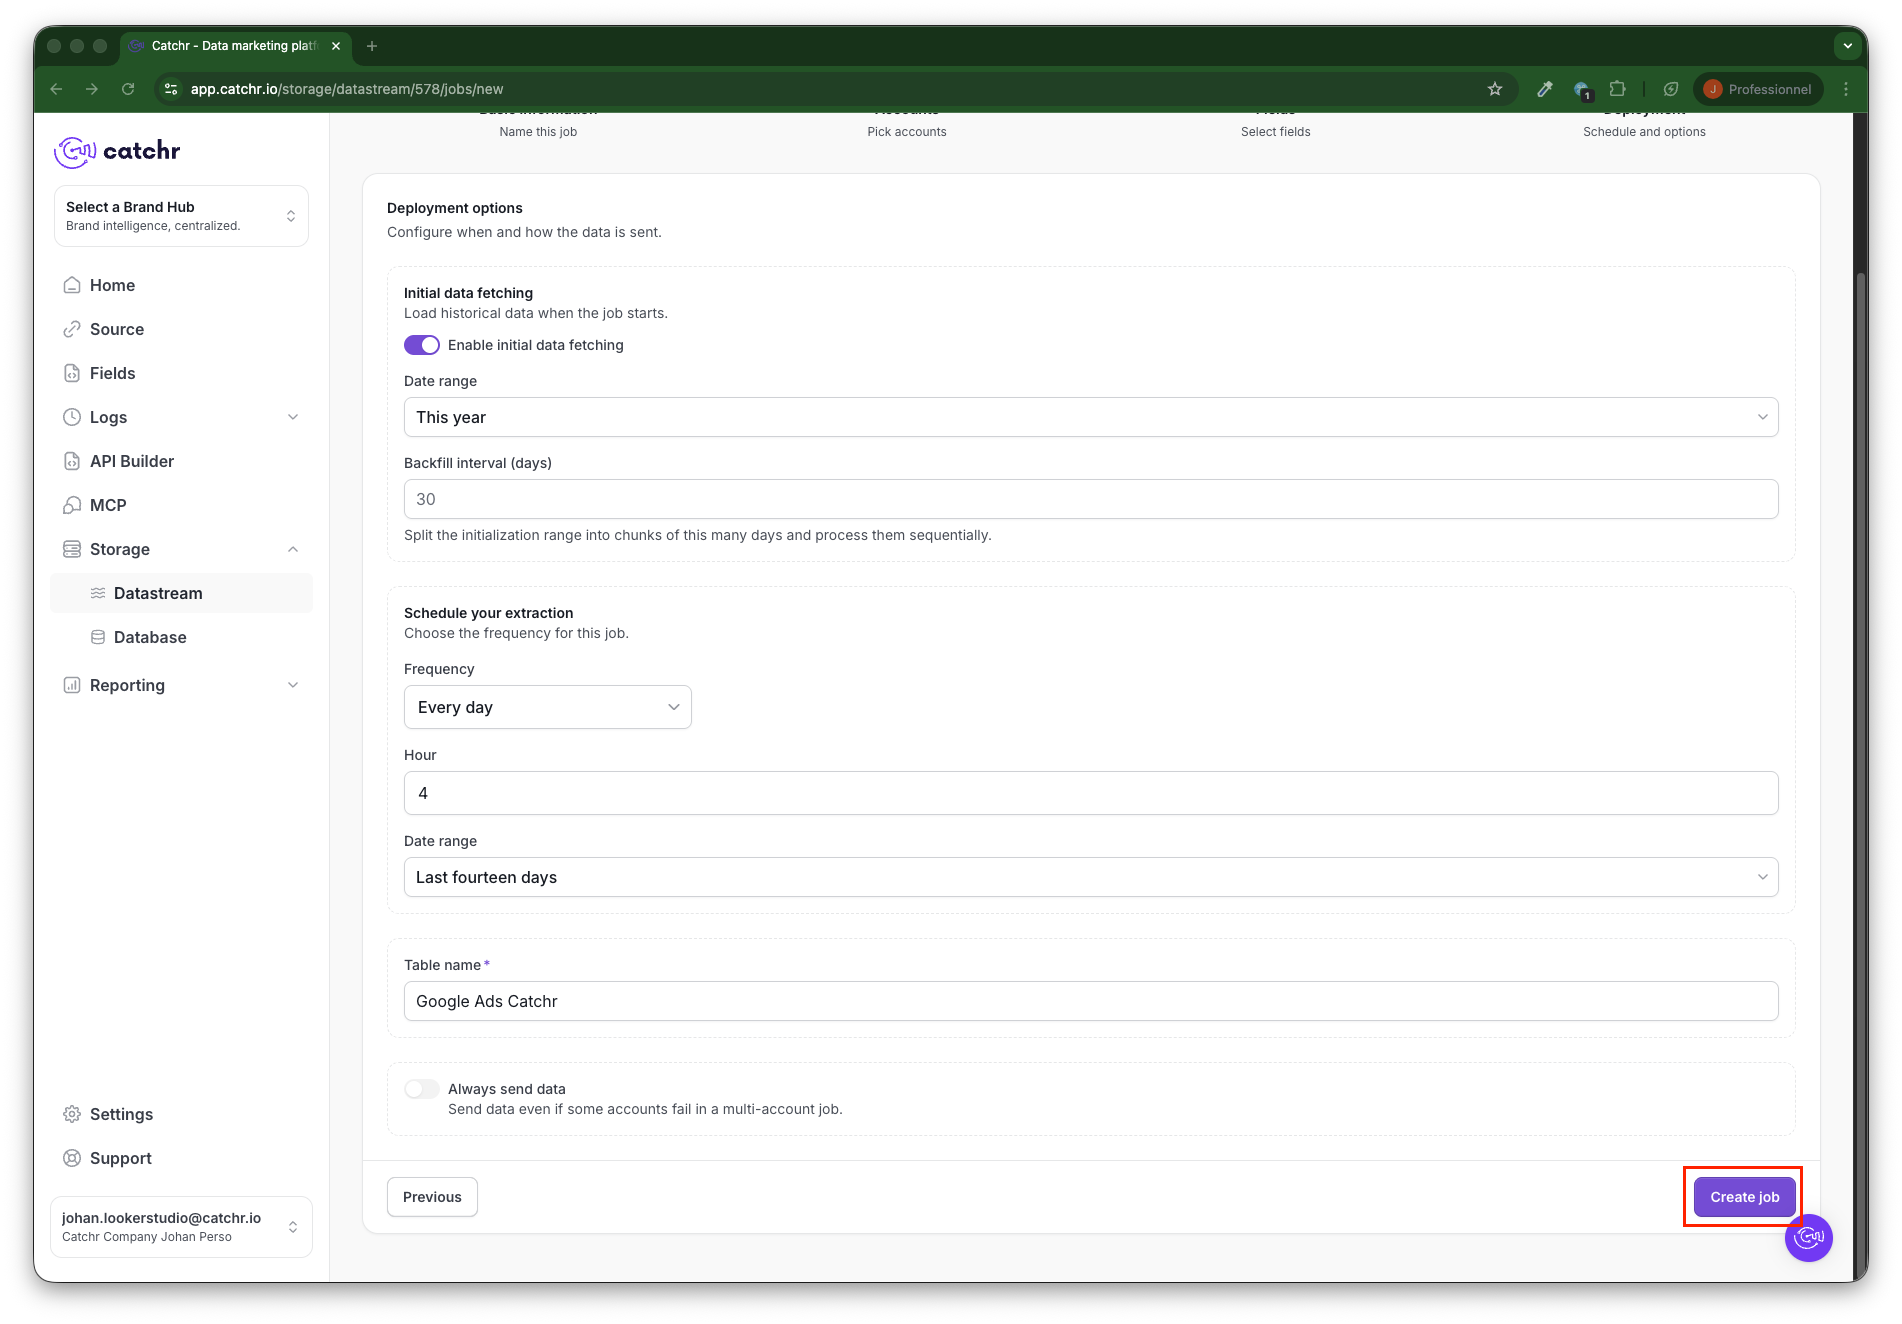
Option of your destination: choose the table's name as it will appear in your destination database. And click Save.
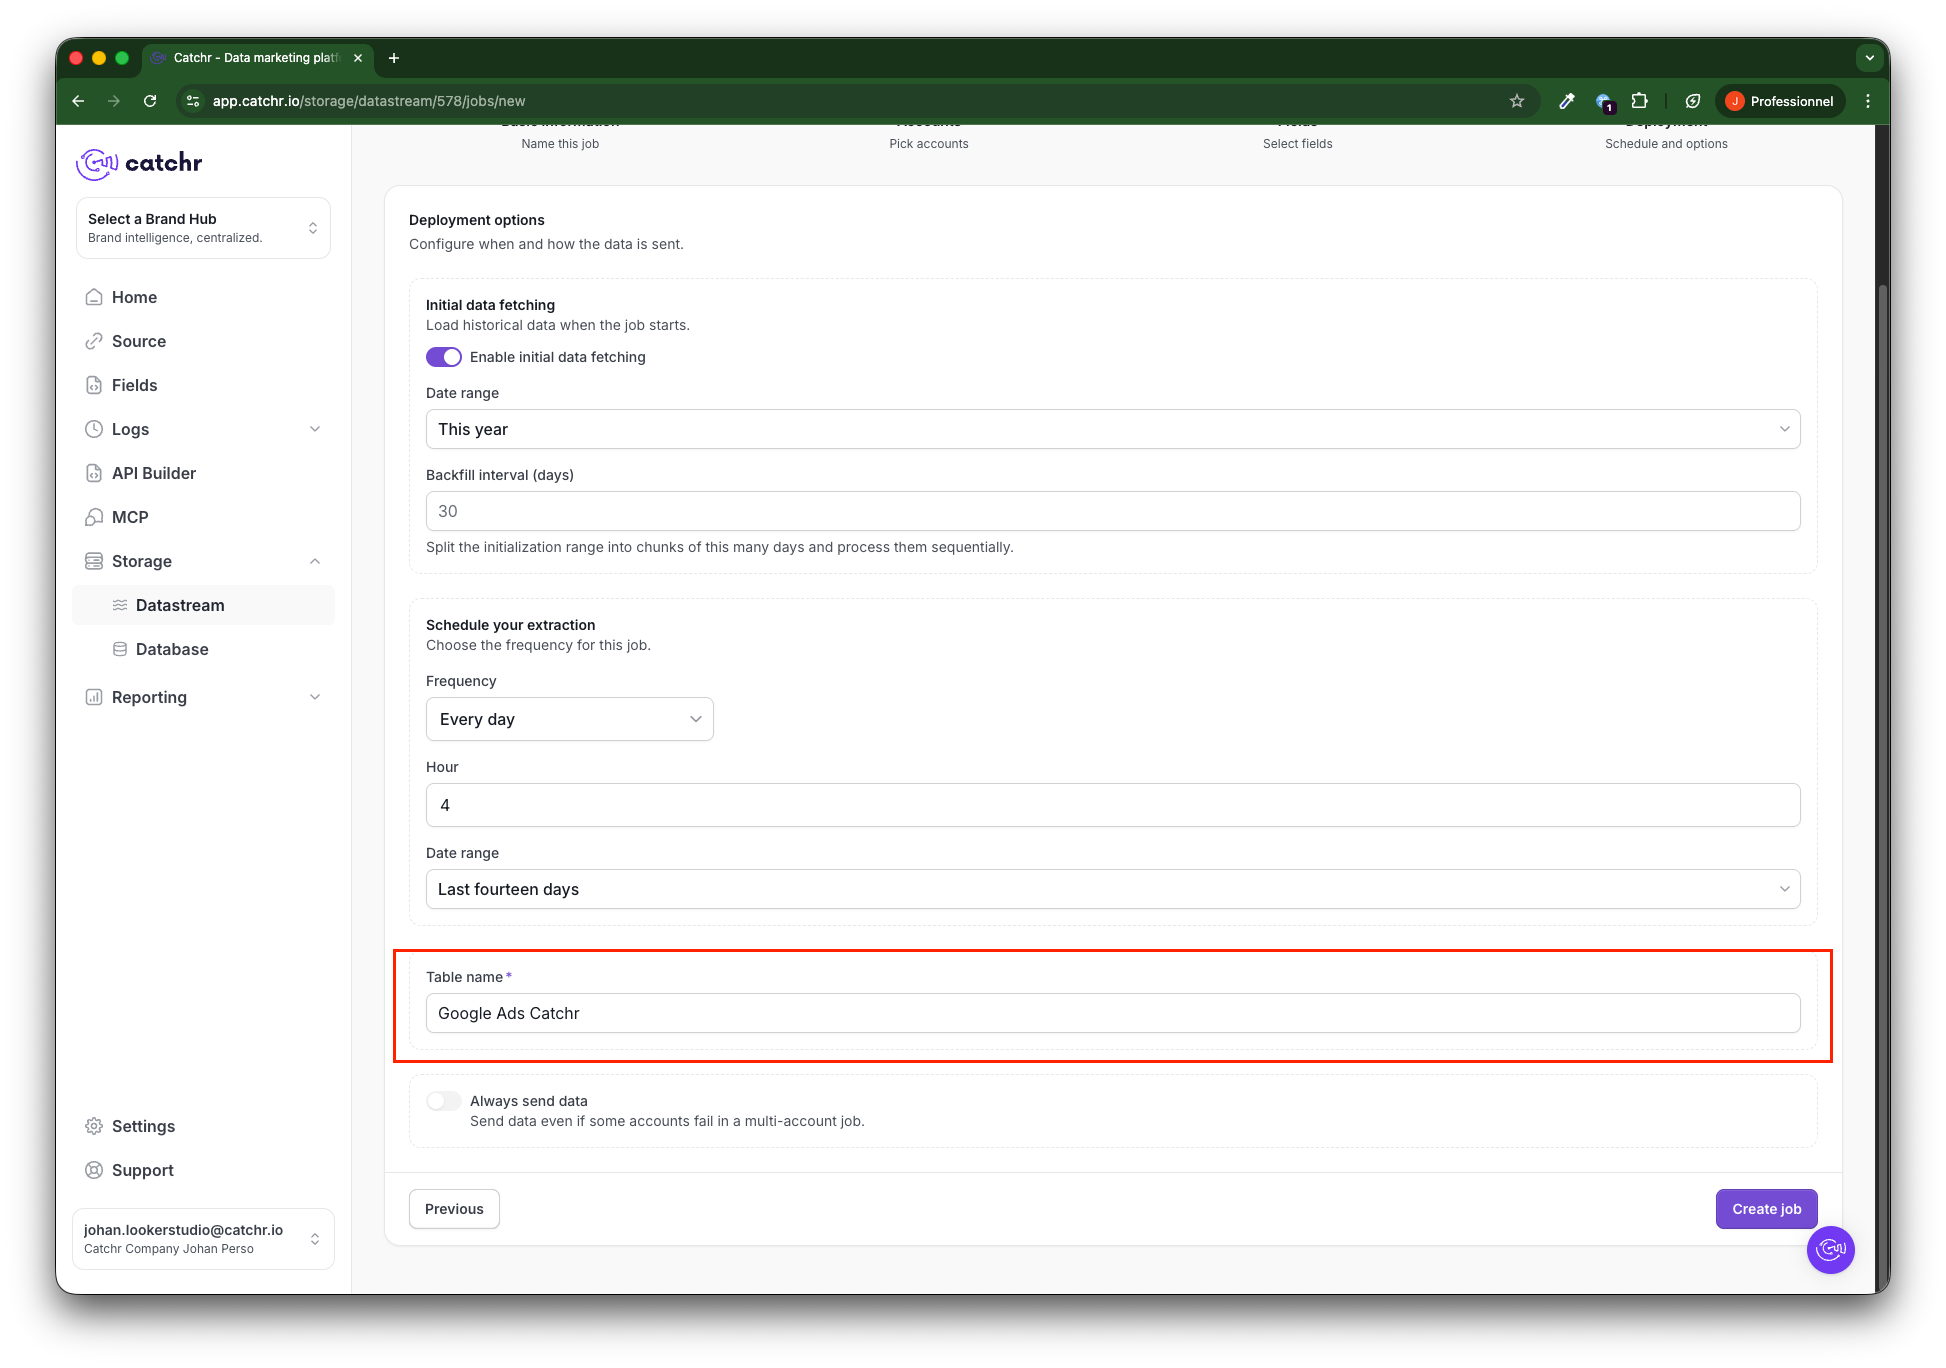
Option of your extraction:
Always send data: when checked, jobs with multiple accounts or a source will always send data, even if an error occurs for one account (data will be sent for the other account, the job will be marked as successful, and you can find the details of the run by account). If this option is not checked, any error will stop the run, and the entire job will return an error.
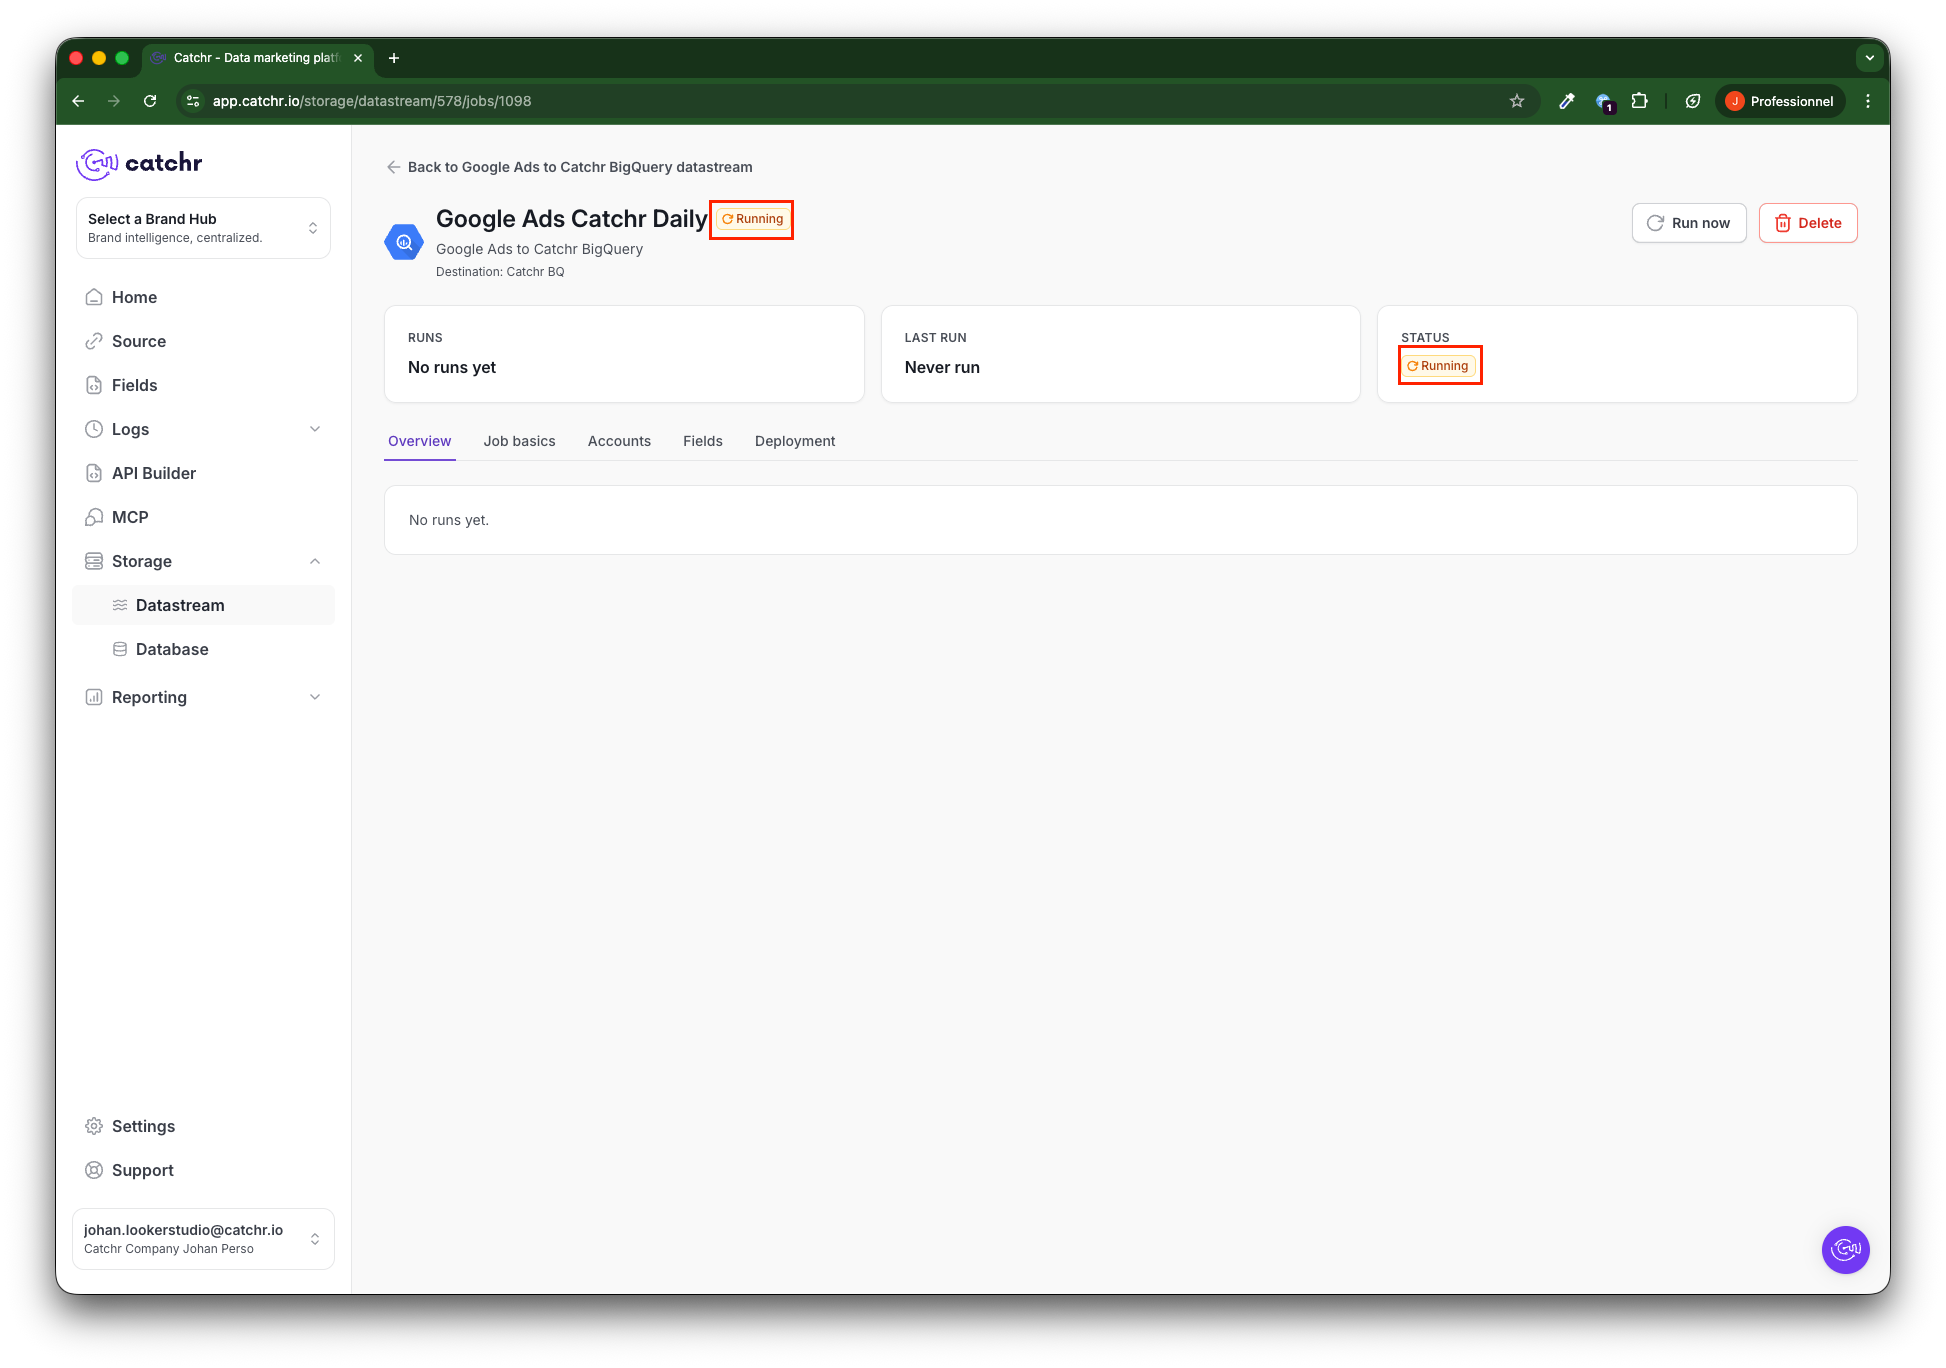
Your job will now launch the initial fetching. It will have a Running status until it finishes (depending on the period selected during the initial fetch, this can take several hours).
Once done, your job will be in Success status.
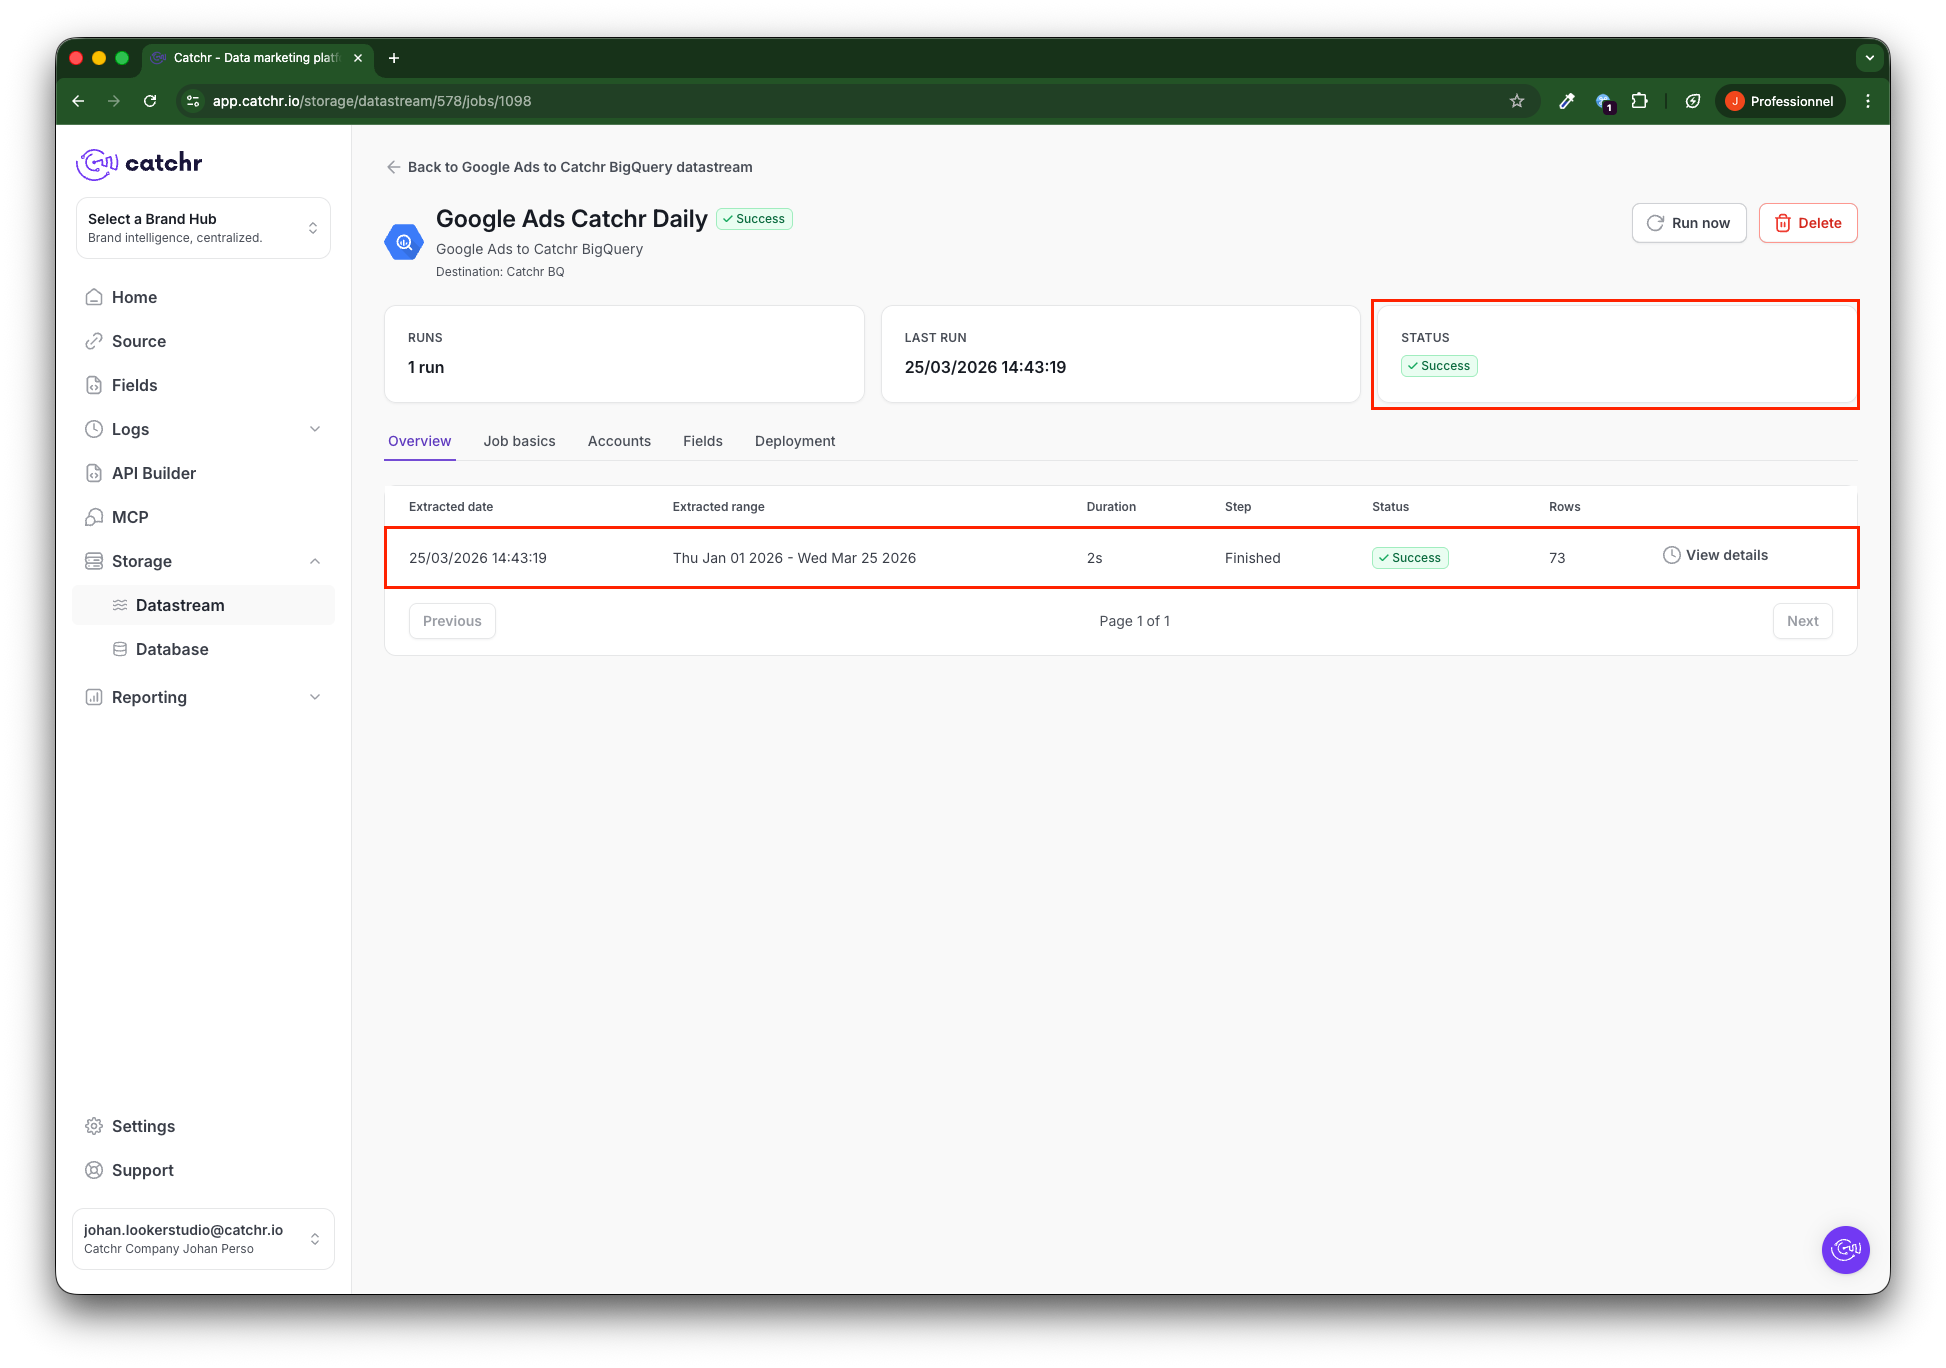
You can click on View details at the end of the rows to get the list of accounts synchronized:

During the job creation process, you might encounter some errors during the data preview step. Here are the most common ones and how to handle them:

Error message:
"We do not have any data for the selected date. In order to proceed to the next step, you need to select a date for which you have some data."
This means the platform's API returned no data for the chosen date.
To proceed, please select a different date when data is available. This step is necessary for Catchr to verify that the request is valid.
Error message:

"This combination of fields is not possible."
This means the selected fields cannot be requested together due to API limitations.
Try simplifying your selection or removing conflicting fields.
If you encounter a different issue or need help resolving an error, please, contact us via the in-app chat or at [email protected] — we’re here to help!

