This tutorial explains how to install Catchr's MCP for Claude.
It covers two different setups:
- Claude subscription accounts
- Claude free accounts using the Claude desktop app
Make sure you know which type of Claude account you are using:
- Claude subscription account: a paid Claude account with connector support
- Claude free account: a free account using the Claude desktop app and local MCP configuration
In Claude, open Customize, then Connectors.
Click + to add a new connector, then click Add custom connector.
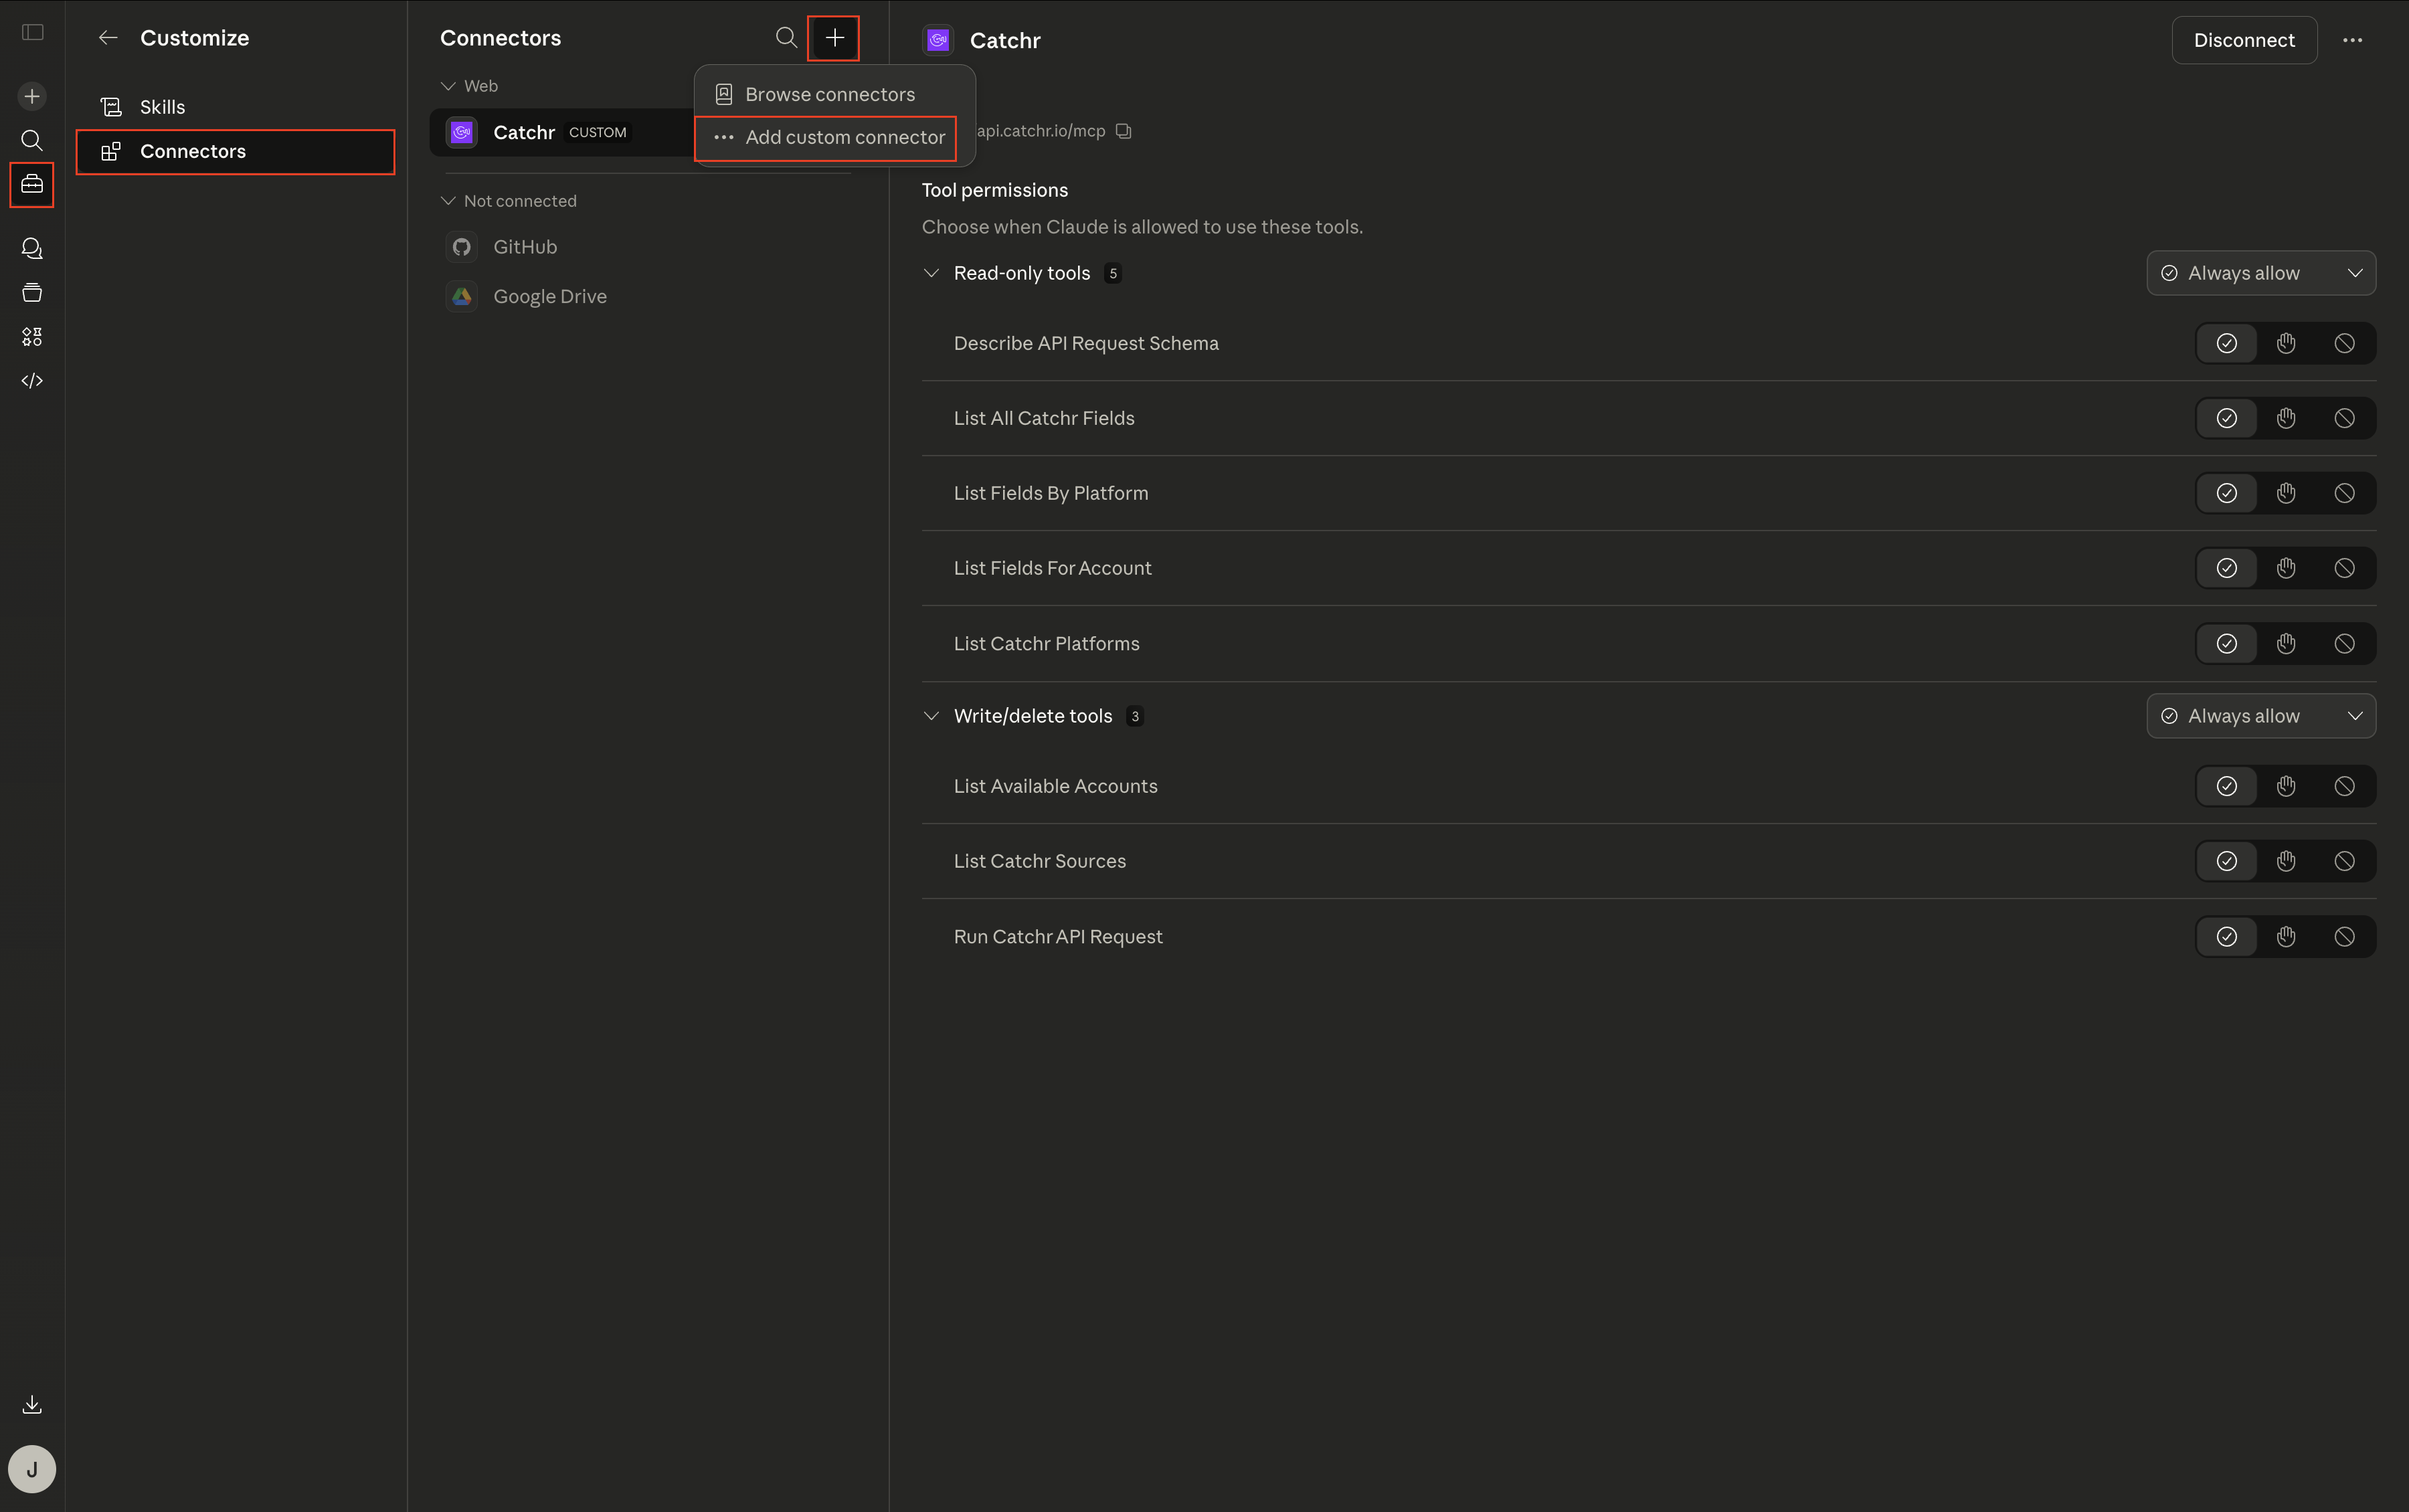
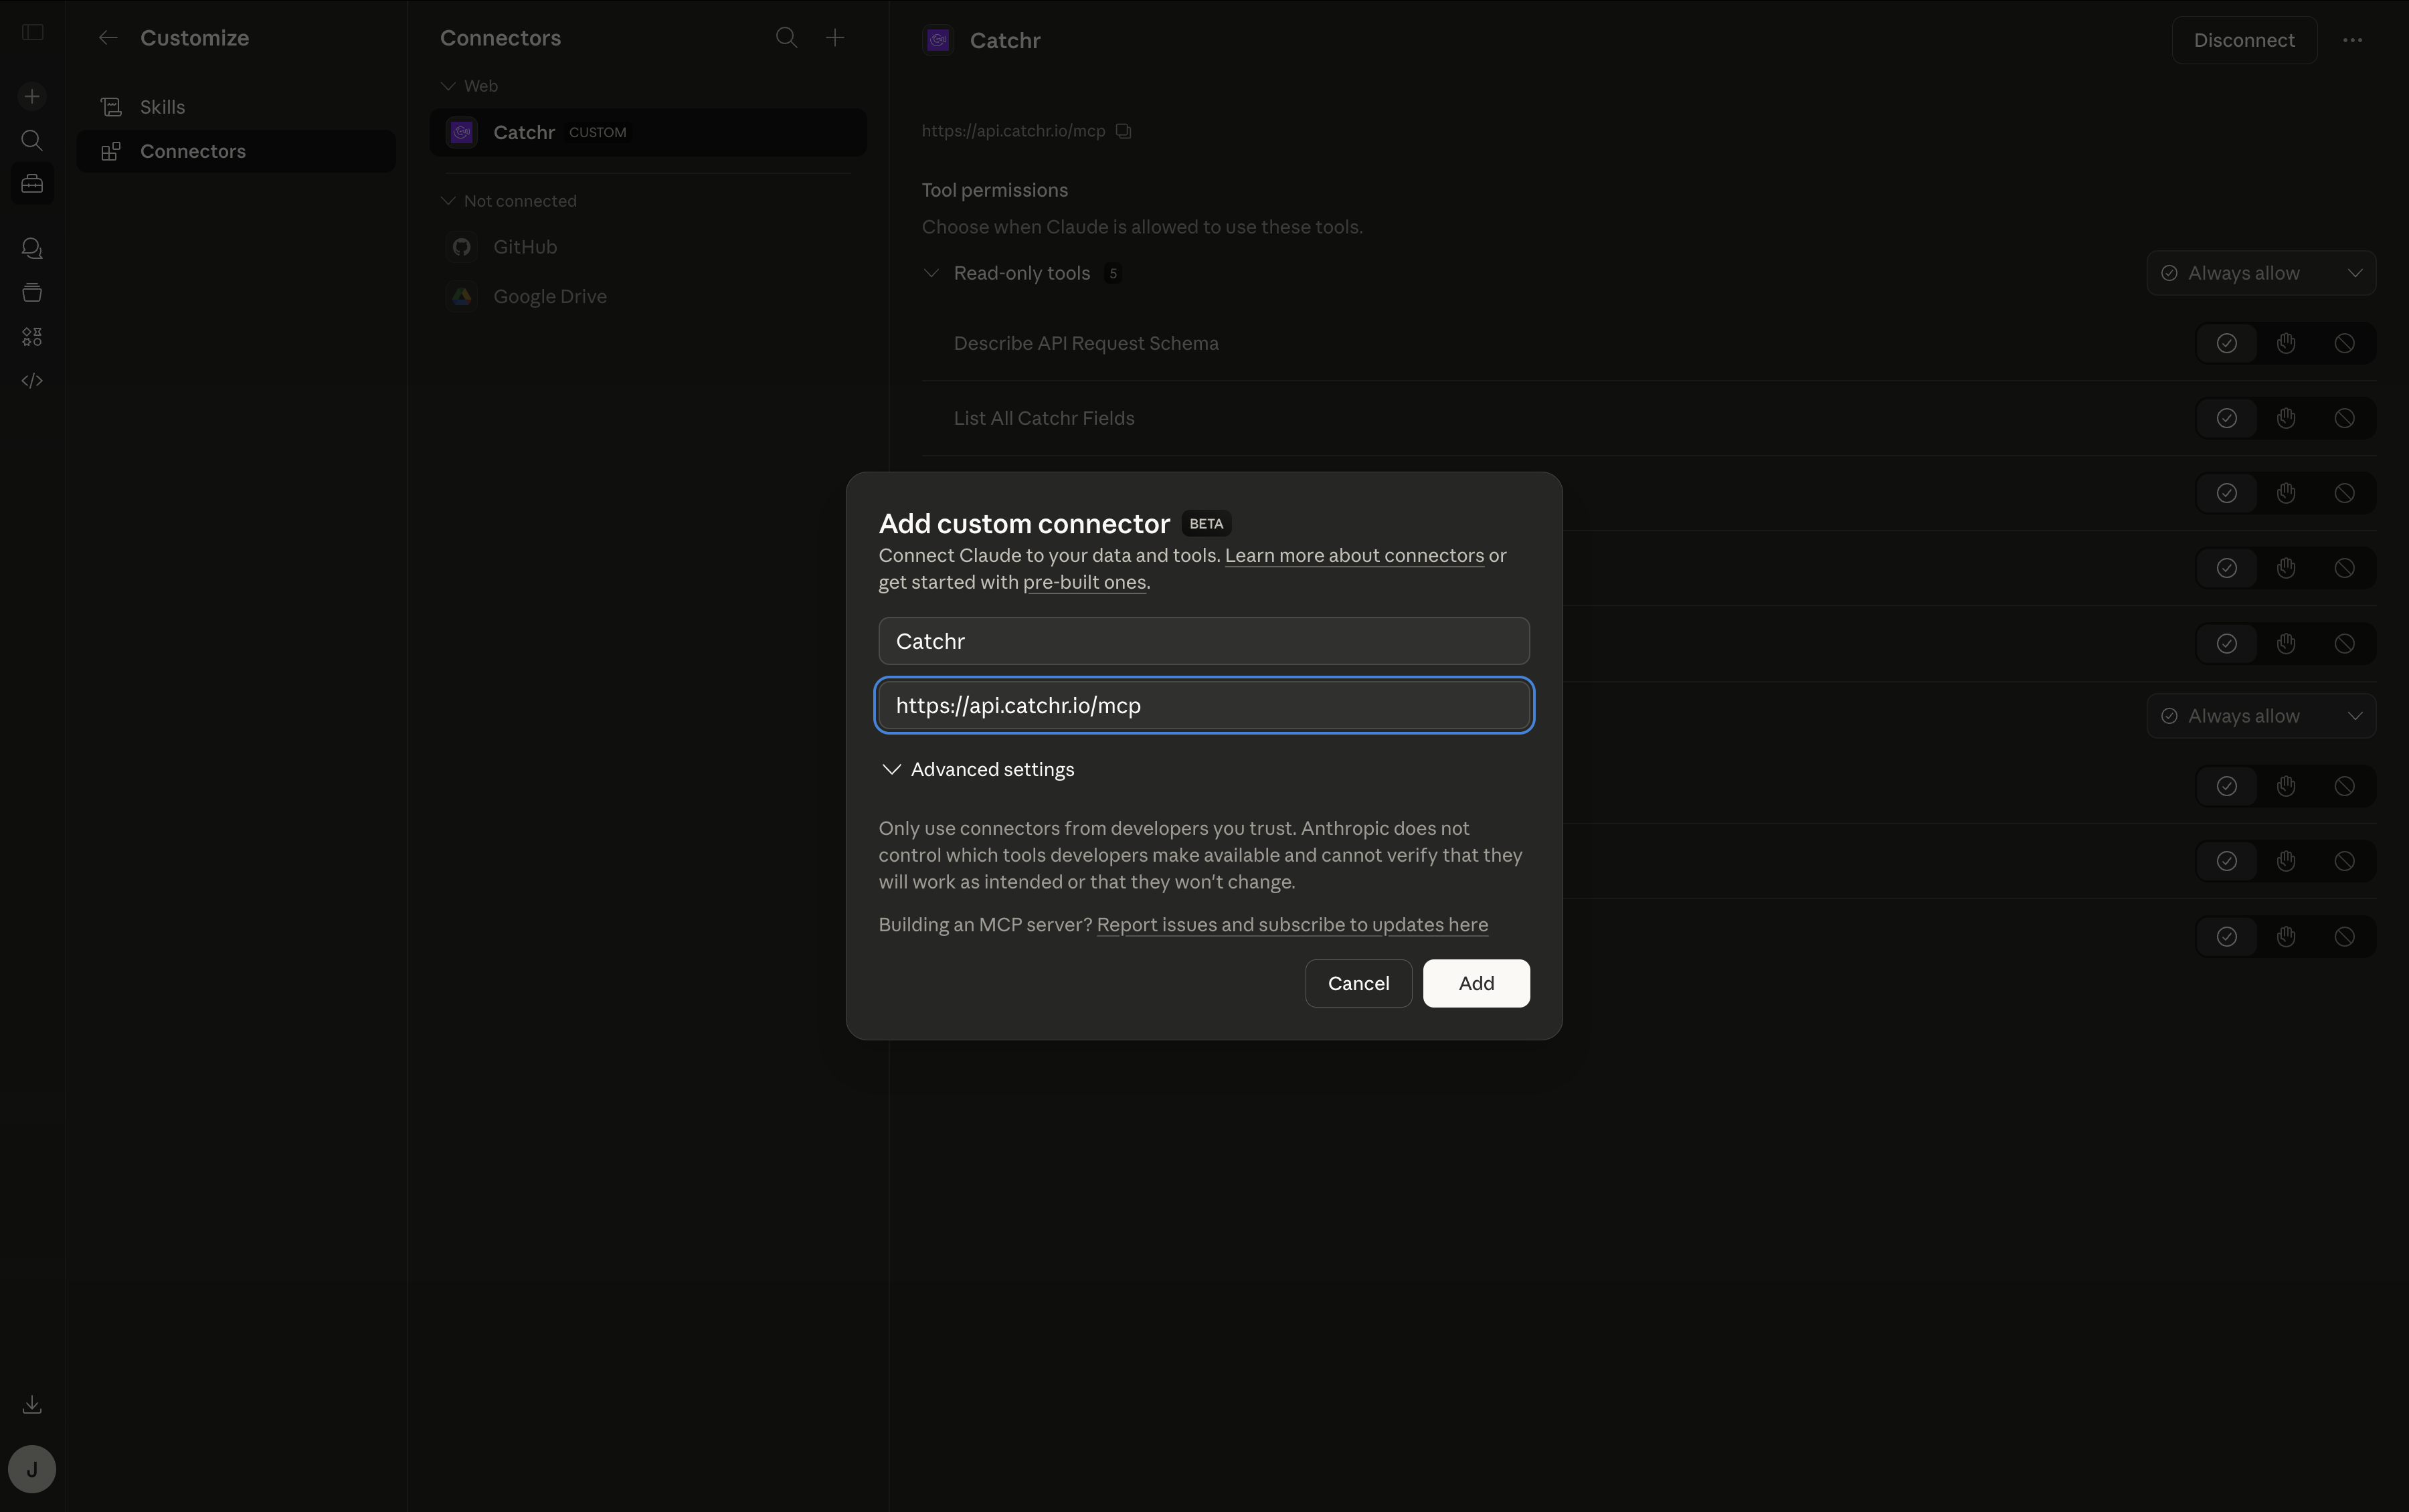
Use the following values:
- Name: Catchr is a good default name
- MCP URL: https://api.catchr.io/mcp
Finish the connector setup in Claude.
For free accounts, use the Claude desktop app.
In the Claude desktop app, go to Settings, then Developer, then click Edit Settings.
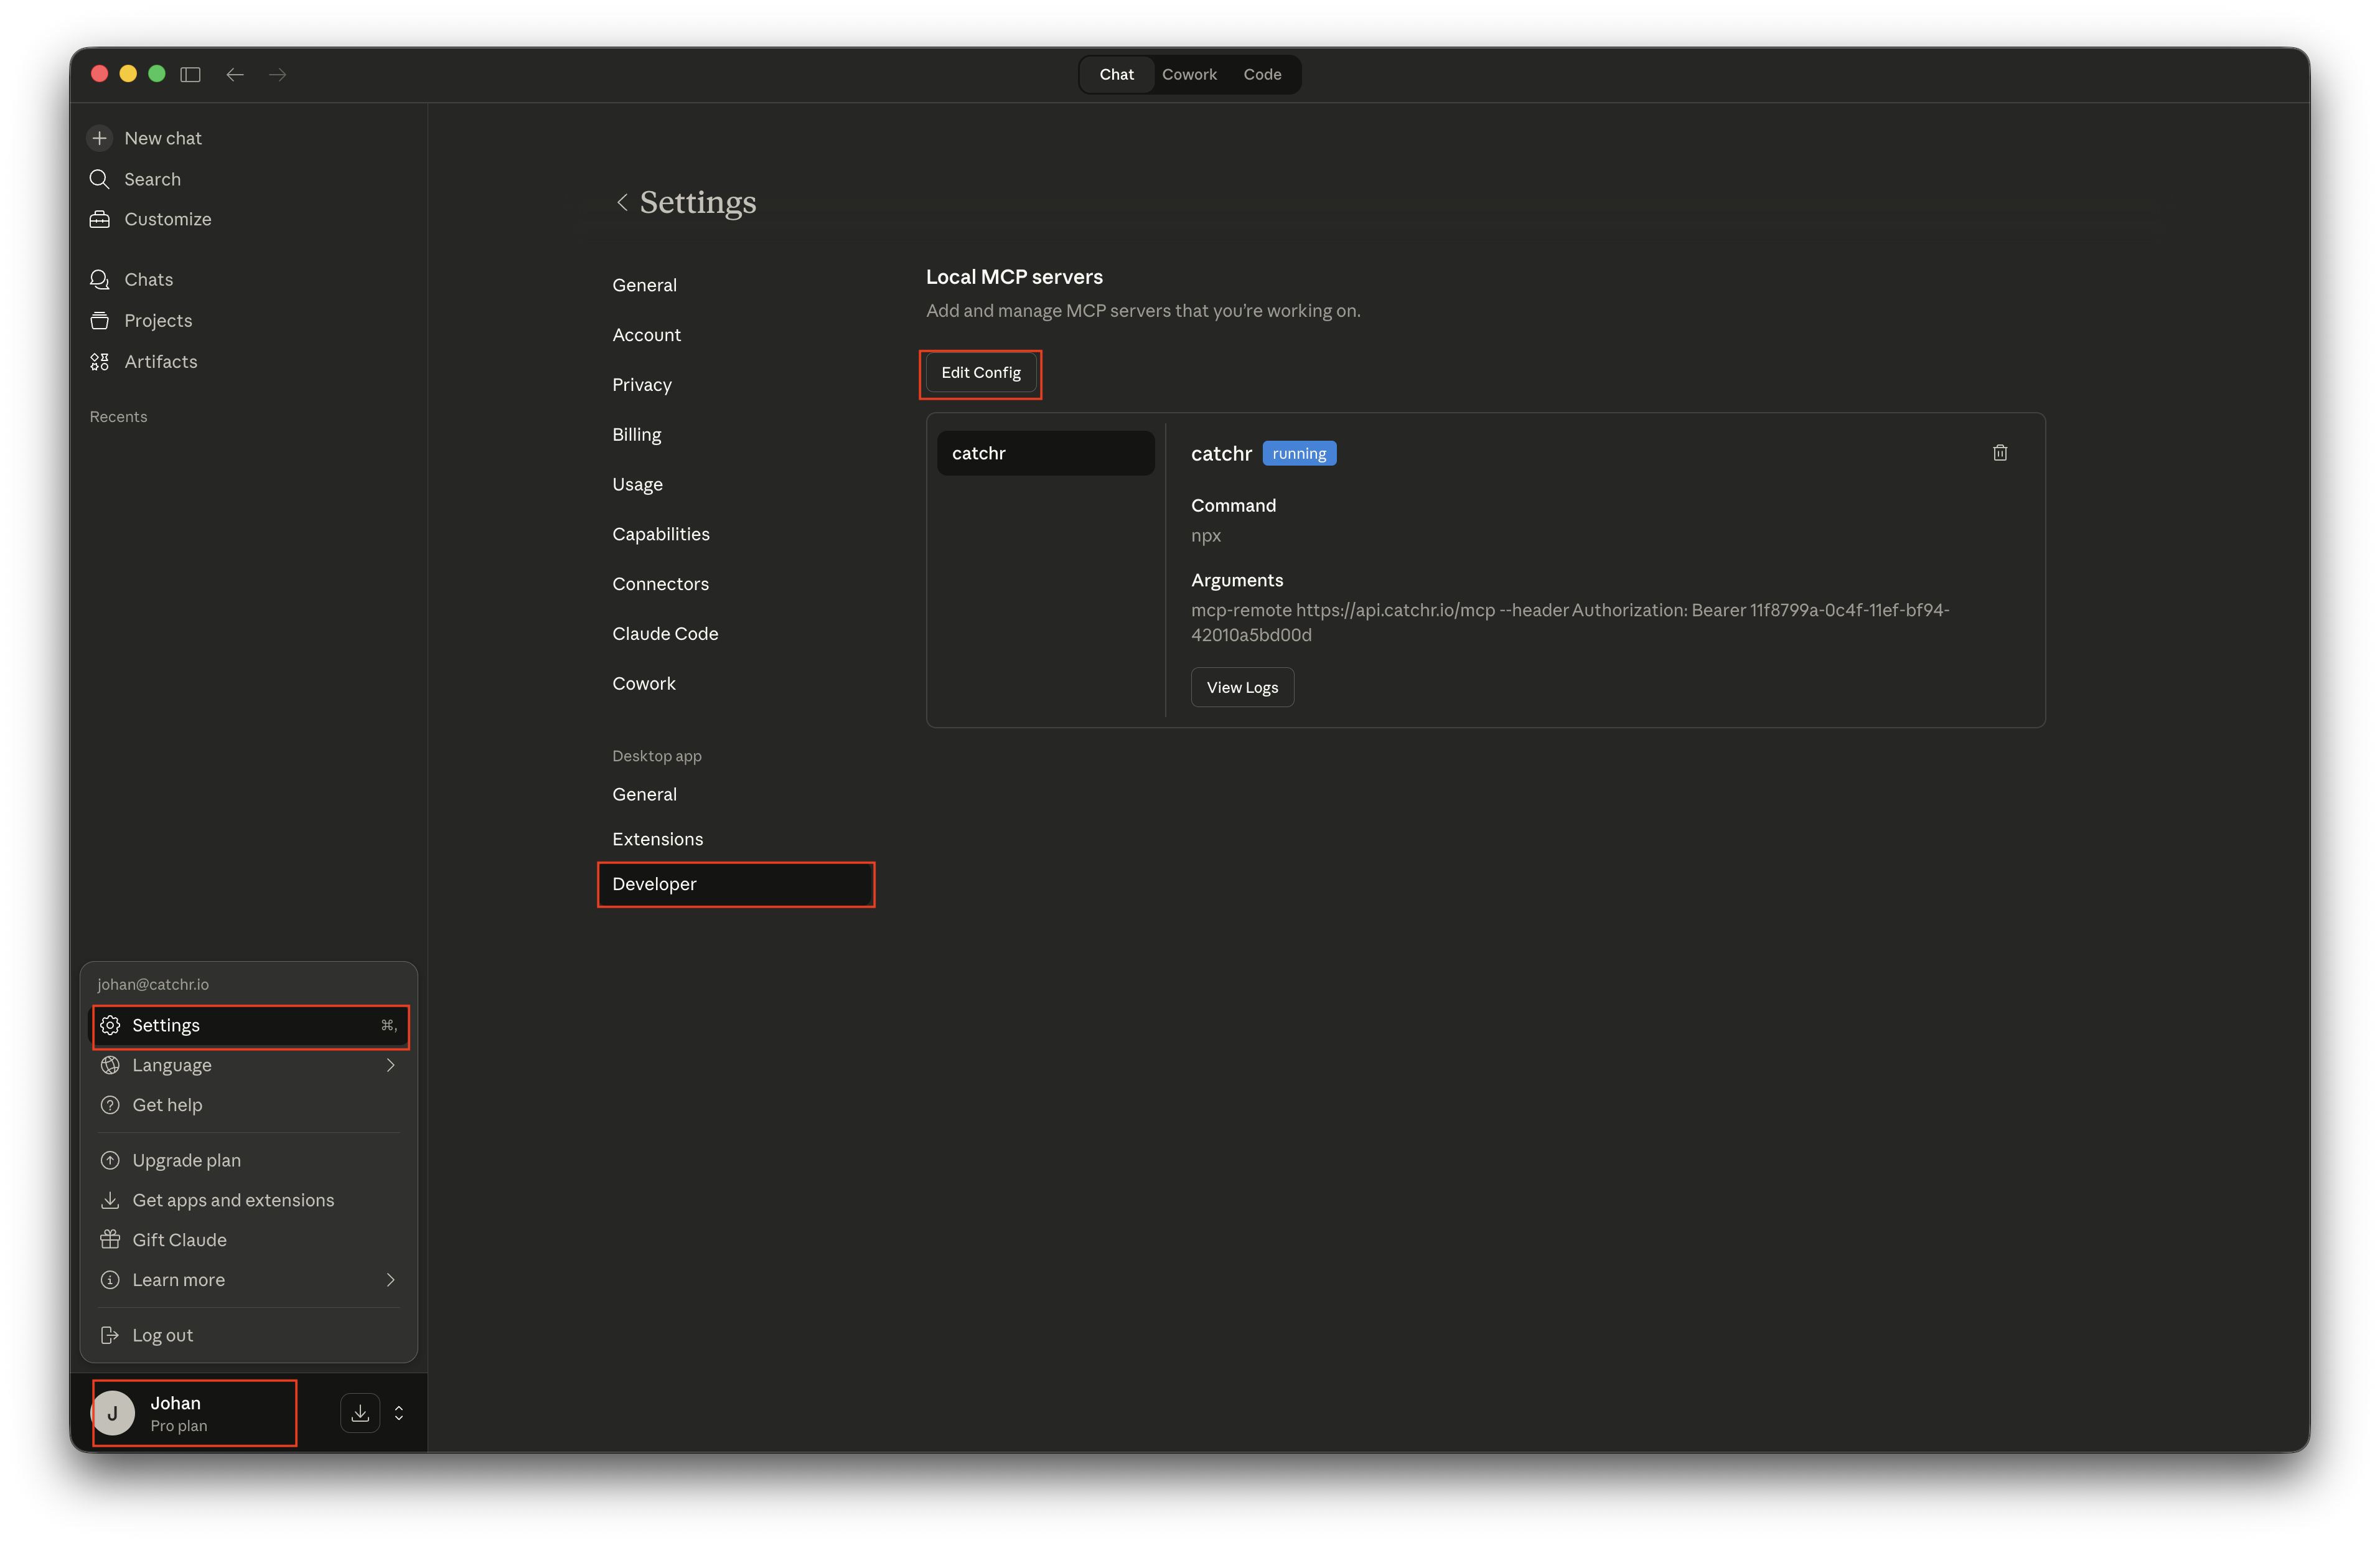
This opens the folder that contains the claude_desktop_config.json file.
Open claude_desktop_config.json with a text editor such as TextEdit.
Add the following block under mcpServers:
"mcpServers": {

  "catchr": {

    "command": "npx",

    "args": [

      "mcp-remote",

      "https://api.catchr.io/mcp",

      "--header",

      "Authorization: Bearer <YOUR_CATCHR_API_KEY>"

    ]

  }

}If the file has not been modified yet, it may look like this after adding Catchr:
{

  "mcpServers": {

    "catchr": {

      "command": "npx",

      "args": [

        "mcp-remote",

        "https://api.catchr.io/mcp",

        "--header",

        "Authorization: Bearer <YOUR_CATCHR_API_KEY>"

      ]

    }

  },

  "preferences": {

    "coworkScheduledTasksEnabled": true,

    "ccdScheduledTasksEnabled": true,

    "sidebarMode": "chat",

    "coworkWebSearchEnabled": true

  }

}
Replace <YOUR_CATCHR_API_KEY> with your own Catchr API KEY. You can find it on https://app.catchr.io/settings/api
- Use the subscription account flow if Claude supports custom connectors in your plan.
- Use the free account flow only with the Claude desktop app.
- Keep the MCP URL set to https://api.catchr.io/mcp.
- Never share your real bearer token in documentation or screenshots.
Once Catchr is installed in Claude, you can start using prompt libraries and usage examples with your connected Catchr data.

