Connecting your Piwik account to Catchr allows you to centralize your web analytics data and automate your reporting workflows. Here are three simple steps to do it.
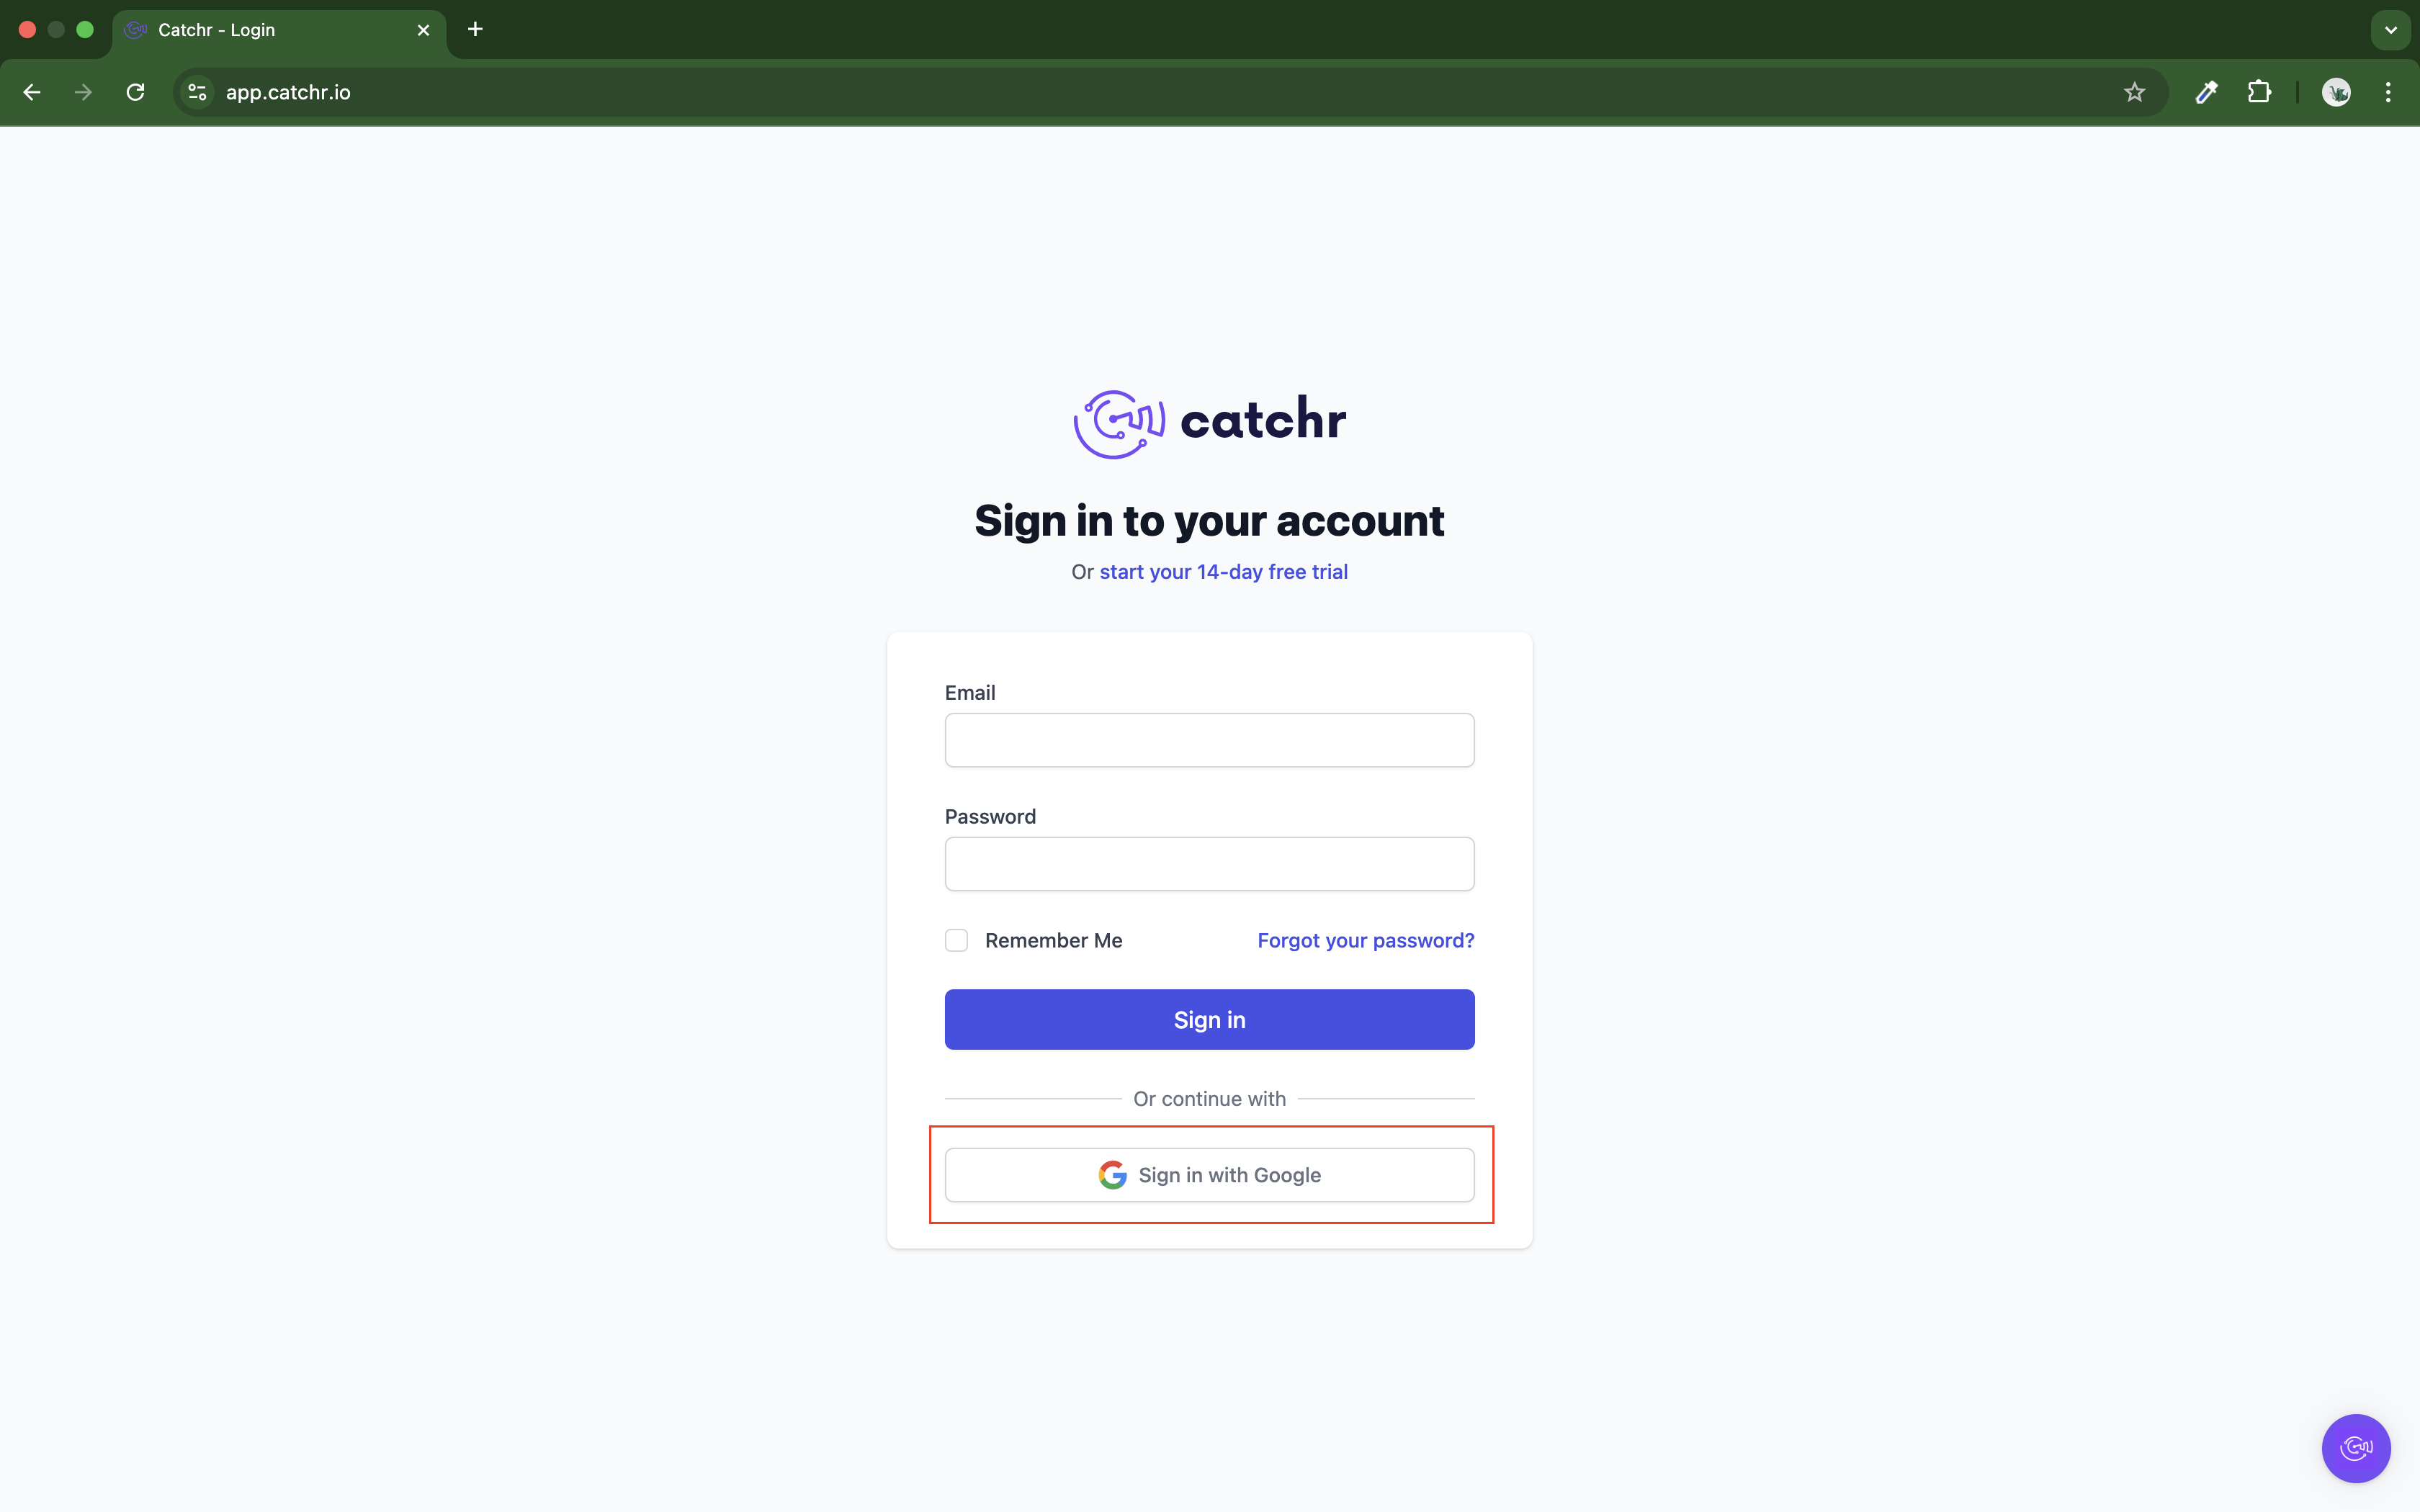
Go to app.catchr.io and log in using your Google account.
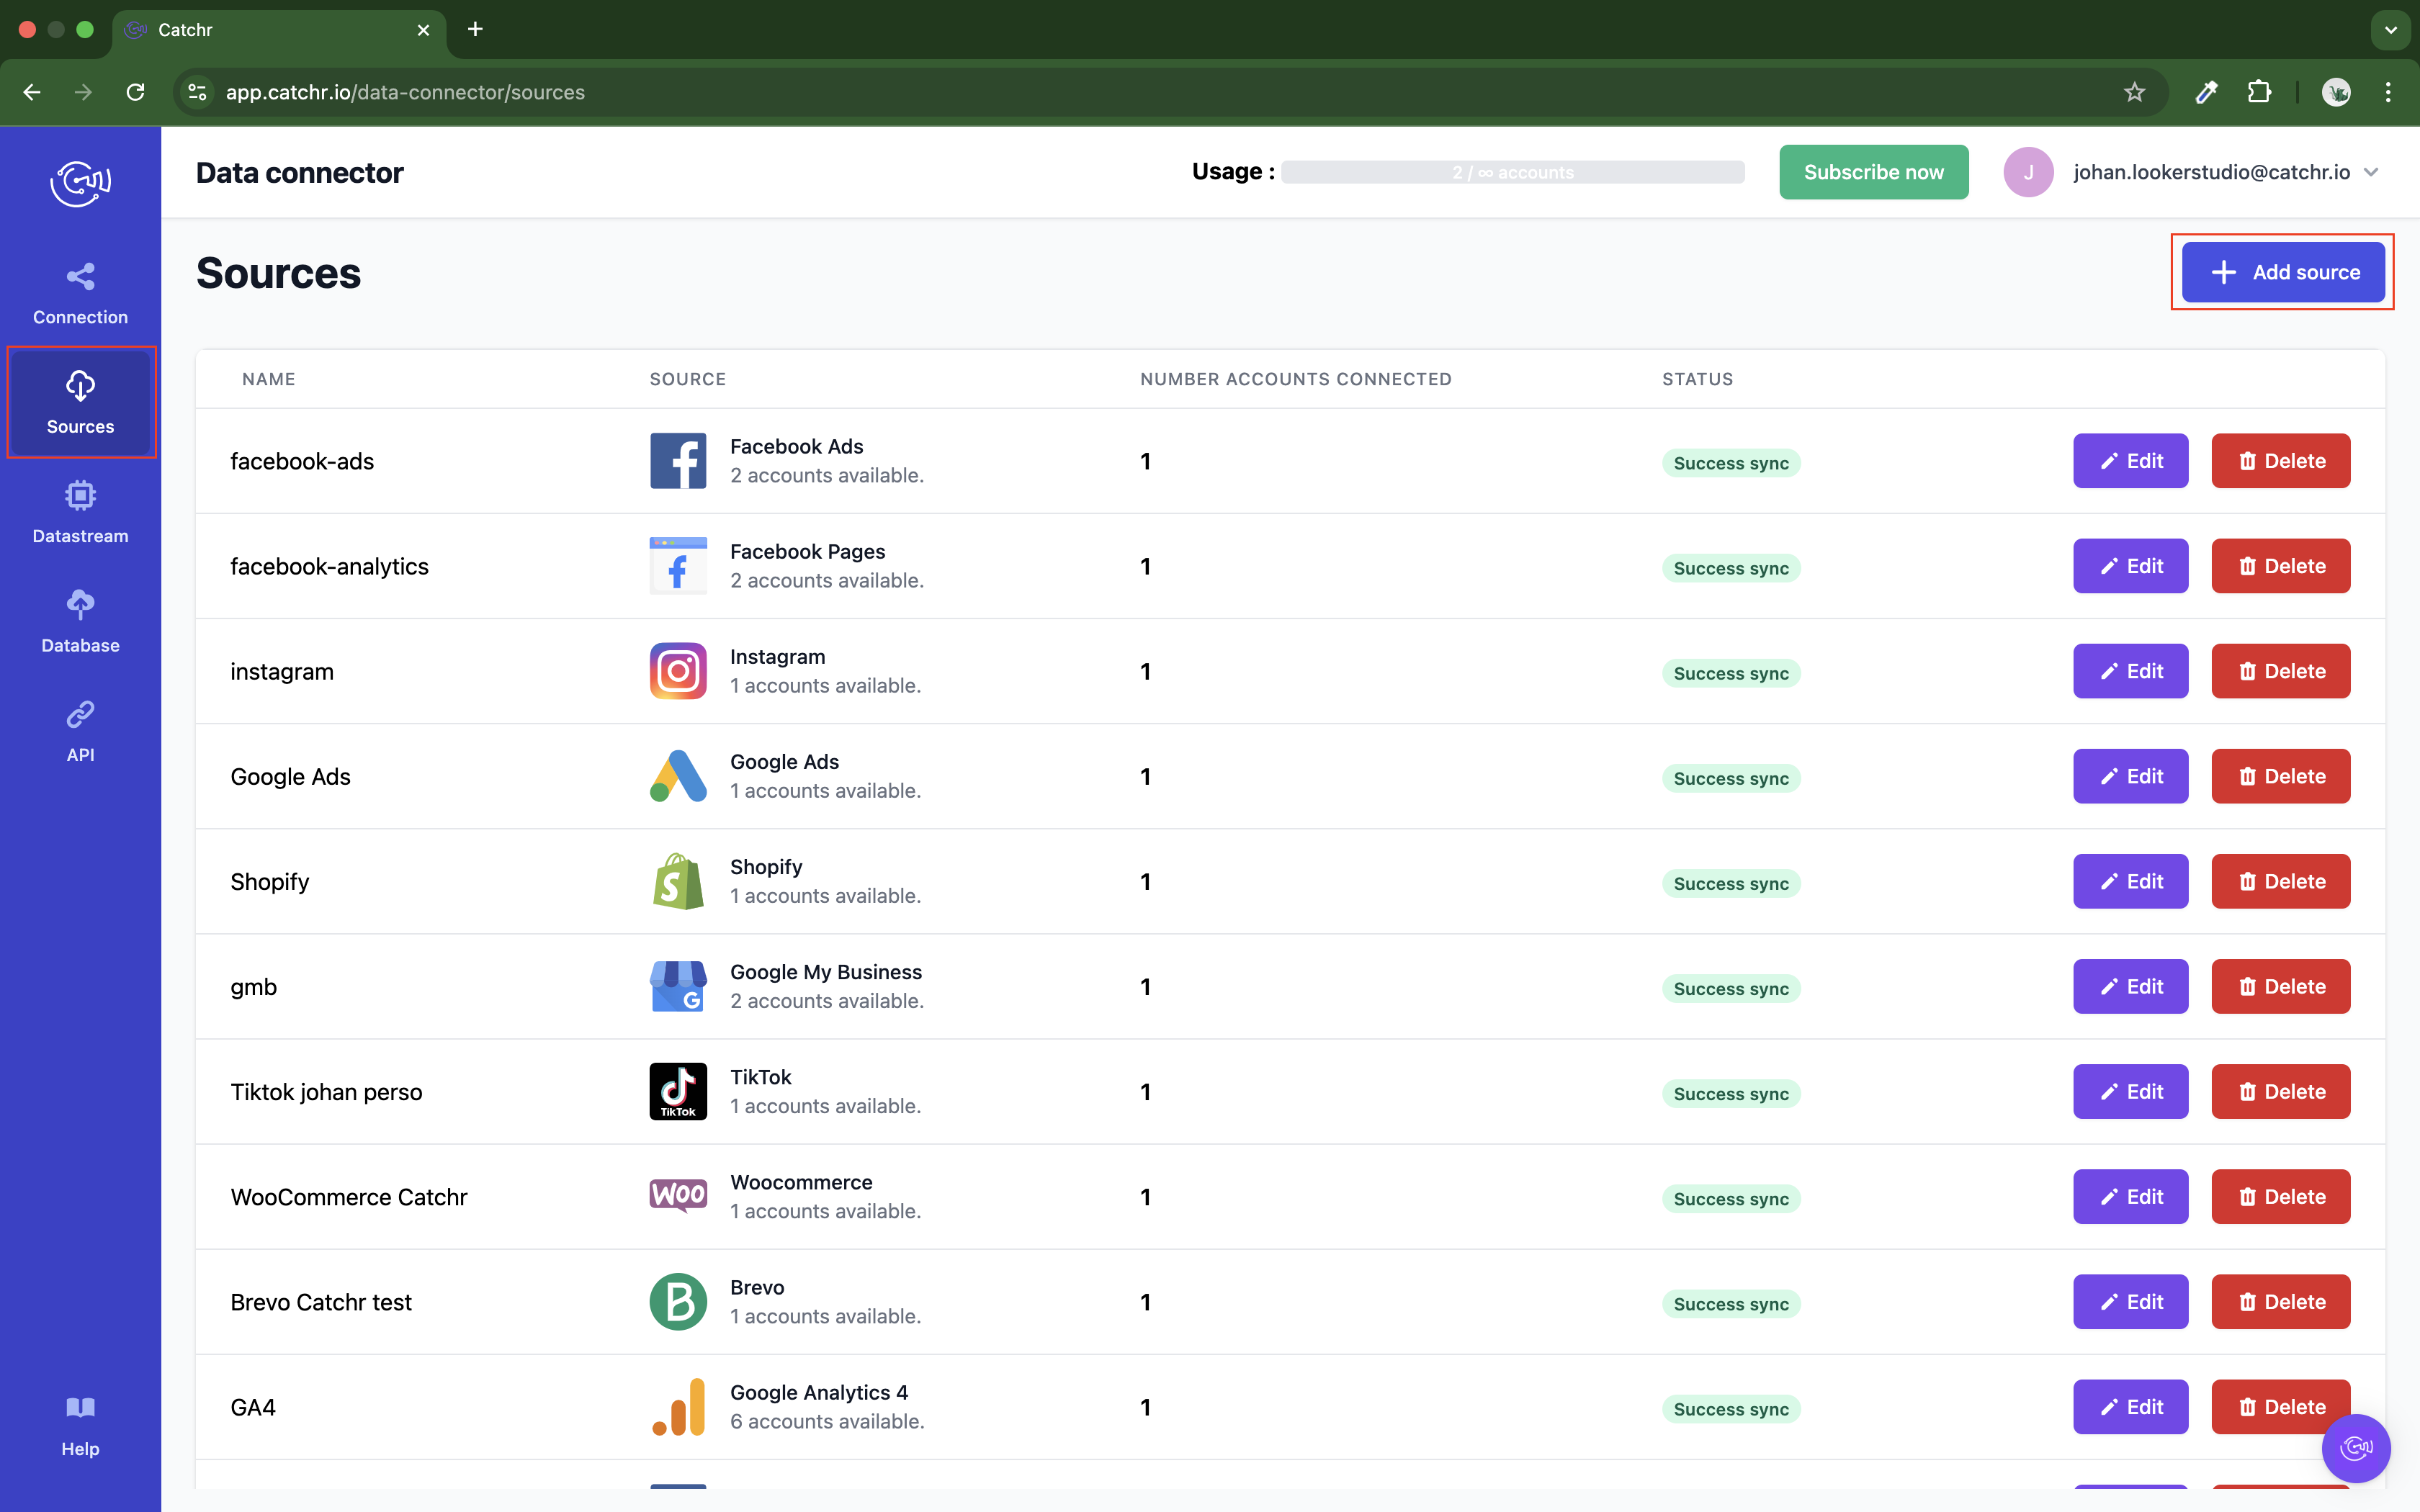
In the left-hand menu, click on Sources.
Click + Add source at the top right of the page.
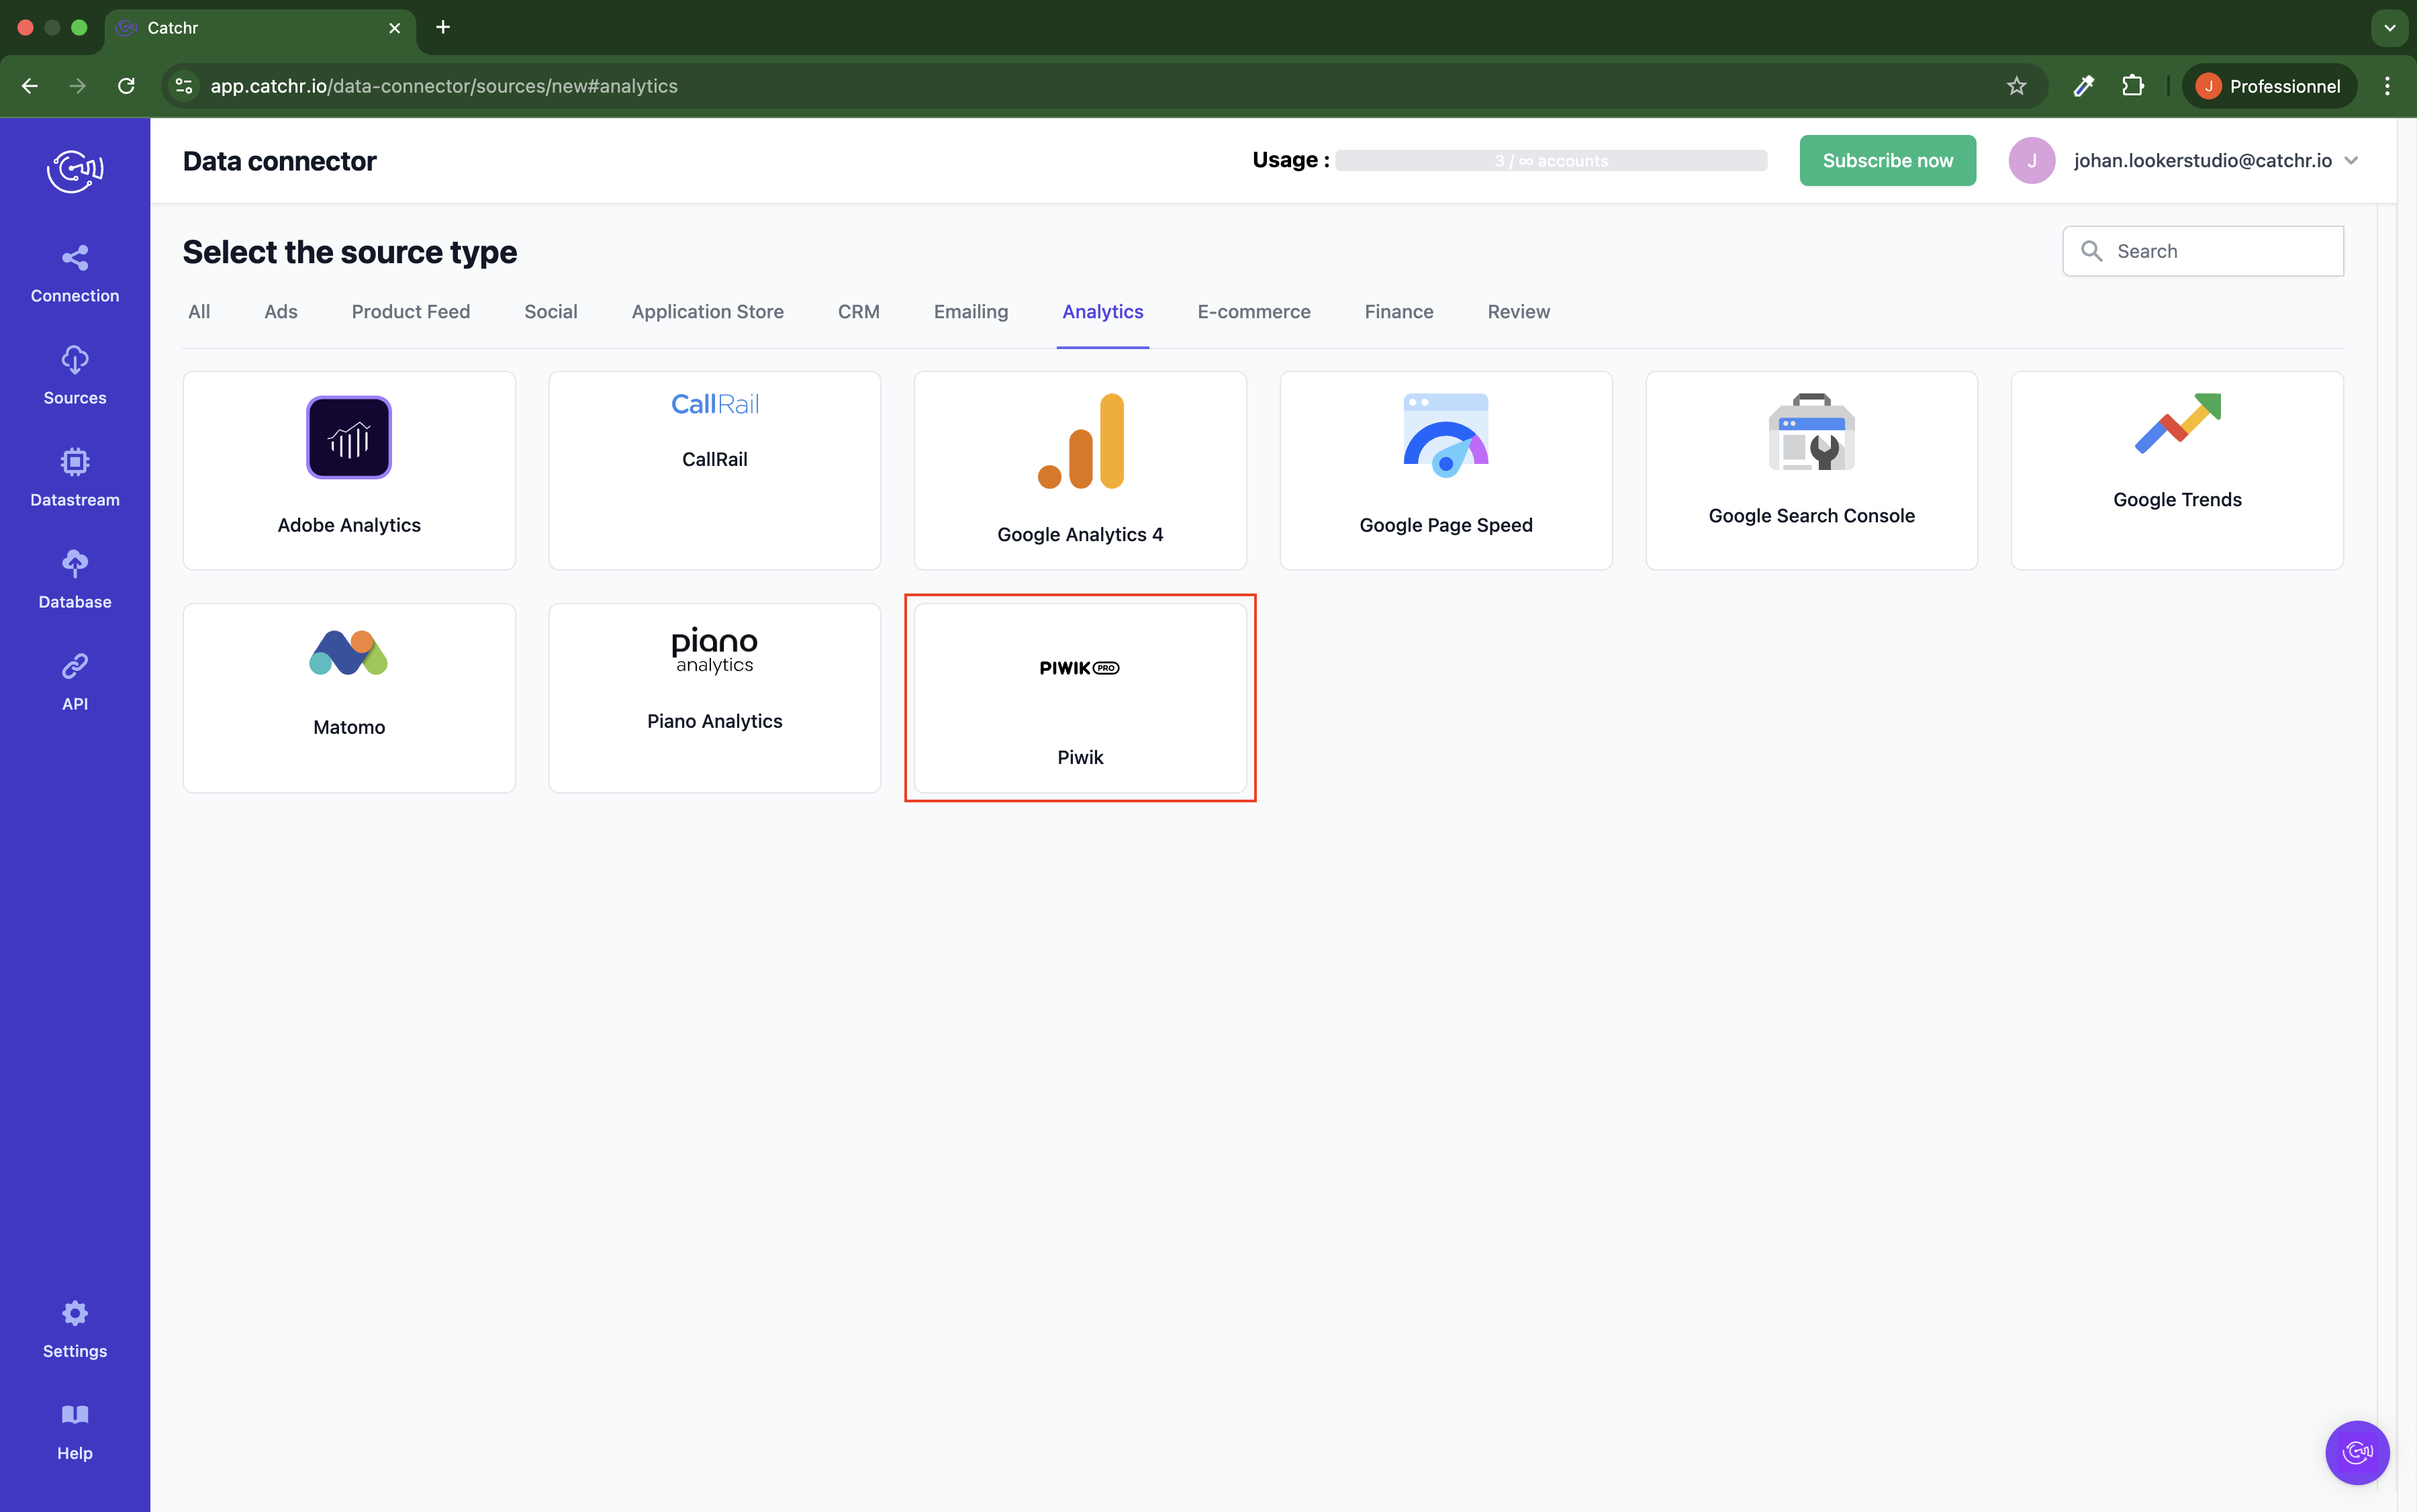
From the list of platforms, select Piwik (available in the Analytics section)
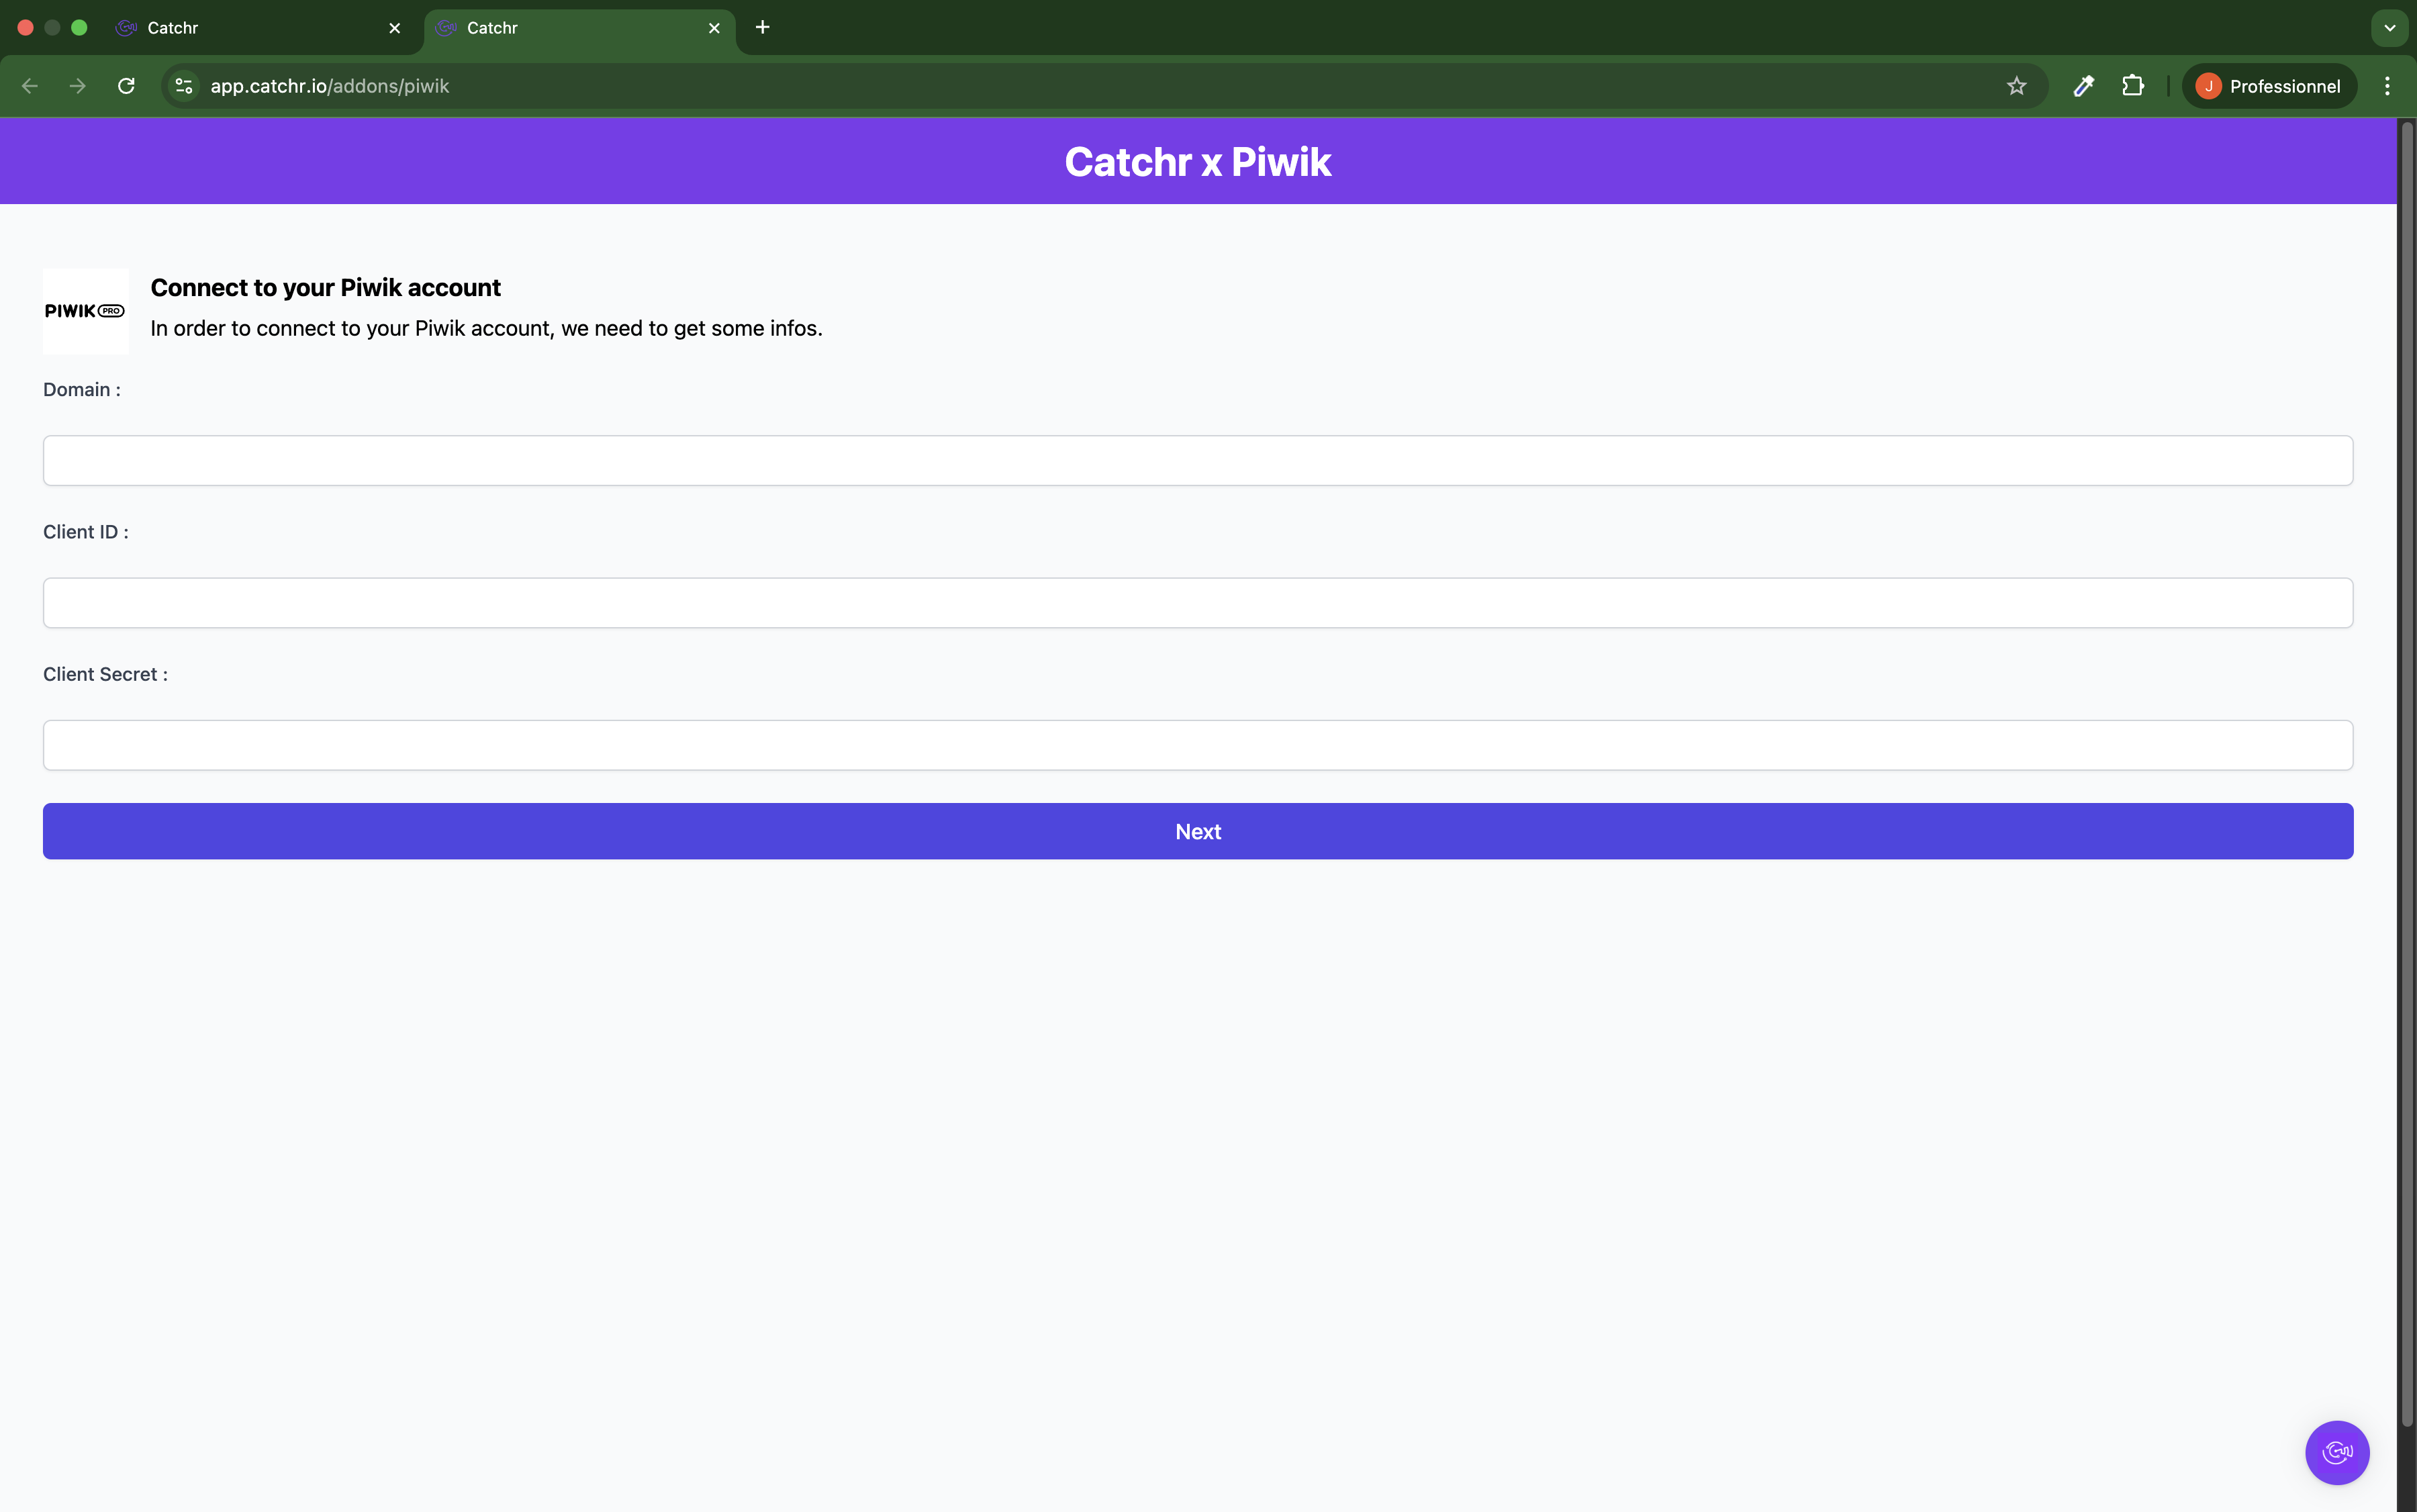
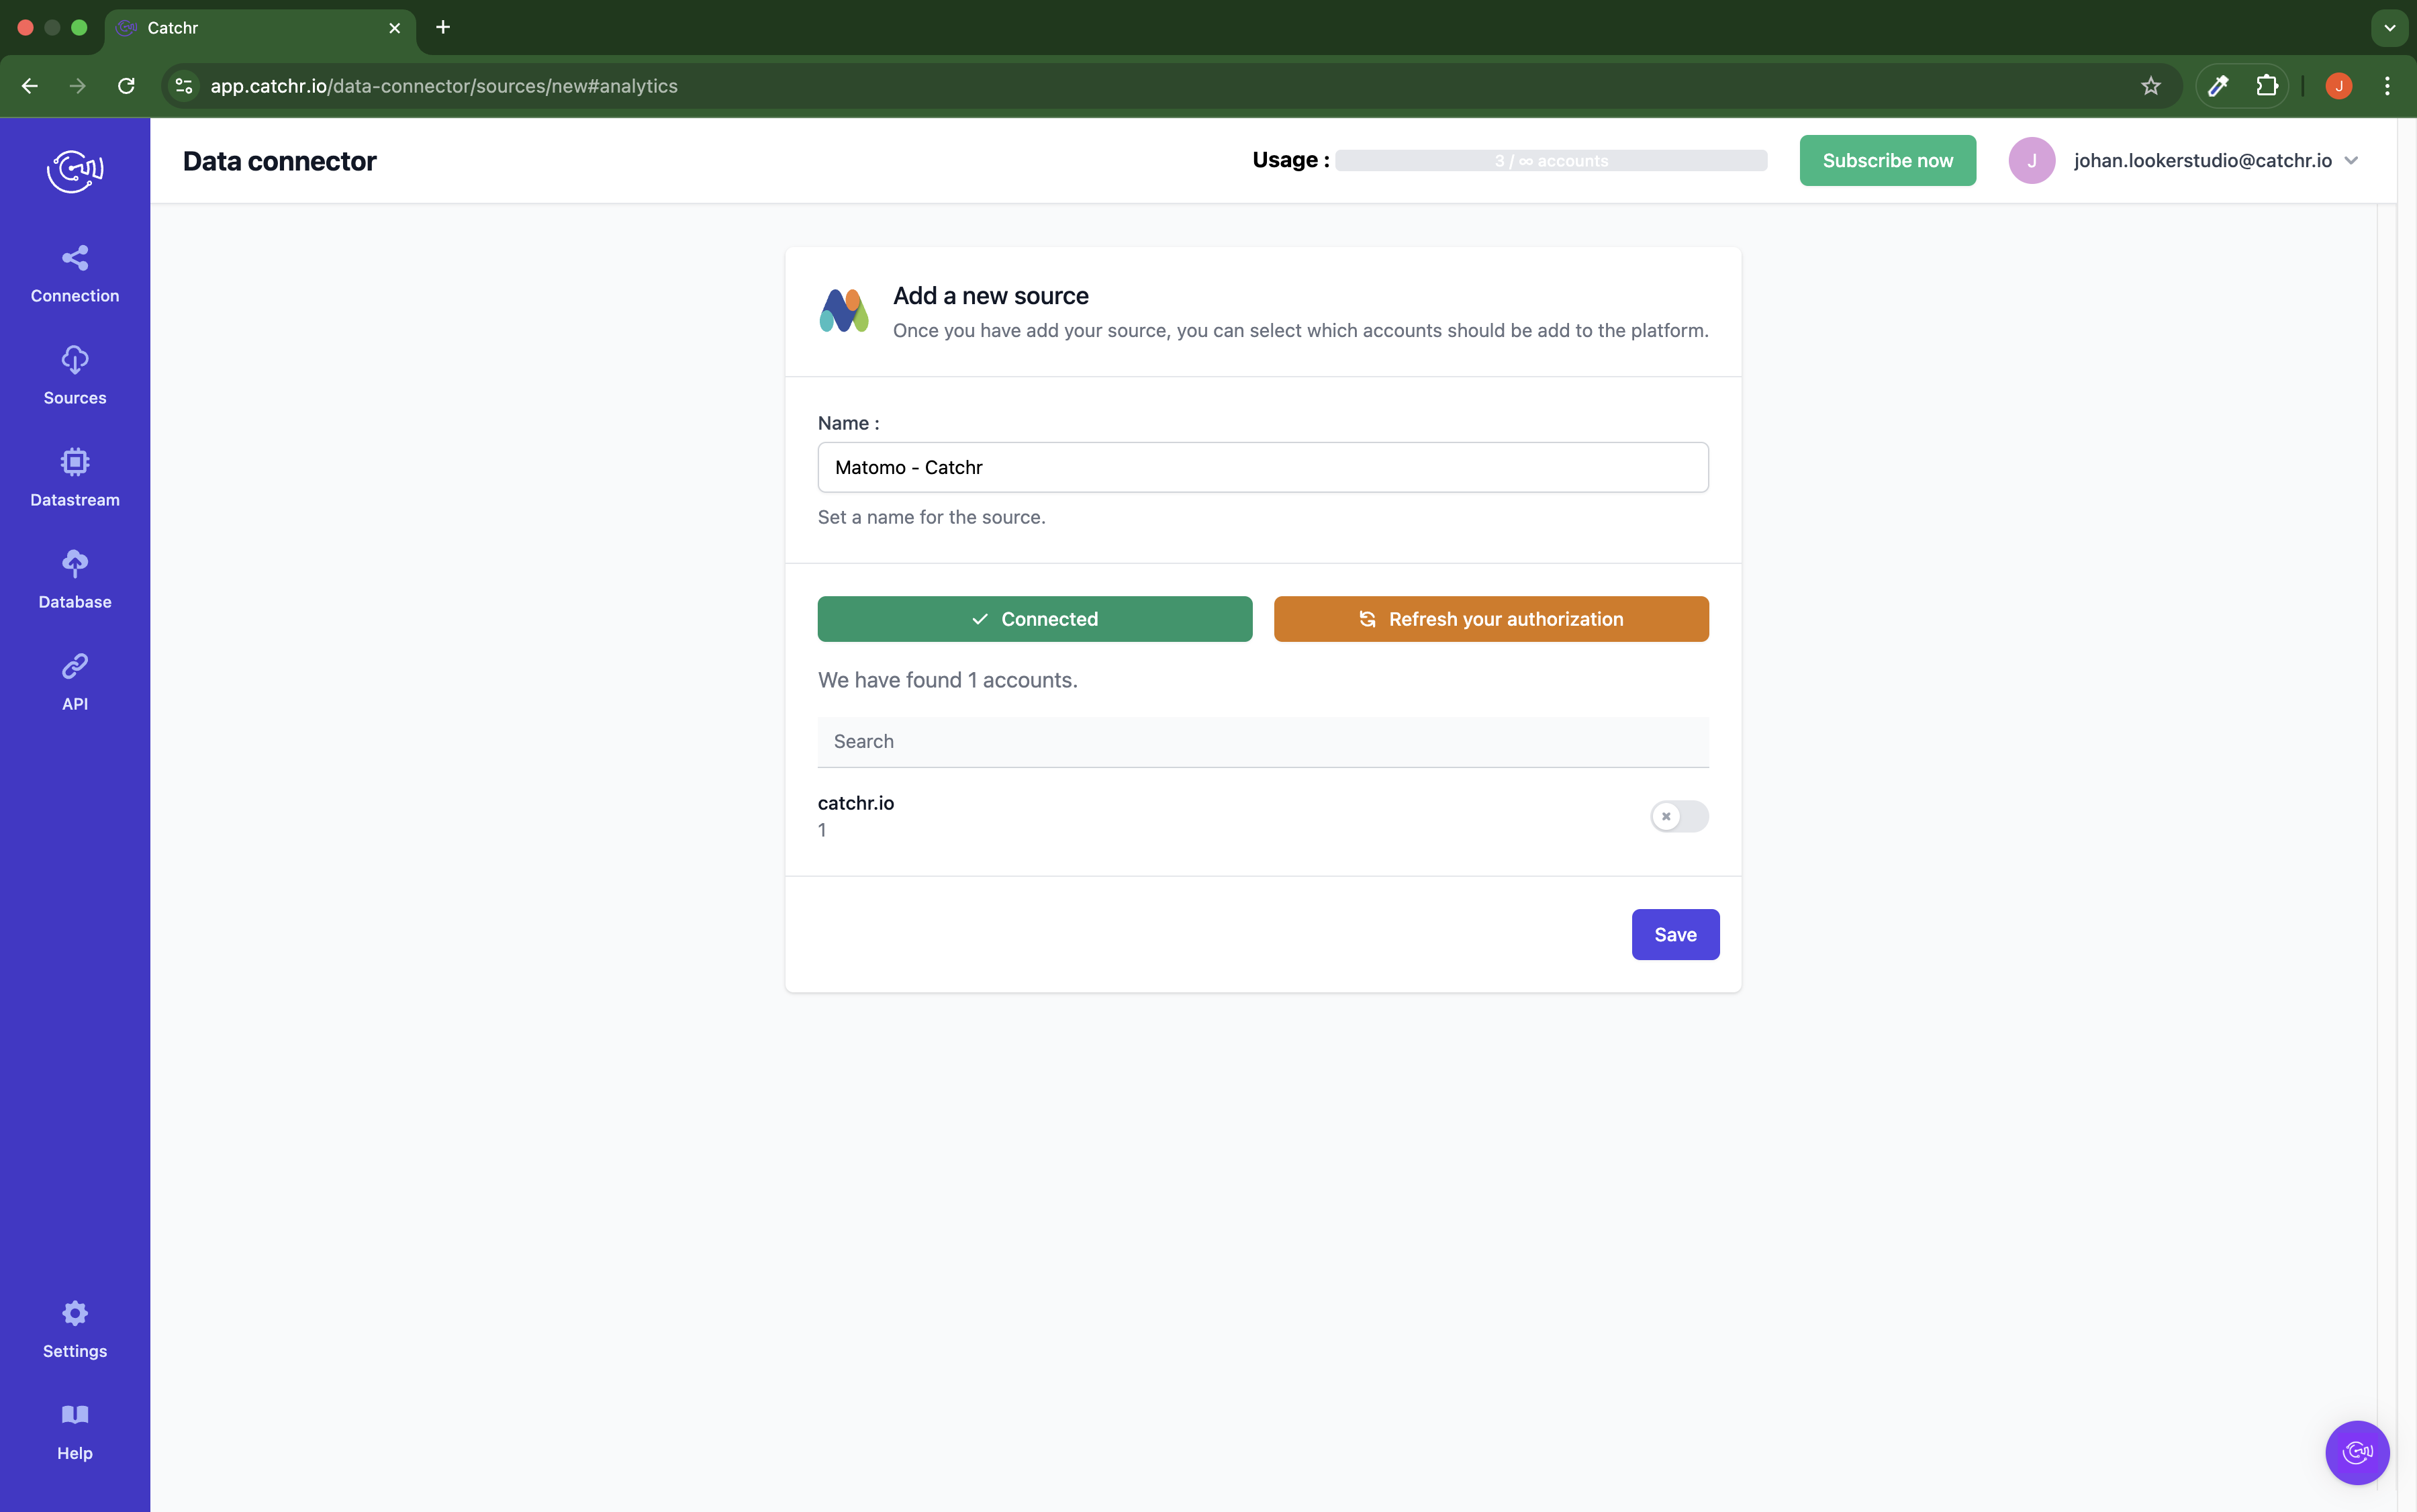
Name your Source on Catchr and click Connect your account (the name is visible in the Source list on Catchr). We advise naming it Piwik - [Catchr username].

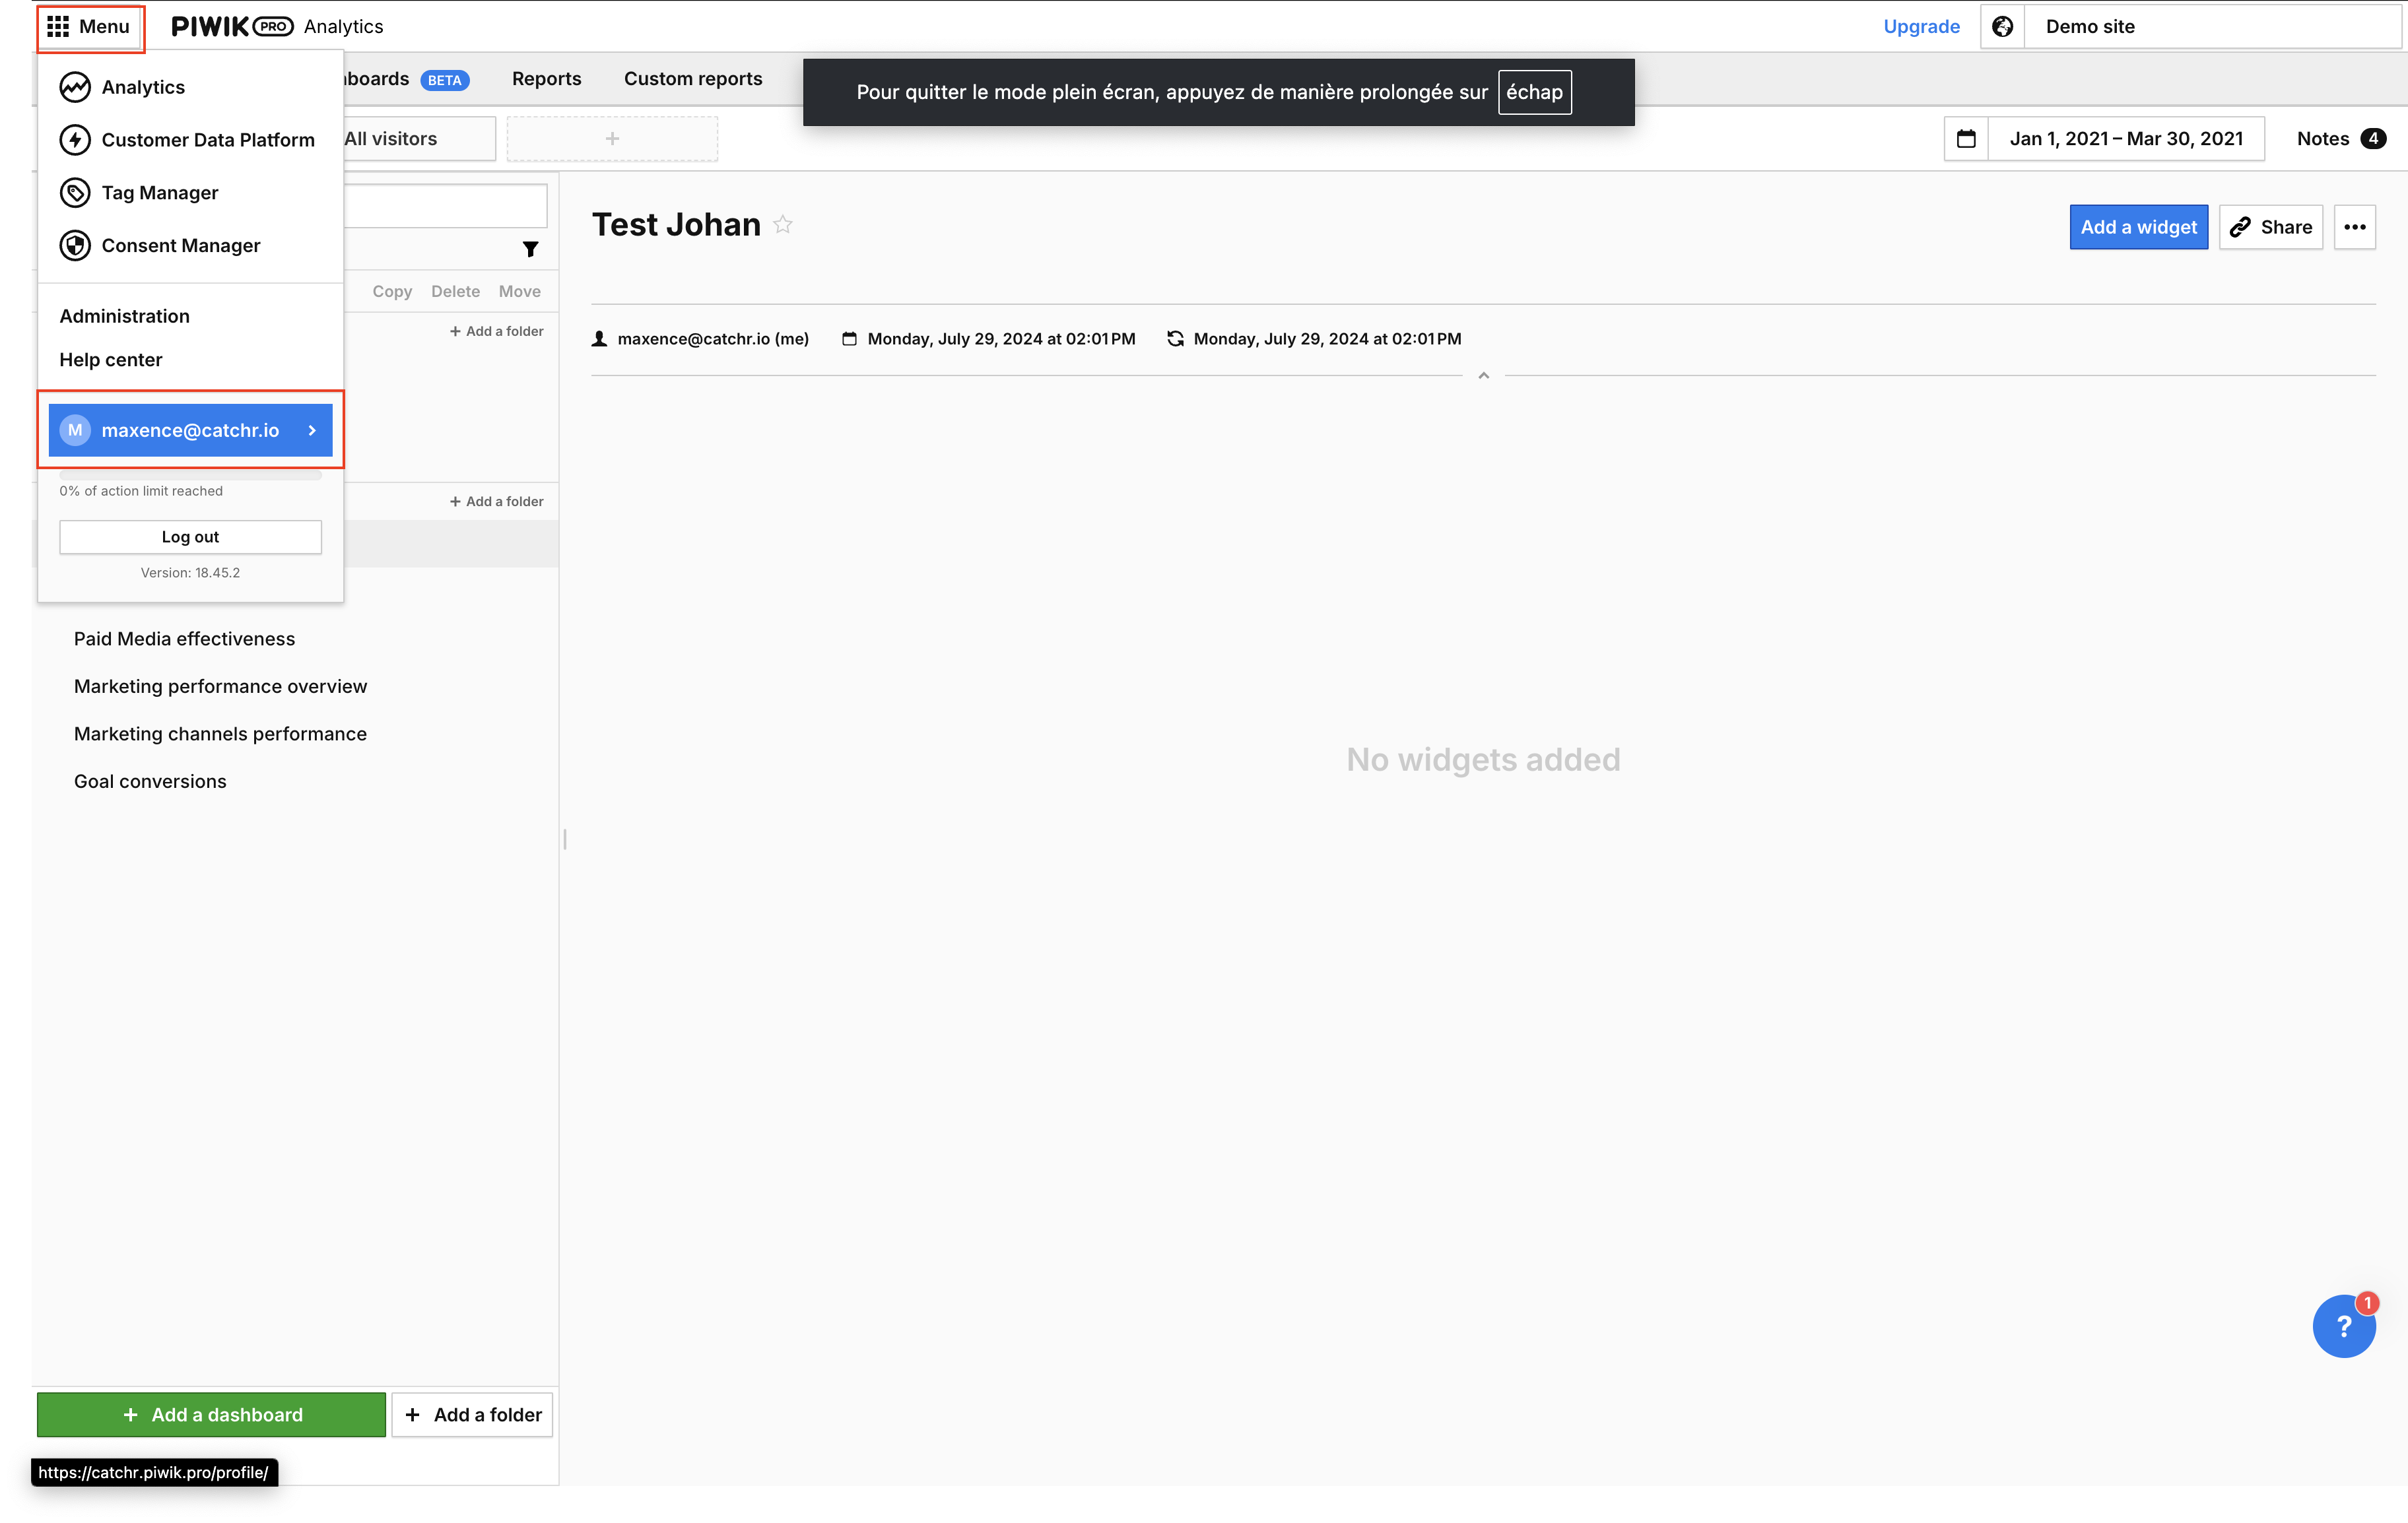
Log in to your Piwik PRO dashboard.
Your account name is the first part of the URL you see in your browser's address bar.
For example, if your URL is catchr.piwik.pro, then your account name is catchr.
Log in to your Piwik PRO dashboard.
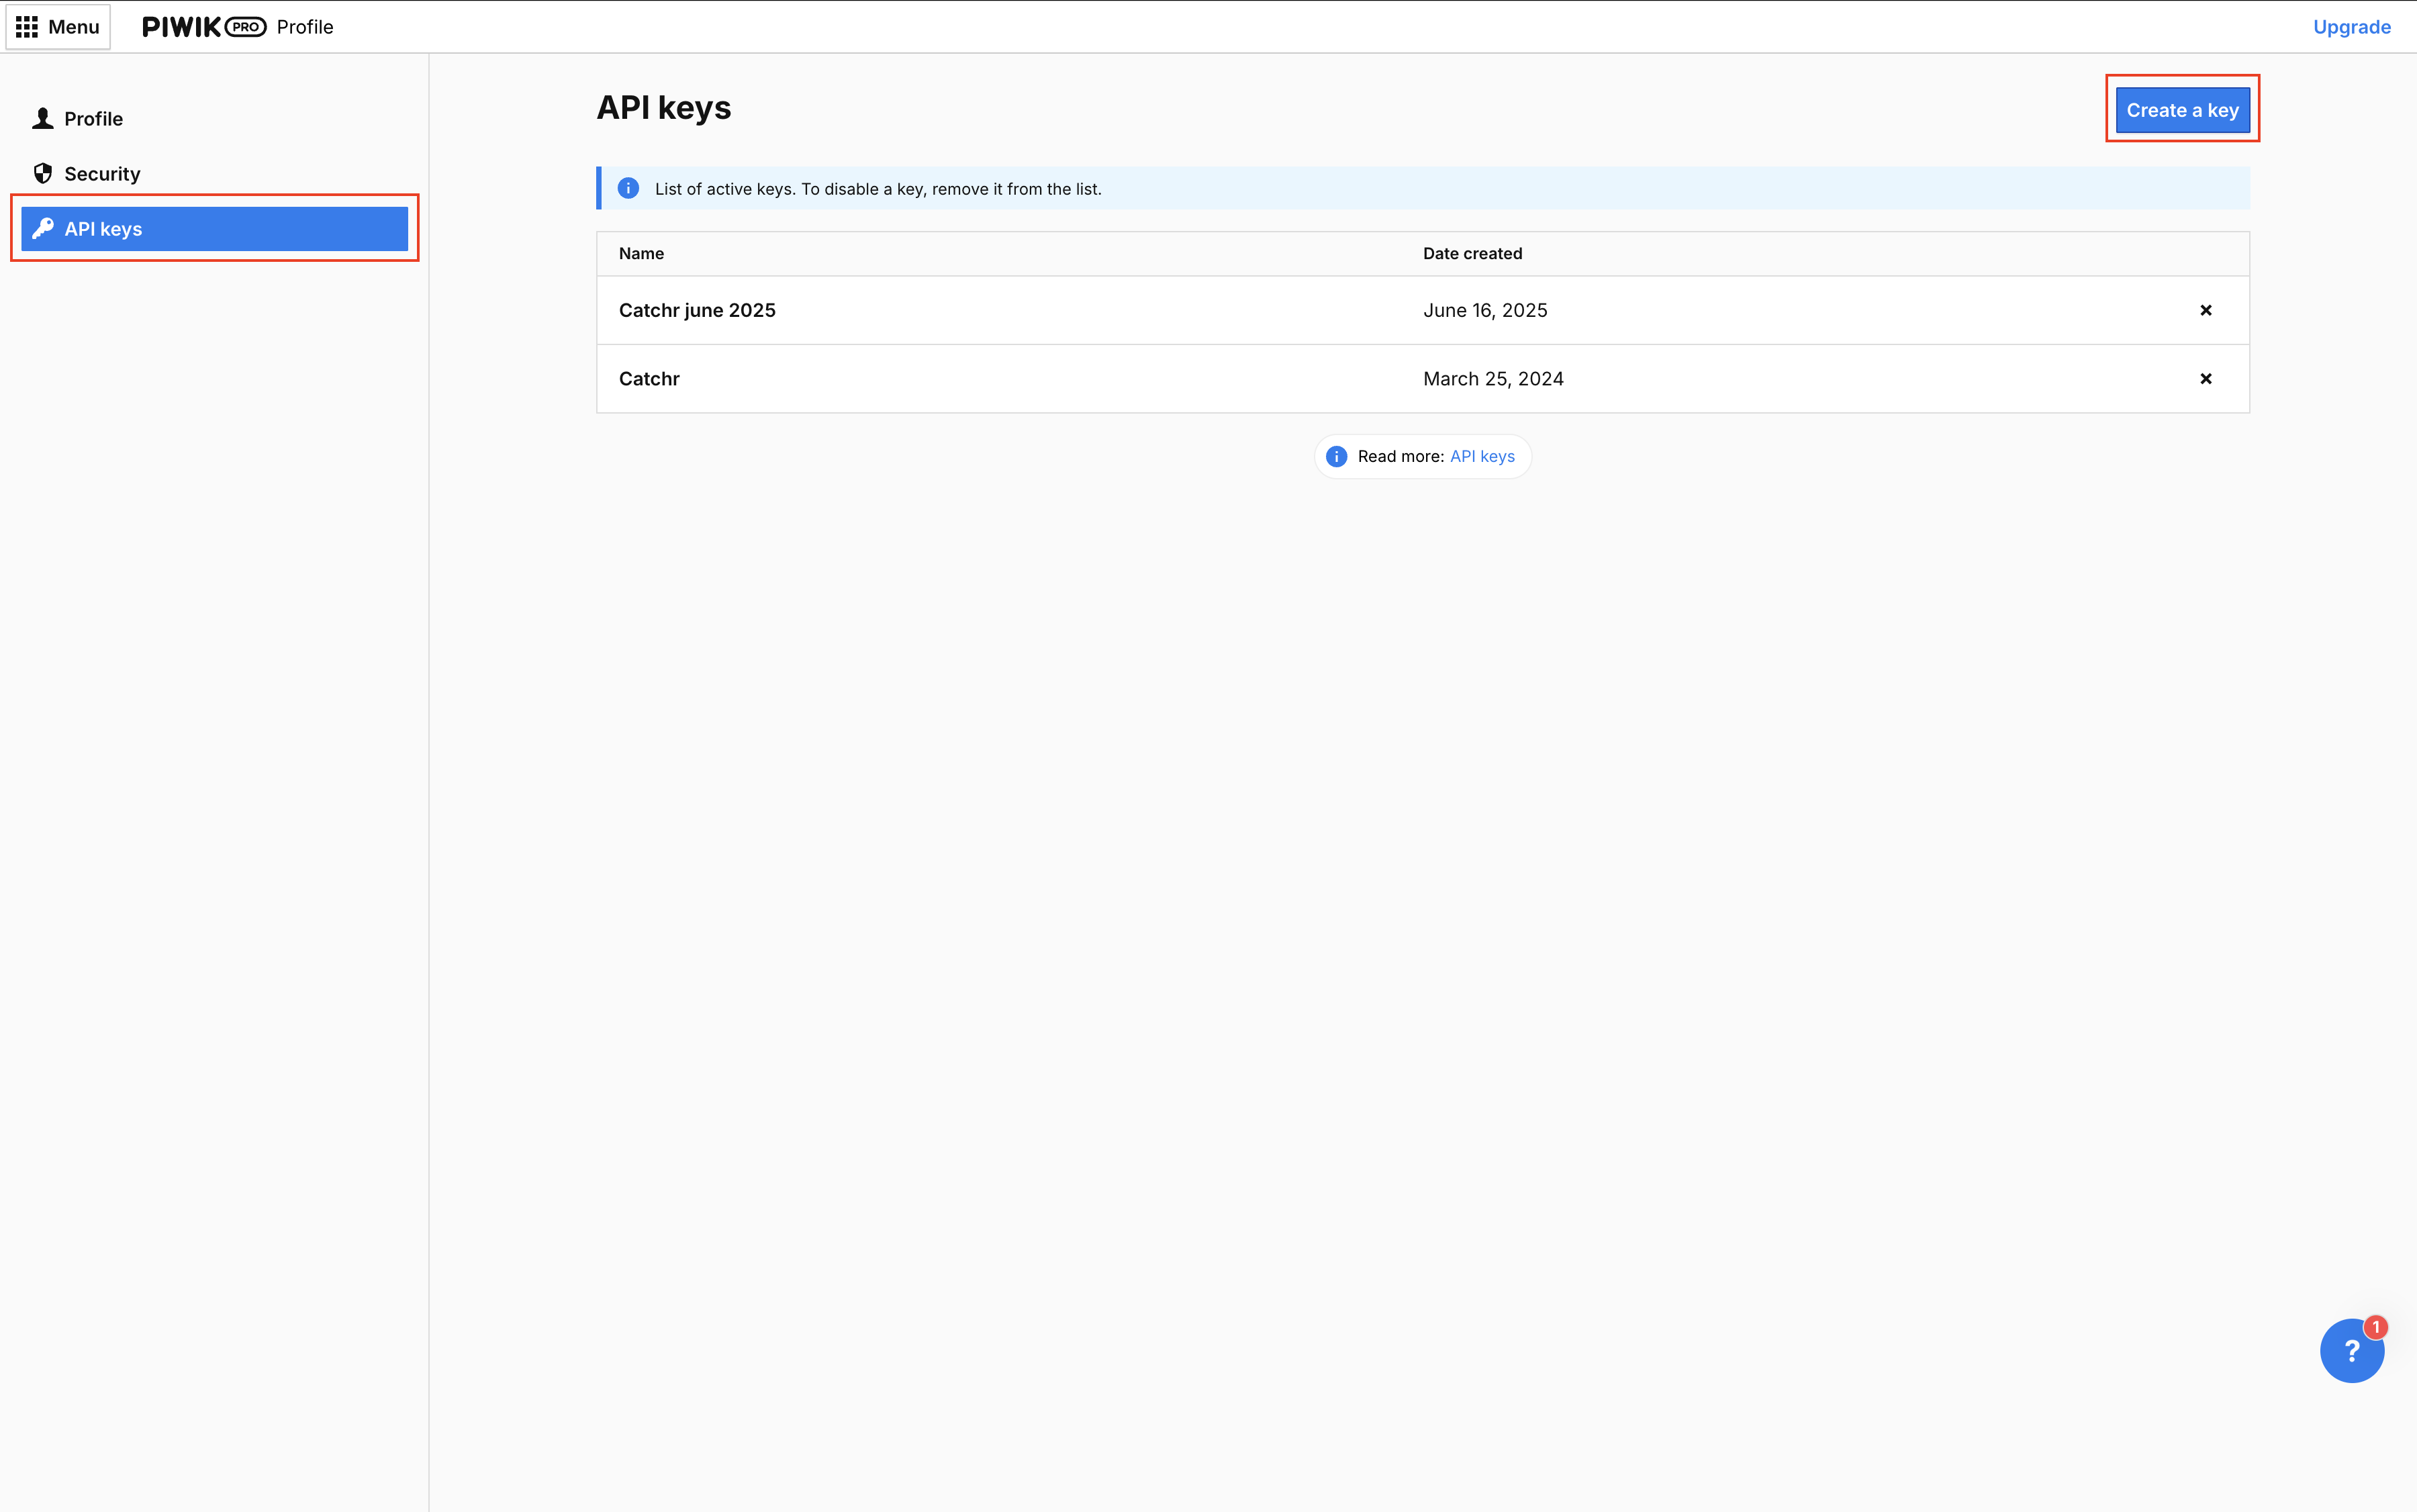
Click Menu in the top left and select Profile from the dropdown.
Select the API Keys tab on the left and click Create key.
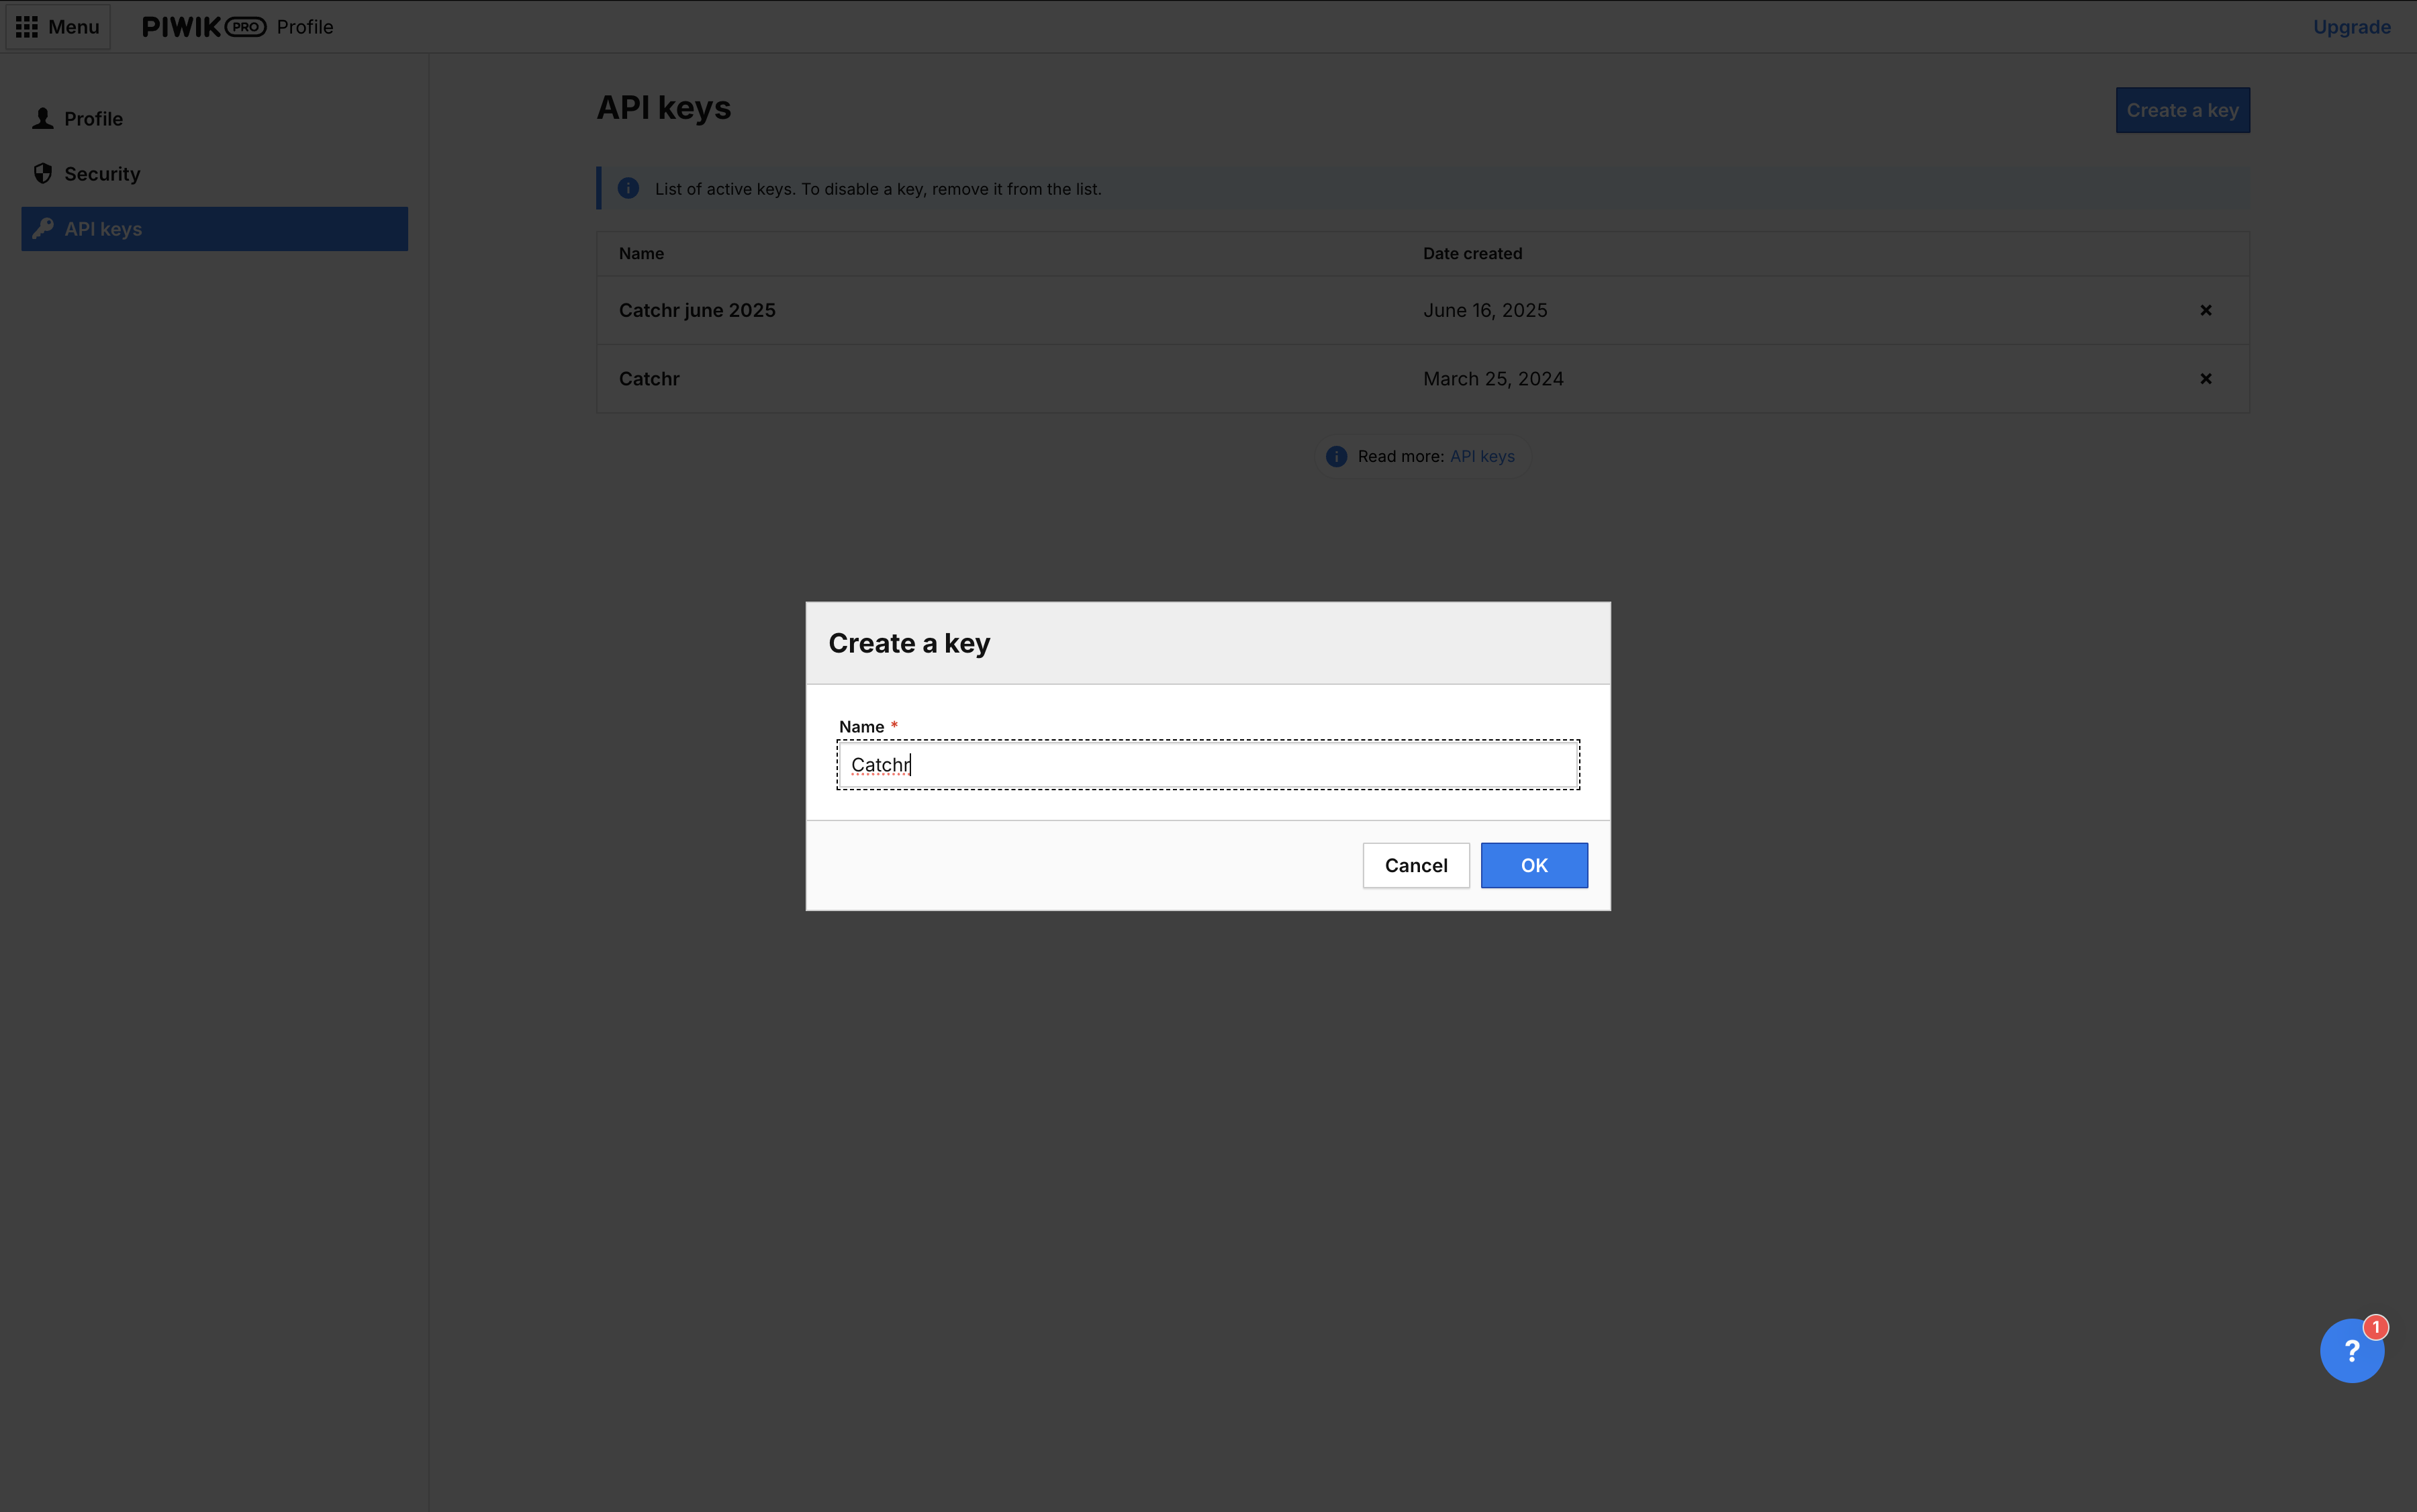
Give your key a name (we advise naming it Catchr) and click OK.
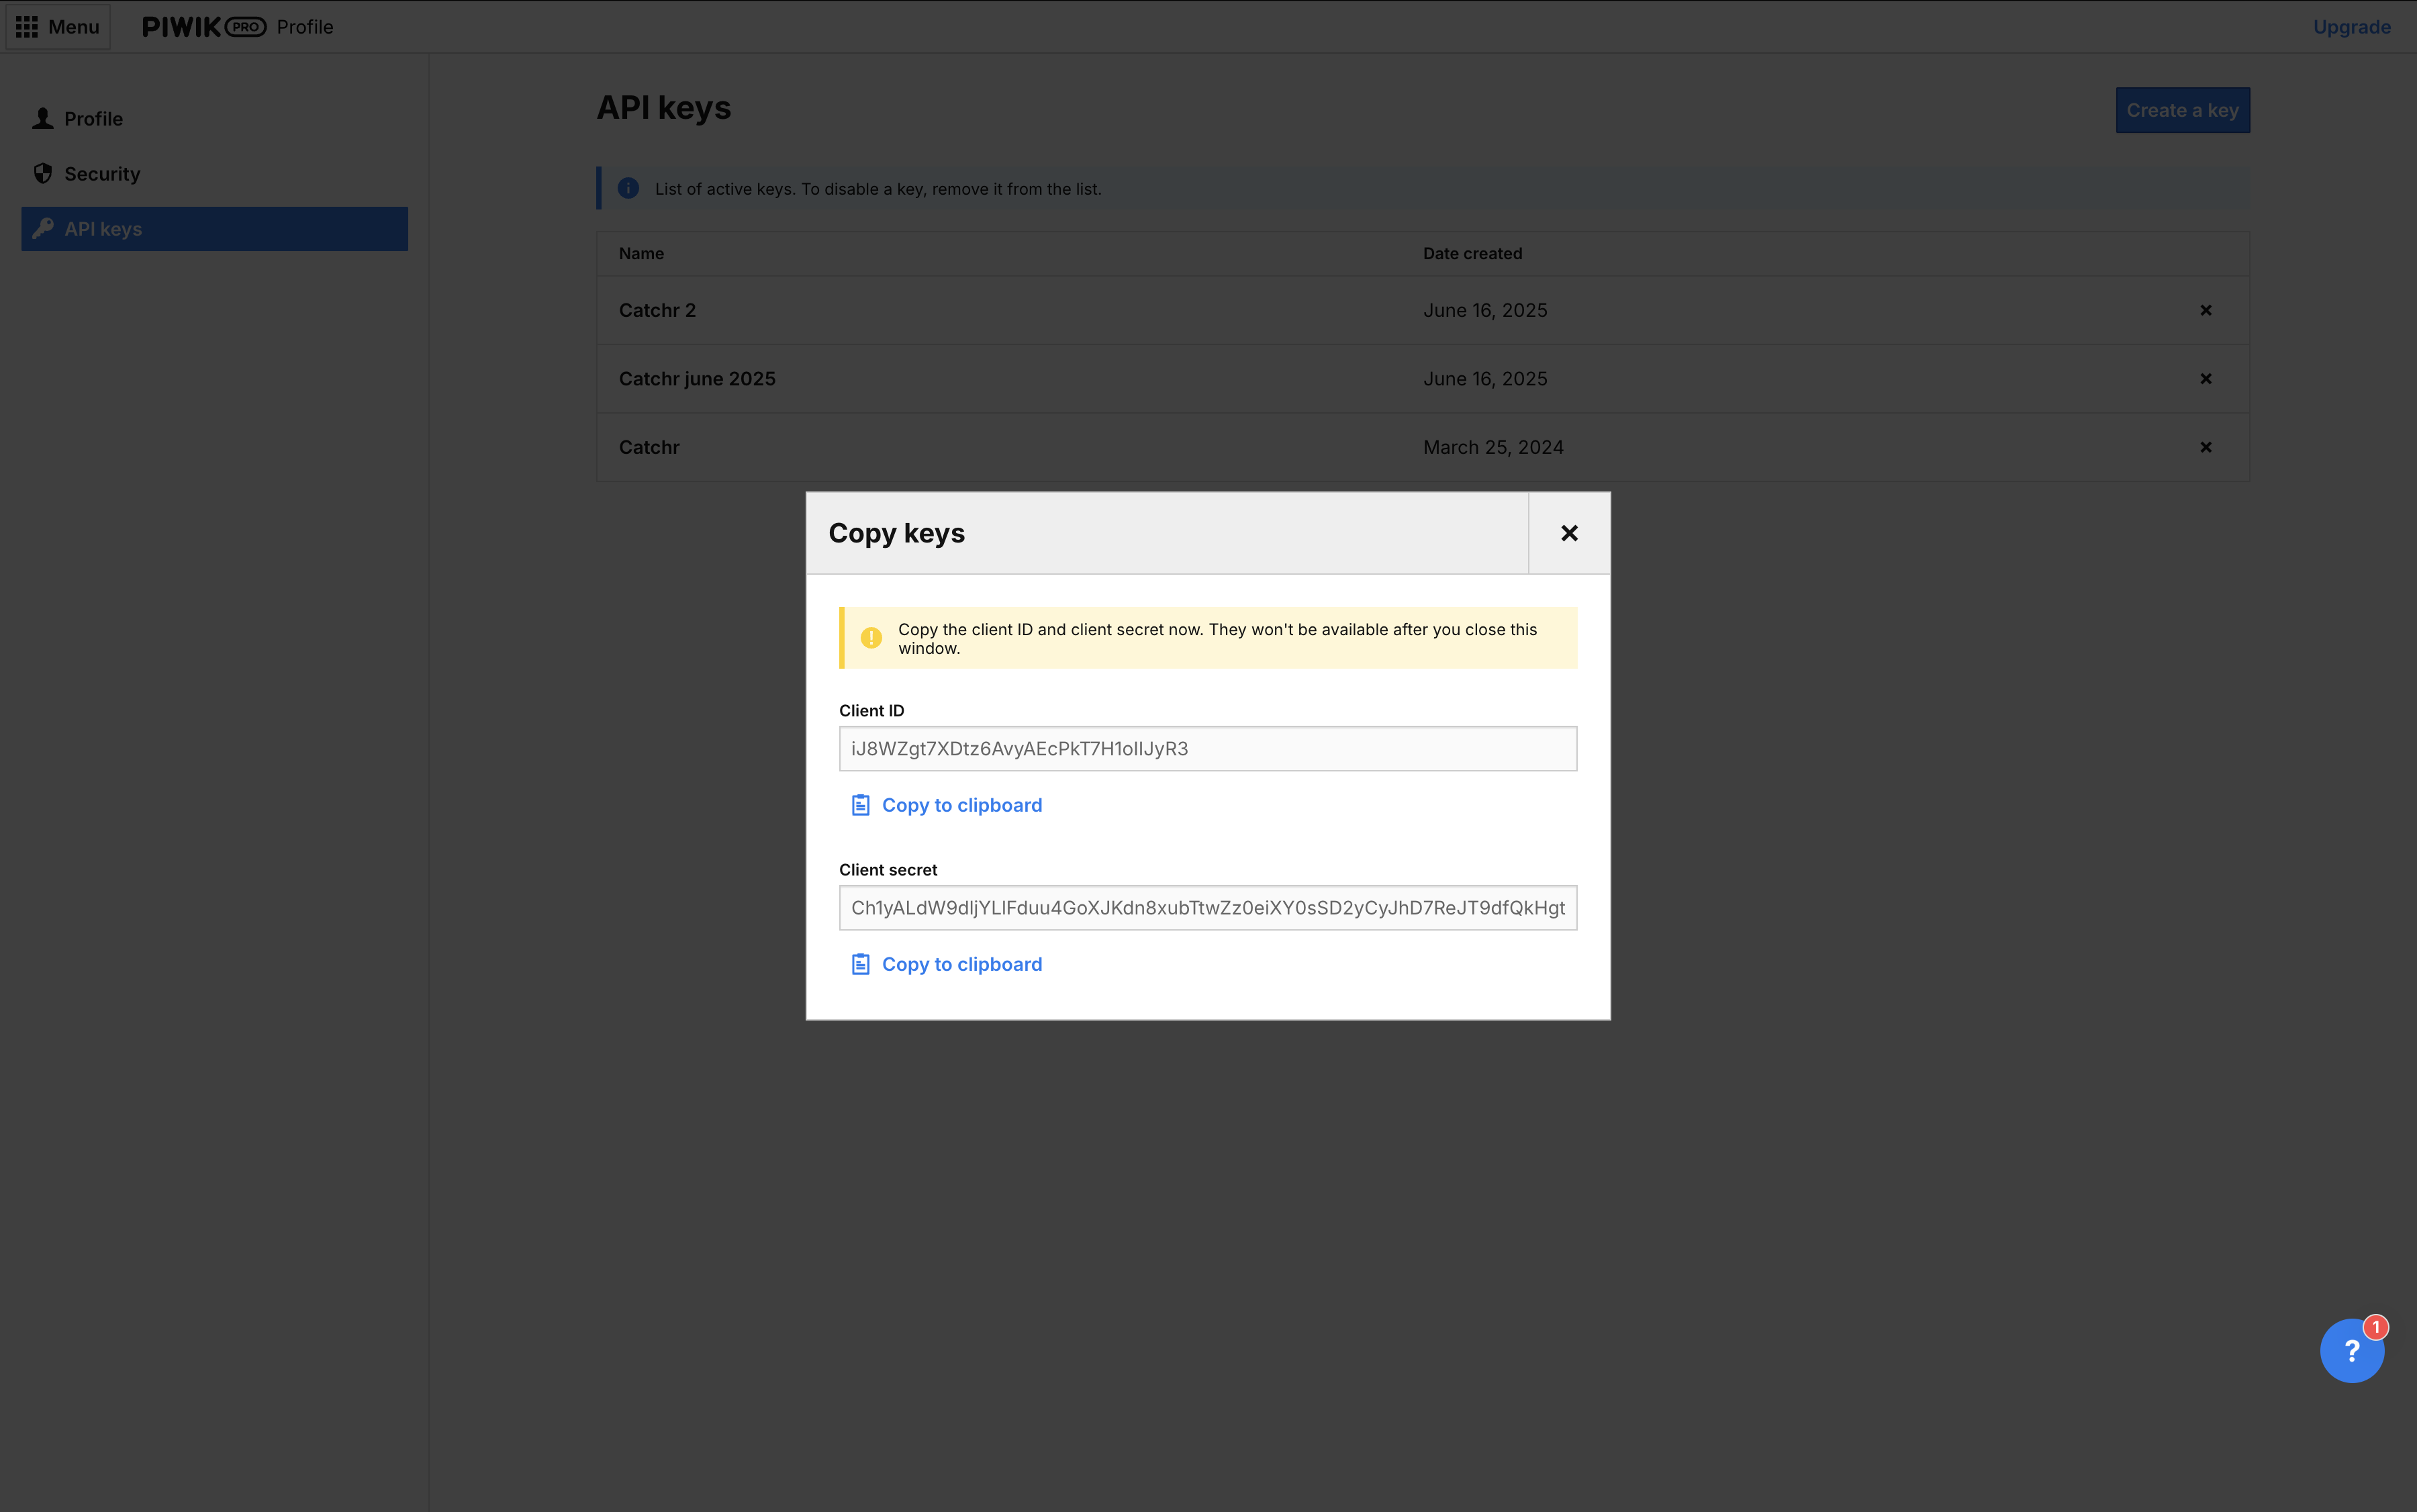
Copy the client ID and client secret. They won’t be available once you close this page. We advise keeping them in a secure place (or not storing them, using them once, and creating a new key for each service).
Your account will now appear in the Accounts list under the source you've just created.
 An inactive account will still appear in the destination setup screens. You can activate it manually, but it will also be automatically activated as soon as it's used in a query. If your Catchr Source contains many accounts, you don't need to activate them manually; Catchr will automatically activate them when they are used.
You can now send data from your available accounts to one of Catchr's supported destinations, such as databases or visualization tools like Looker Studio, Google Sheets, Excel, Power BI, or Tableau.
 Need help setting up a destination?Check out our dedicated tutorialtorials:

